Cardboard Ammonites
I moved to the Dorset coast just over 20 years ago, but long before then I’d already fallen in love with the area’s unique geology. It’s a place I’d read about as a child, with its golden ‘fossil beaches’ and tales of sea-monsters frozen into the cliffs. When you live here, the geology feels dangerously close and the bay seems to wrap you up in its arms. The wilder weather howls in off the sea and turns over each new page of ancient time, revealing sparkling treasures if you’re lucky enough to find them. Ammonites are everywhere here, on road signs, above cafe’s, on beer bottles, carved into stonework, and even twisted around the lampposts. You can’t escape them, but why would you? They are a beautiful reminder of the ancient past. In the time I’ve been working here I’ve made literally thousands of ammonites with children, in schools, at museums across the coast, and at events, even on the beach itself. I’ve made many more myself too, for displays and exhibitions. Some have been simple ‘five-minute’ tasks, other projects have taken many long hours to complete. In the process of creating these I’ve come up with various methods, using virtually the same ingredients, but tweaking the process to suit either the outcome, or the age or ability of those doing the making.
Anyway, I thought I’d share a selection here. There’s also a whole project dedicated to them in my book ‘Art Shaped’.
Just be aware, I share my ideas for teachers and parents to use with their children or students, and unusually, I share the processes for free, not behind a paywall. I’ve always wanted children to have access to free, quality ideas. As a result, occasionally, adults will take project ideas, methods, and resources and use them as if they were their own, sometimes even making money in the process. So, as a reminder, creative projects and ideas belong to the originator, and these are my own original ideas, often ones I have spent many years devising, practicing, and perfecting. They may look easy, but that’s the whole point, I’ve refined them so that they are achievable. So please, you can use these projects, but don’t re-record, rehash, or republish these ideas in any form without permission, firstly it’s not polite, more importantly, it’s not legal. Thanks.
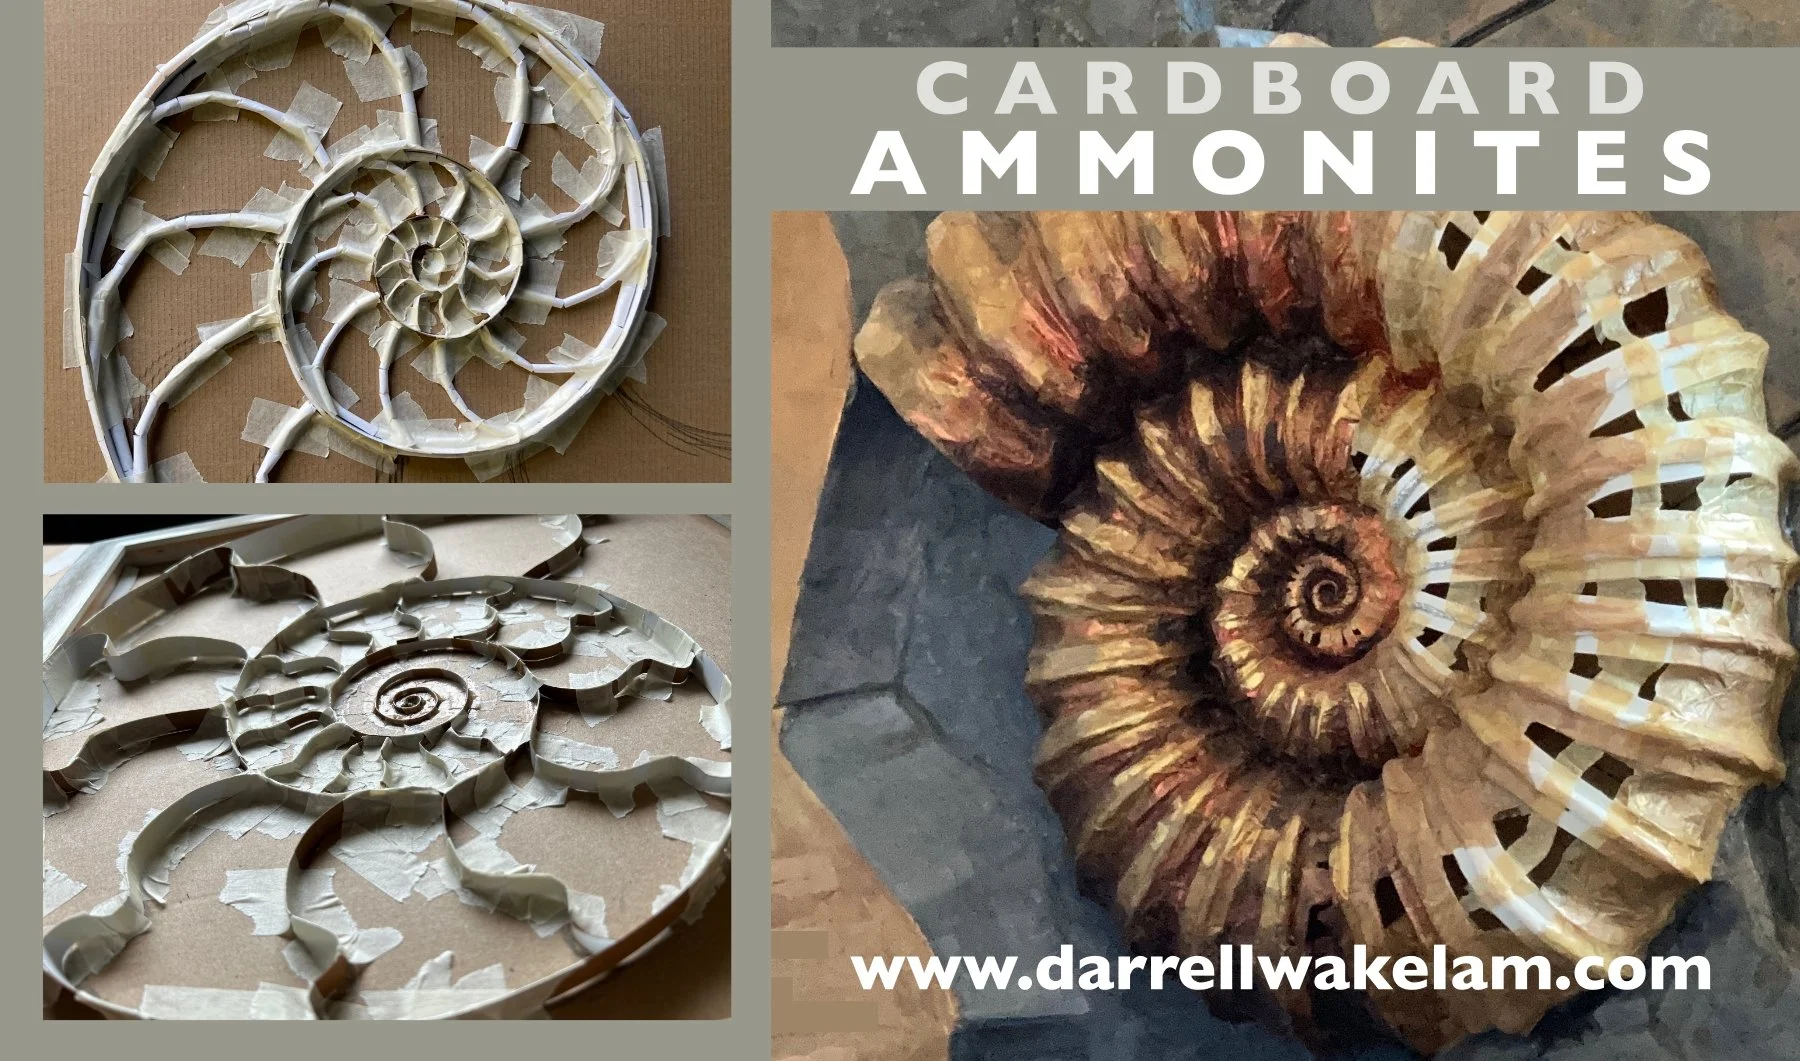
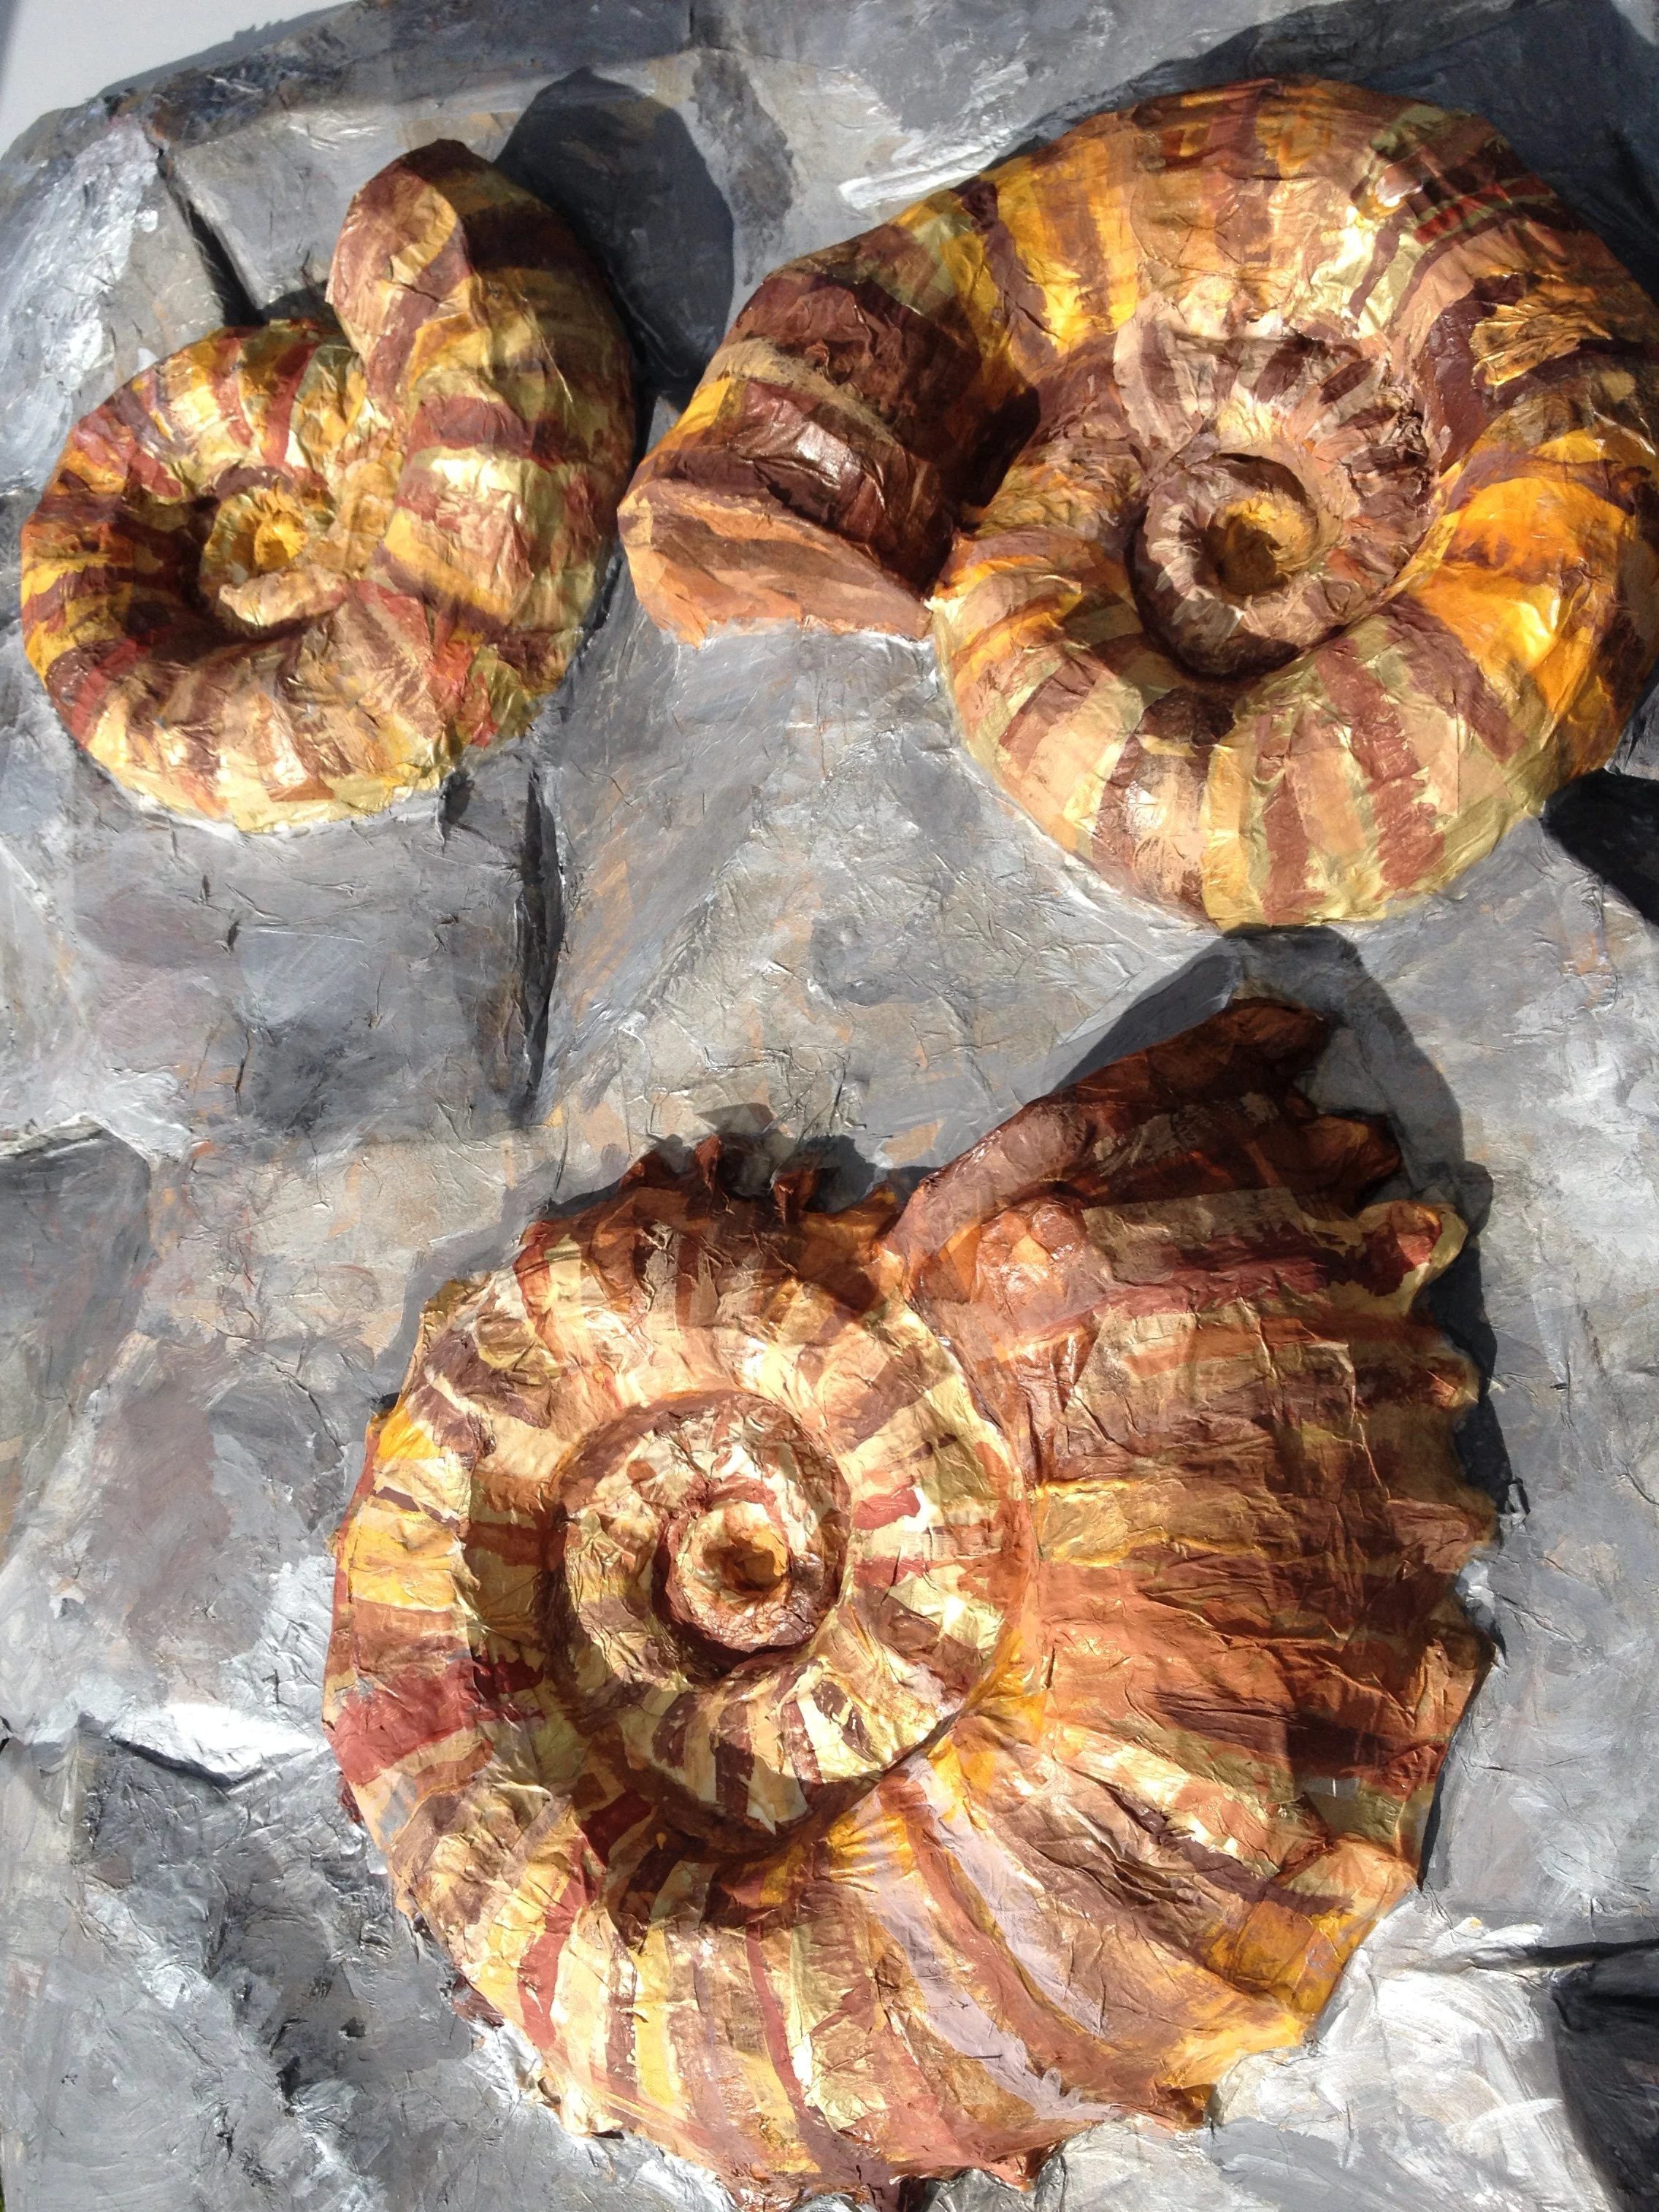
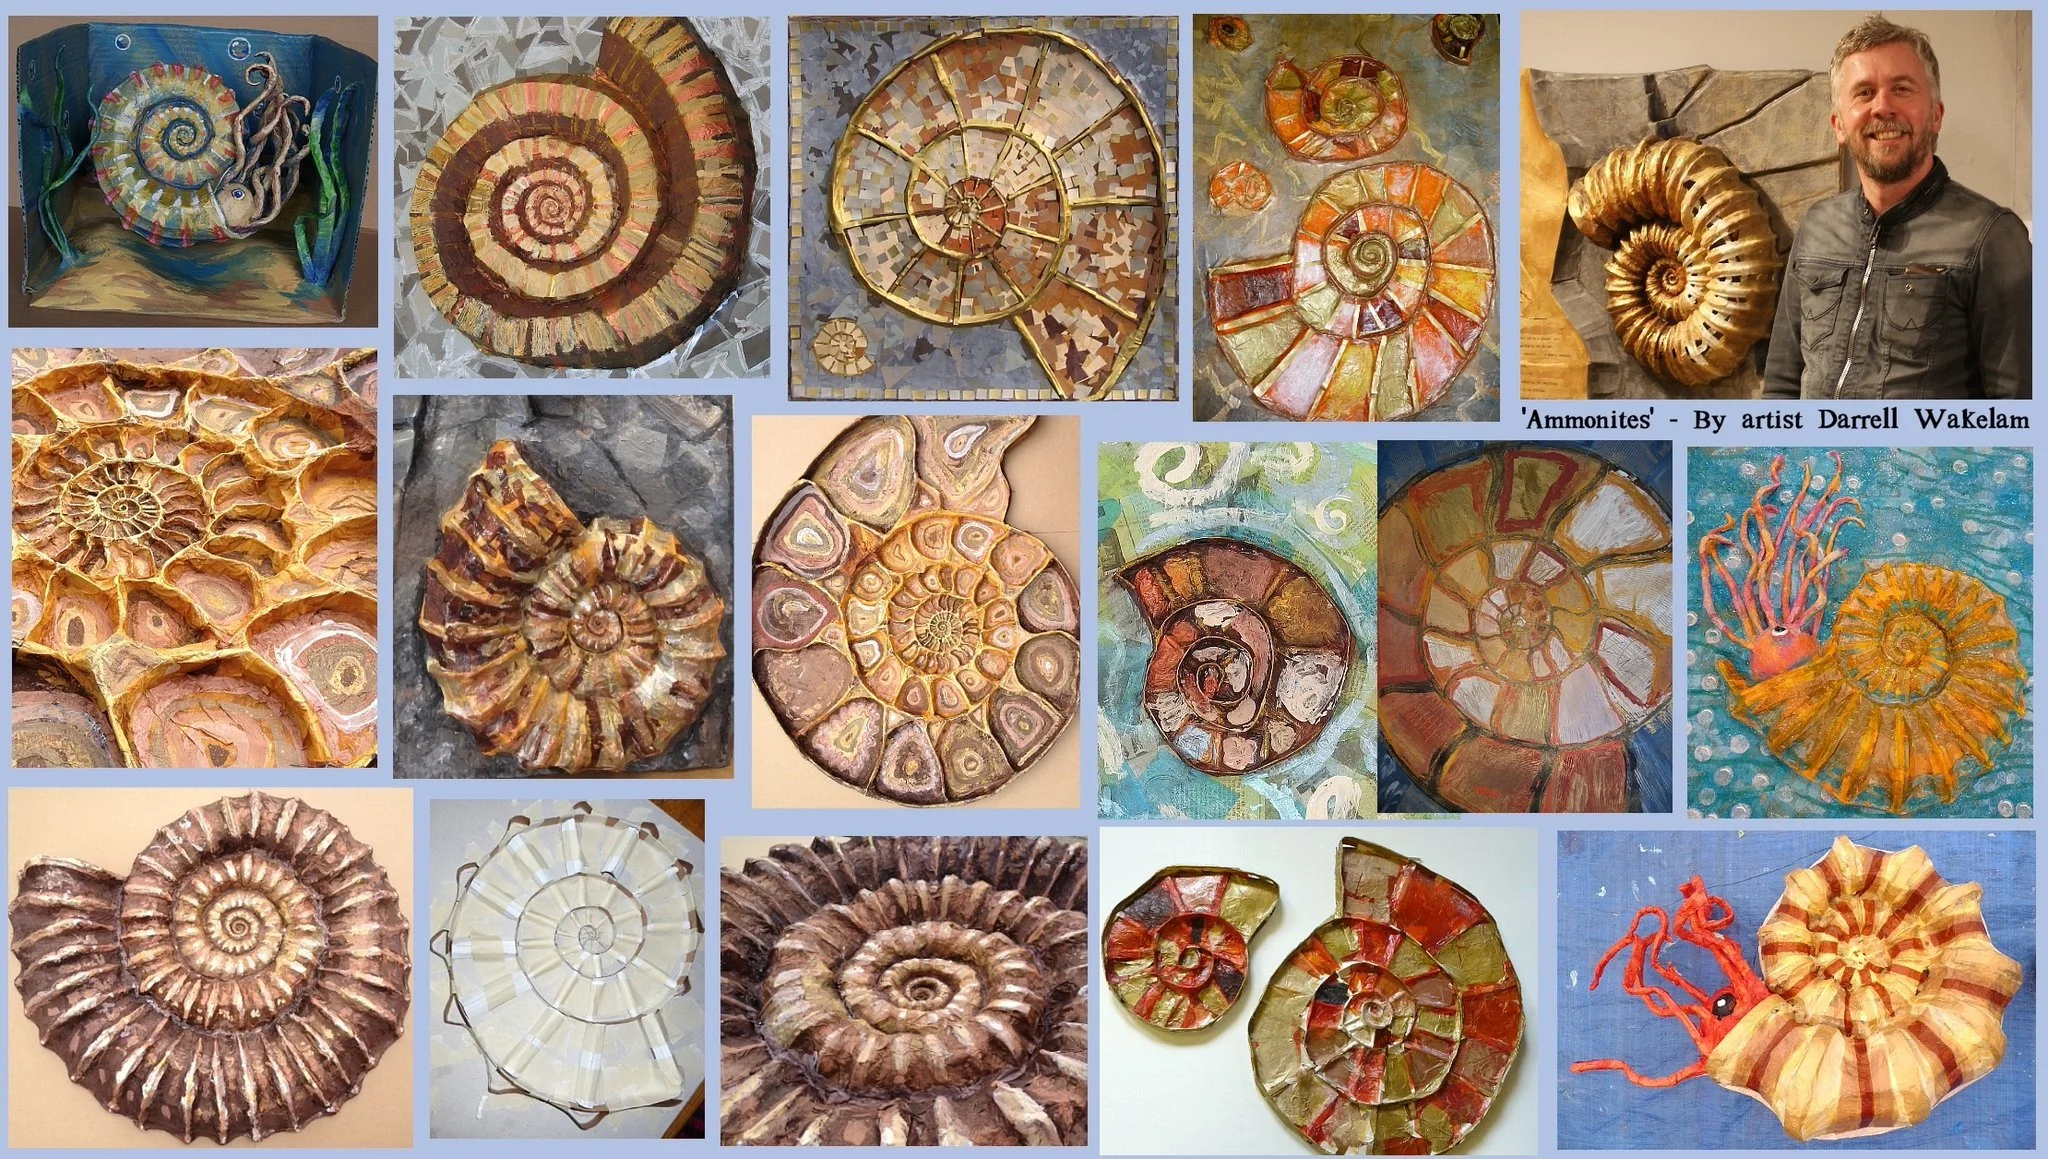
A few of my own sculptures
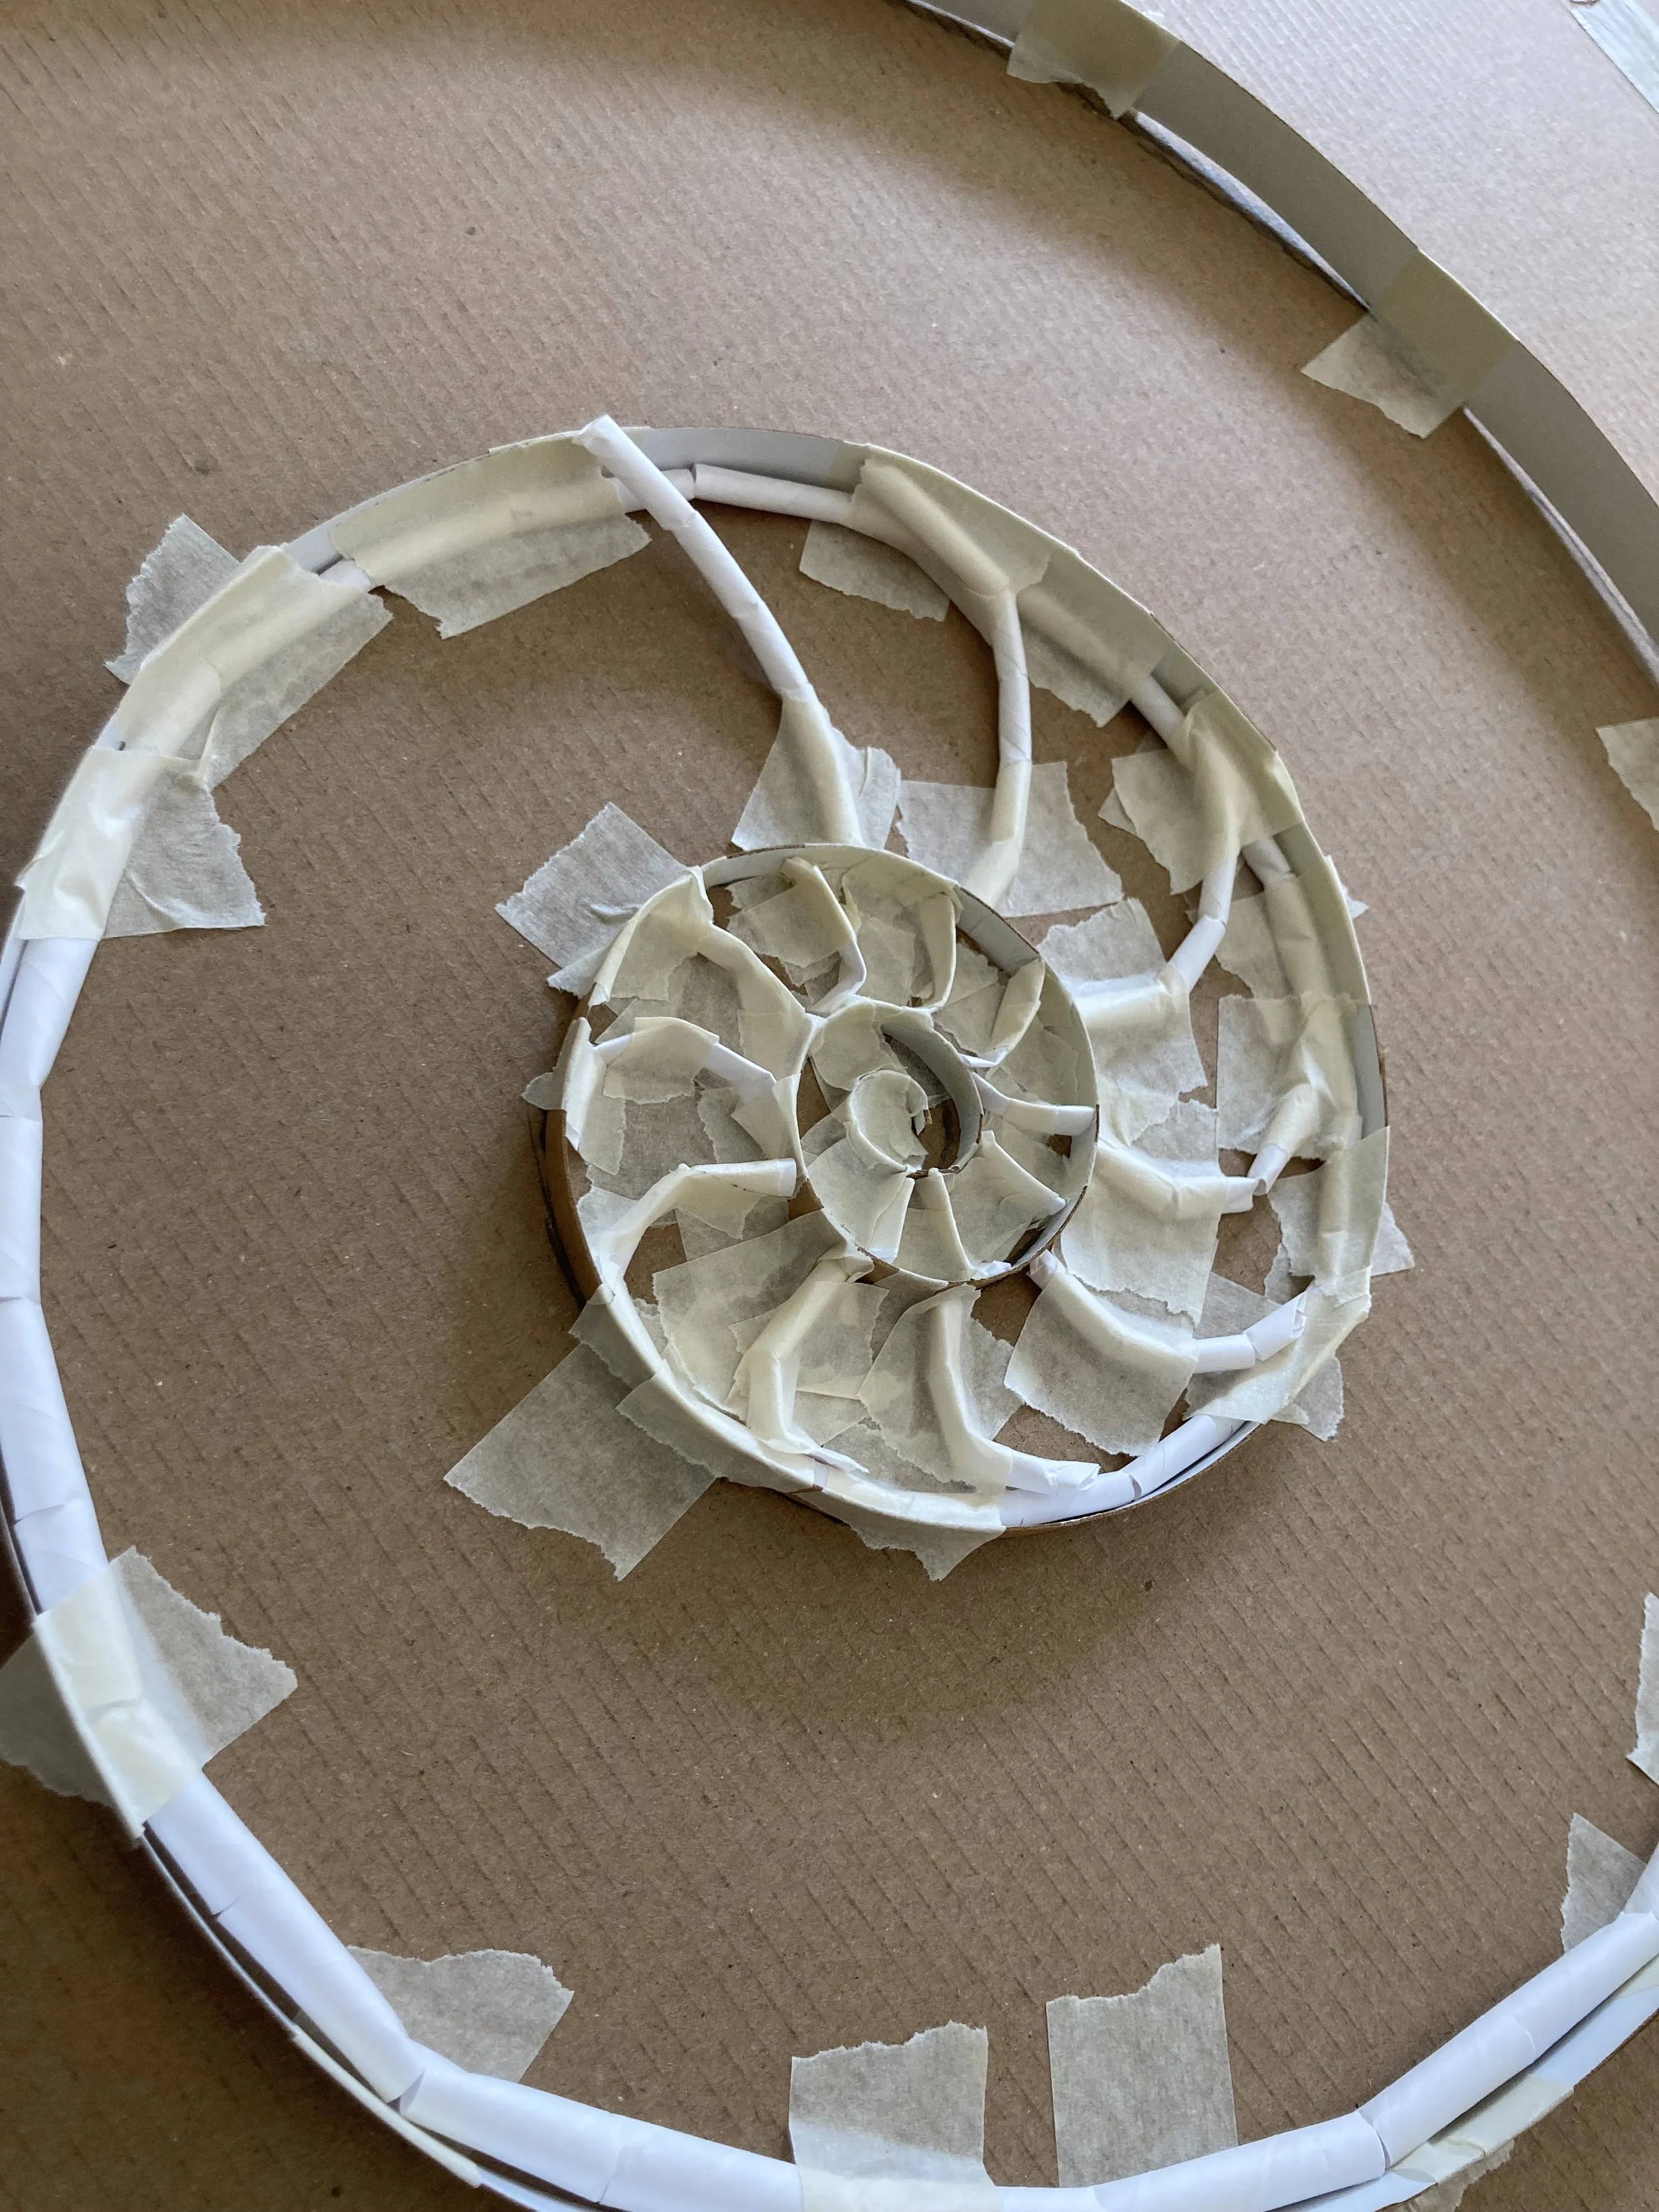
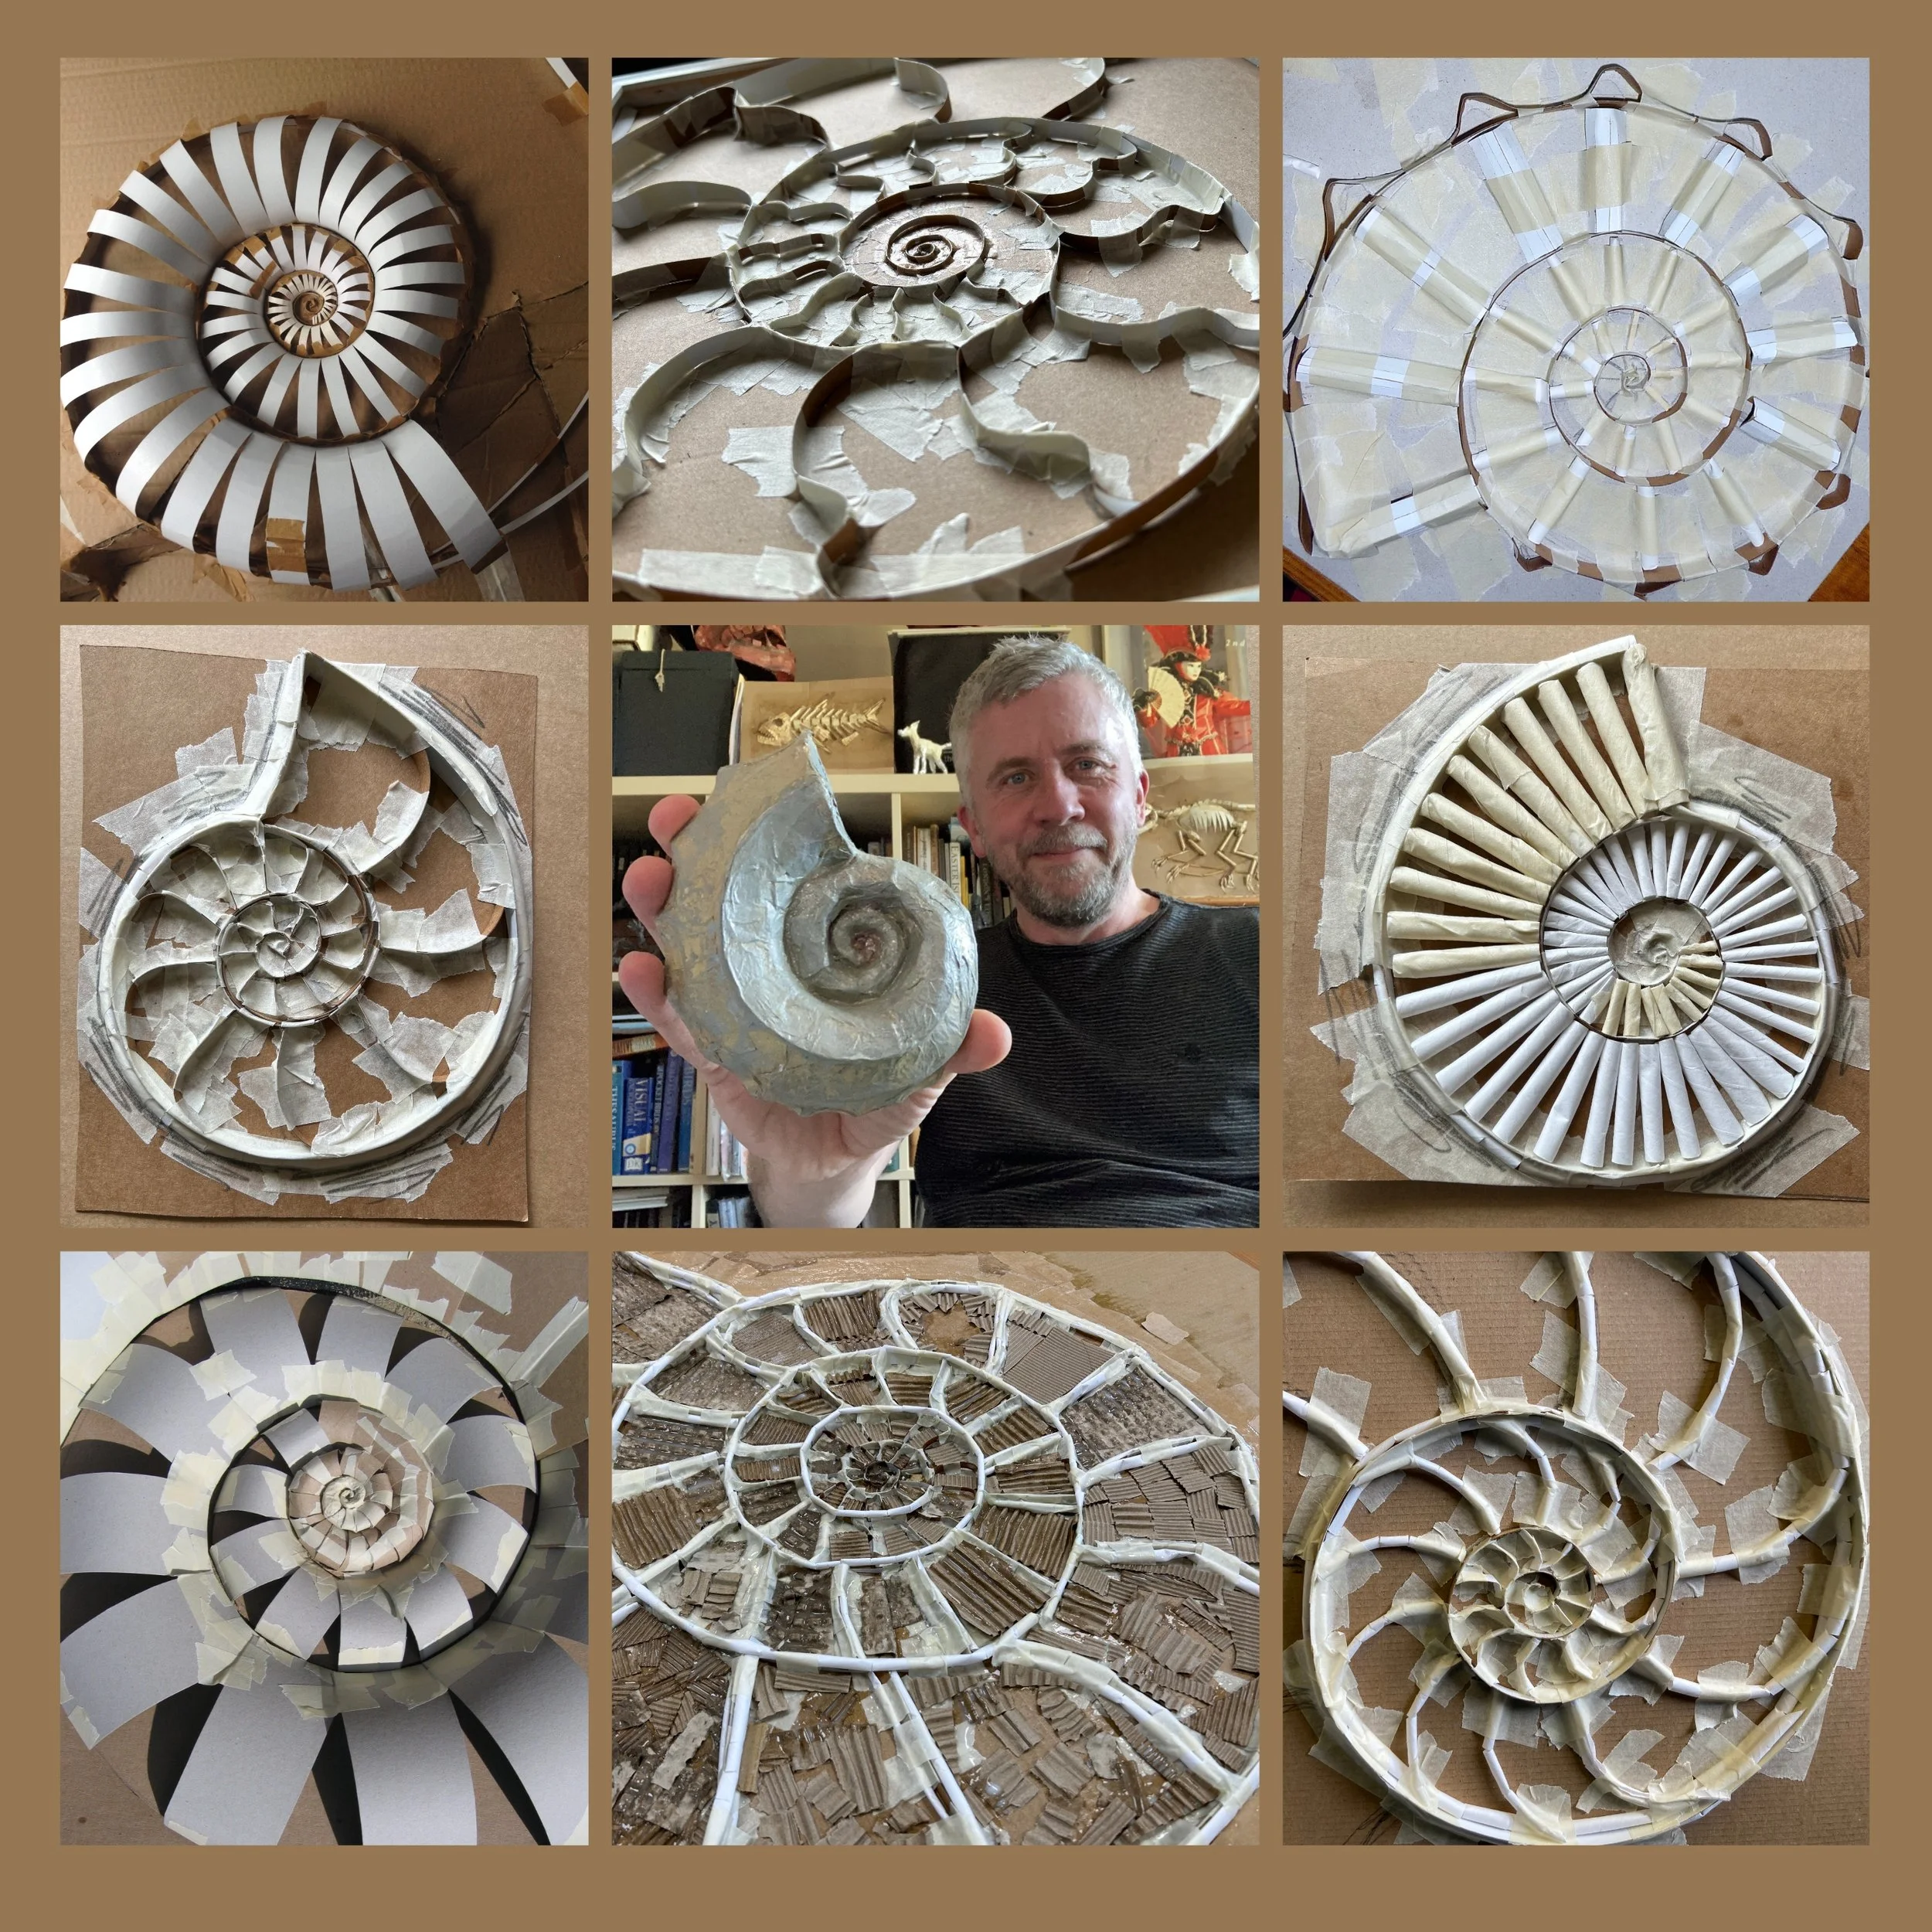
The basic process I’ve used the most is to first create a simple ‘spiral’ shape from thin cardboard. Then to either build the flat ‘segments’ hidden inside, or the arch shaped ‘bridges’ over the shape to create a fully 3D version.
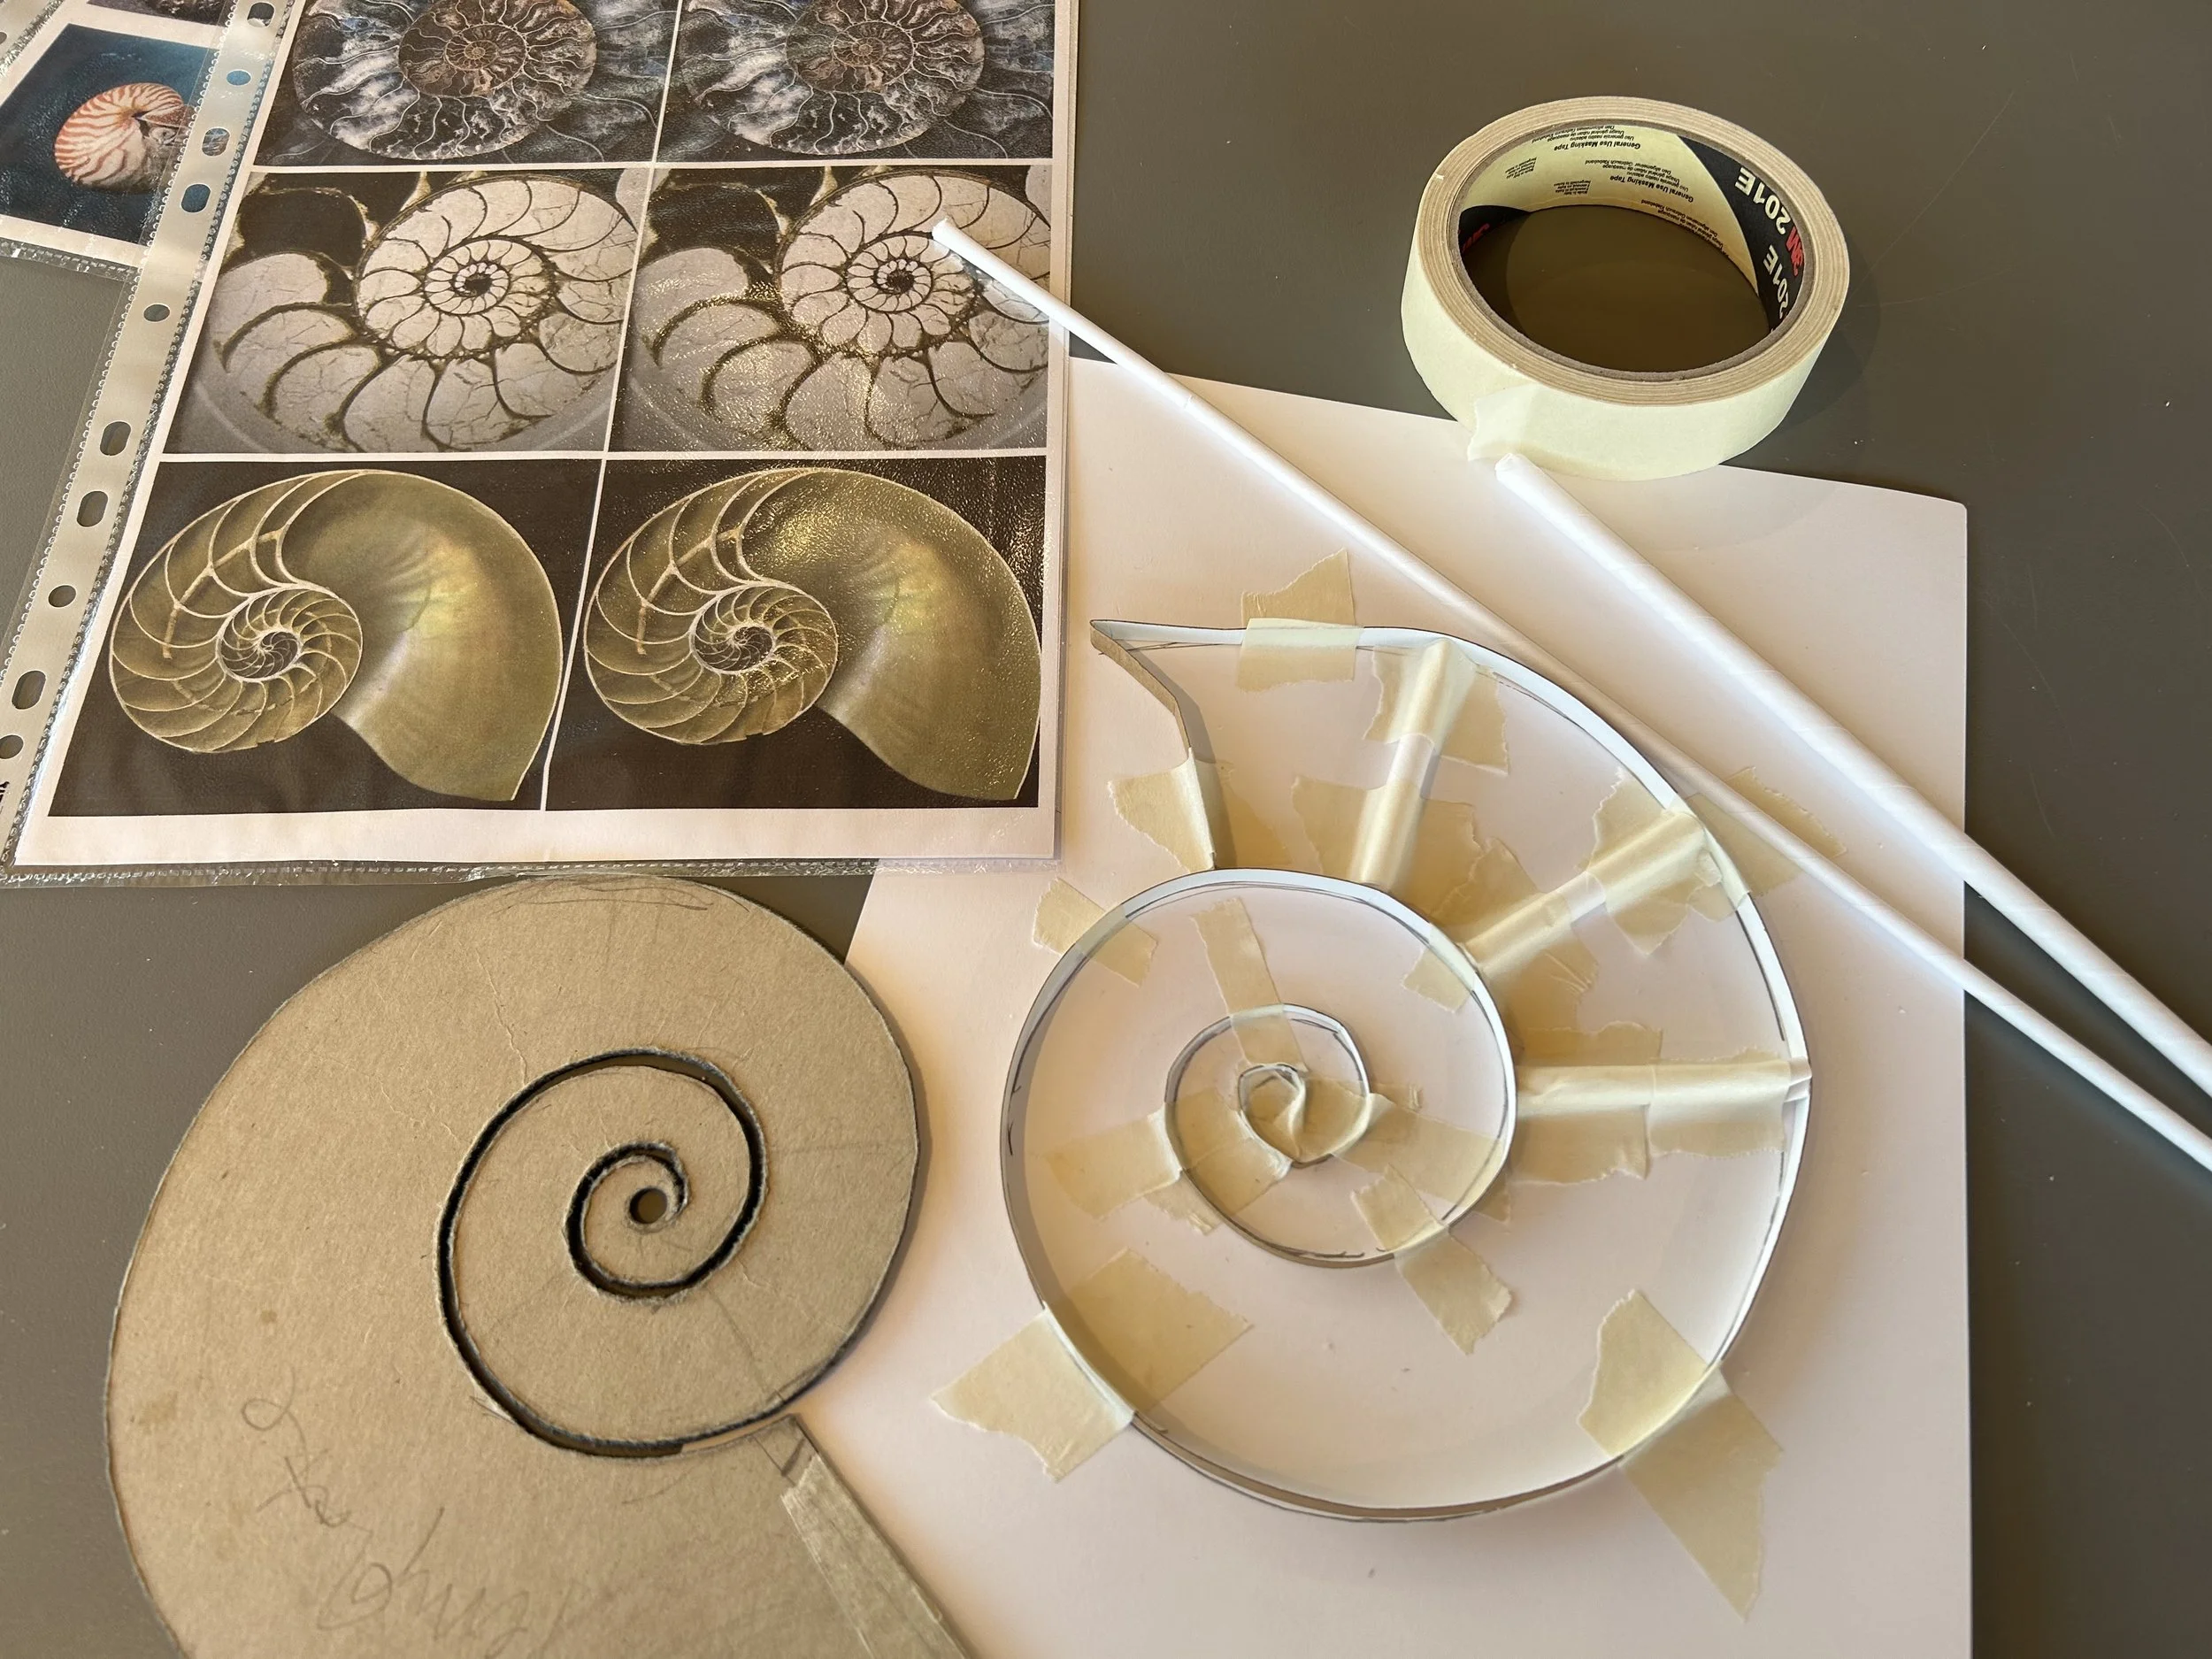
A basic cardboard spiral.
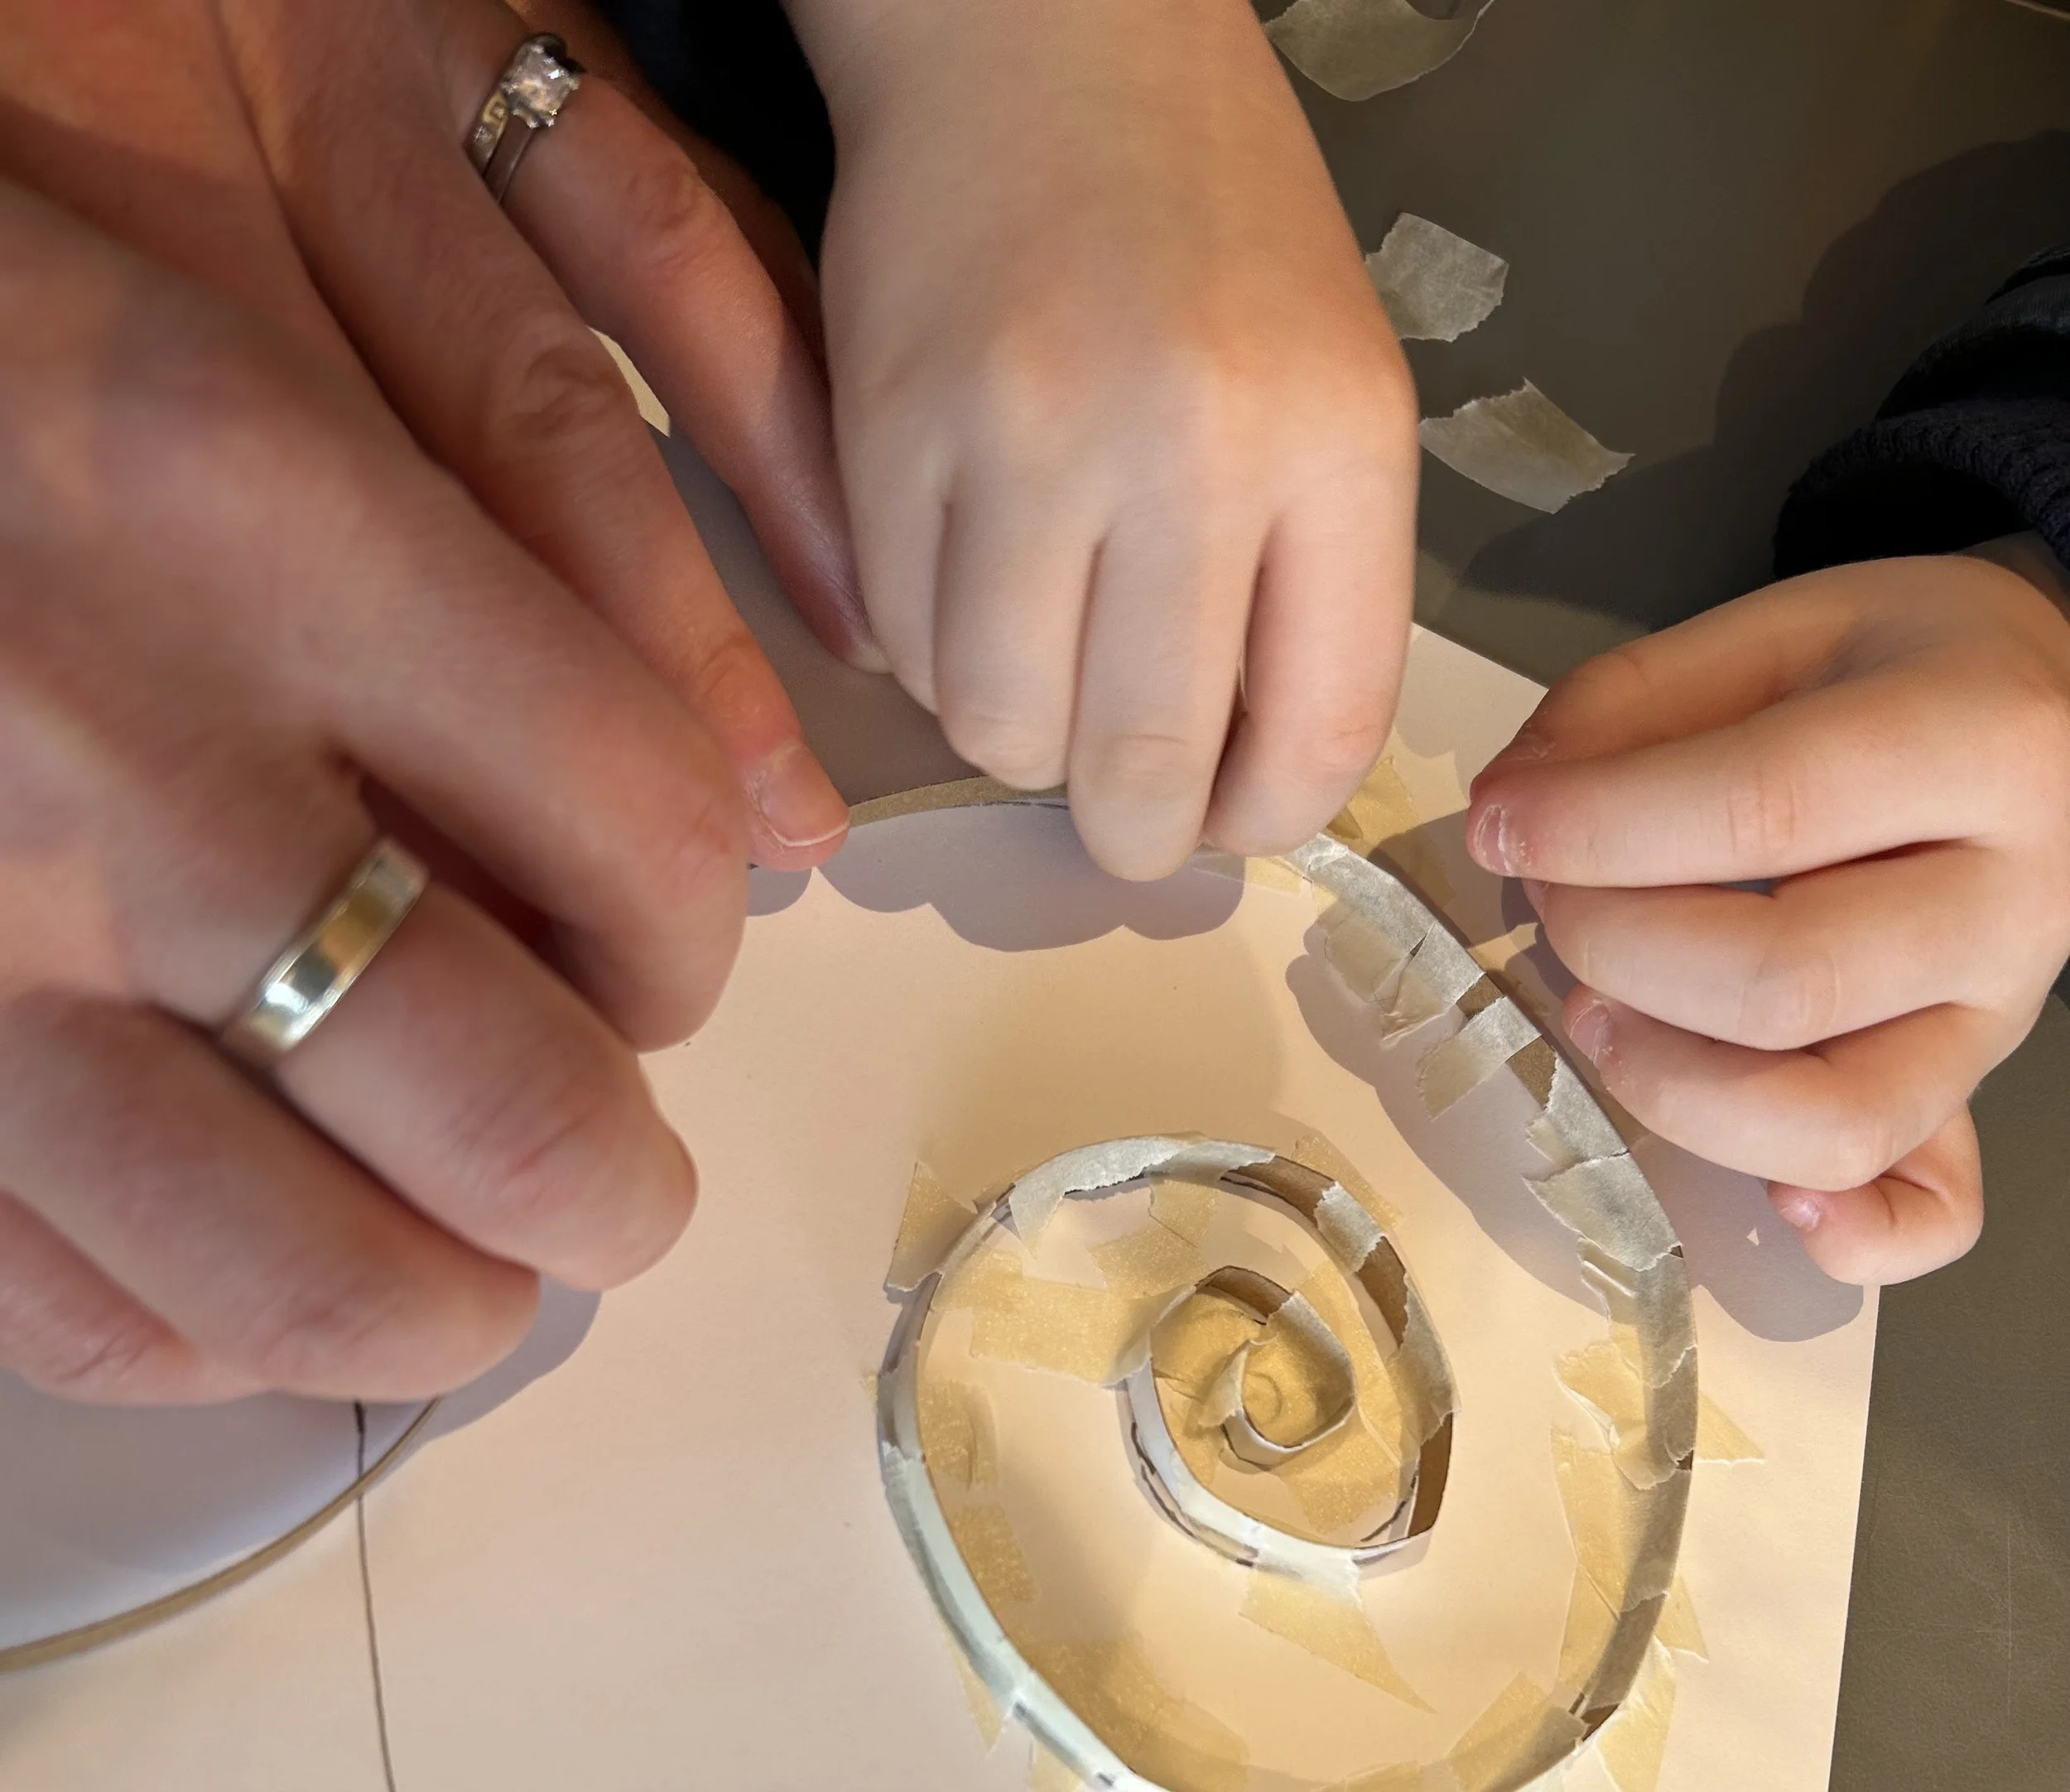
It can be fiddly!
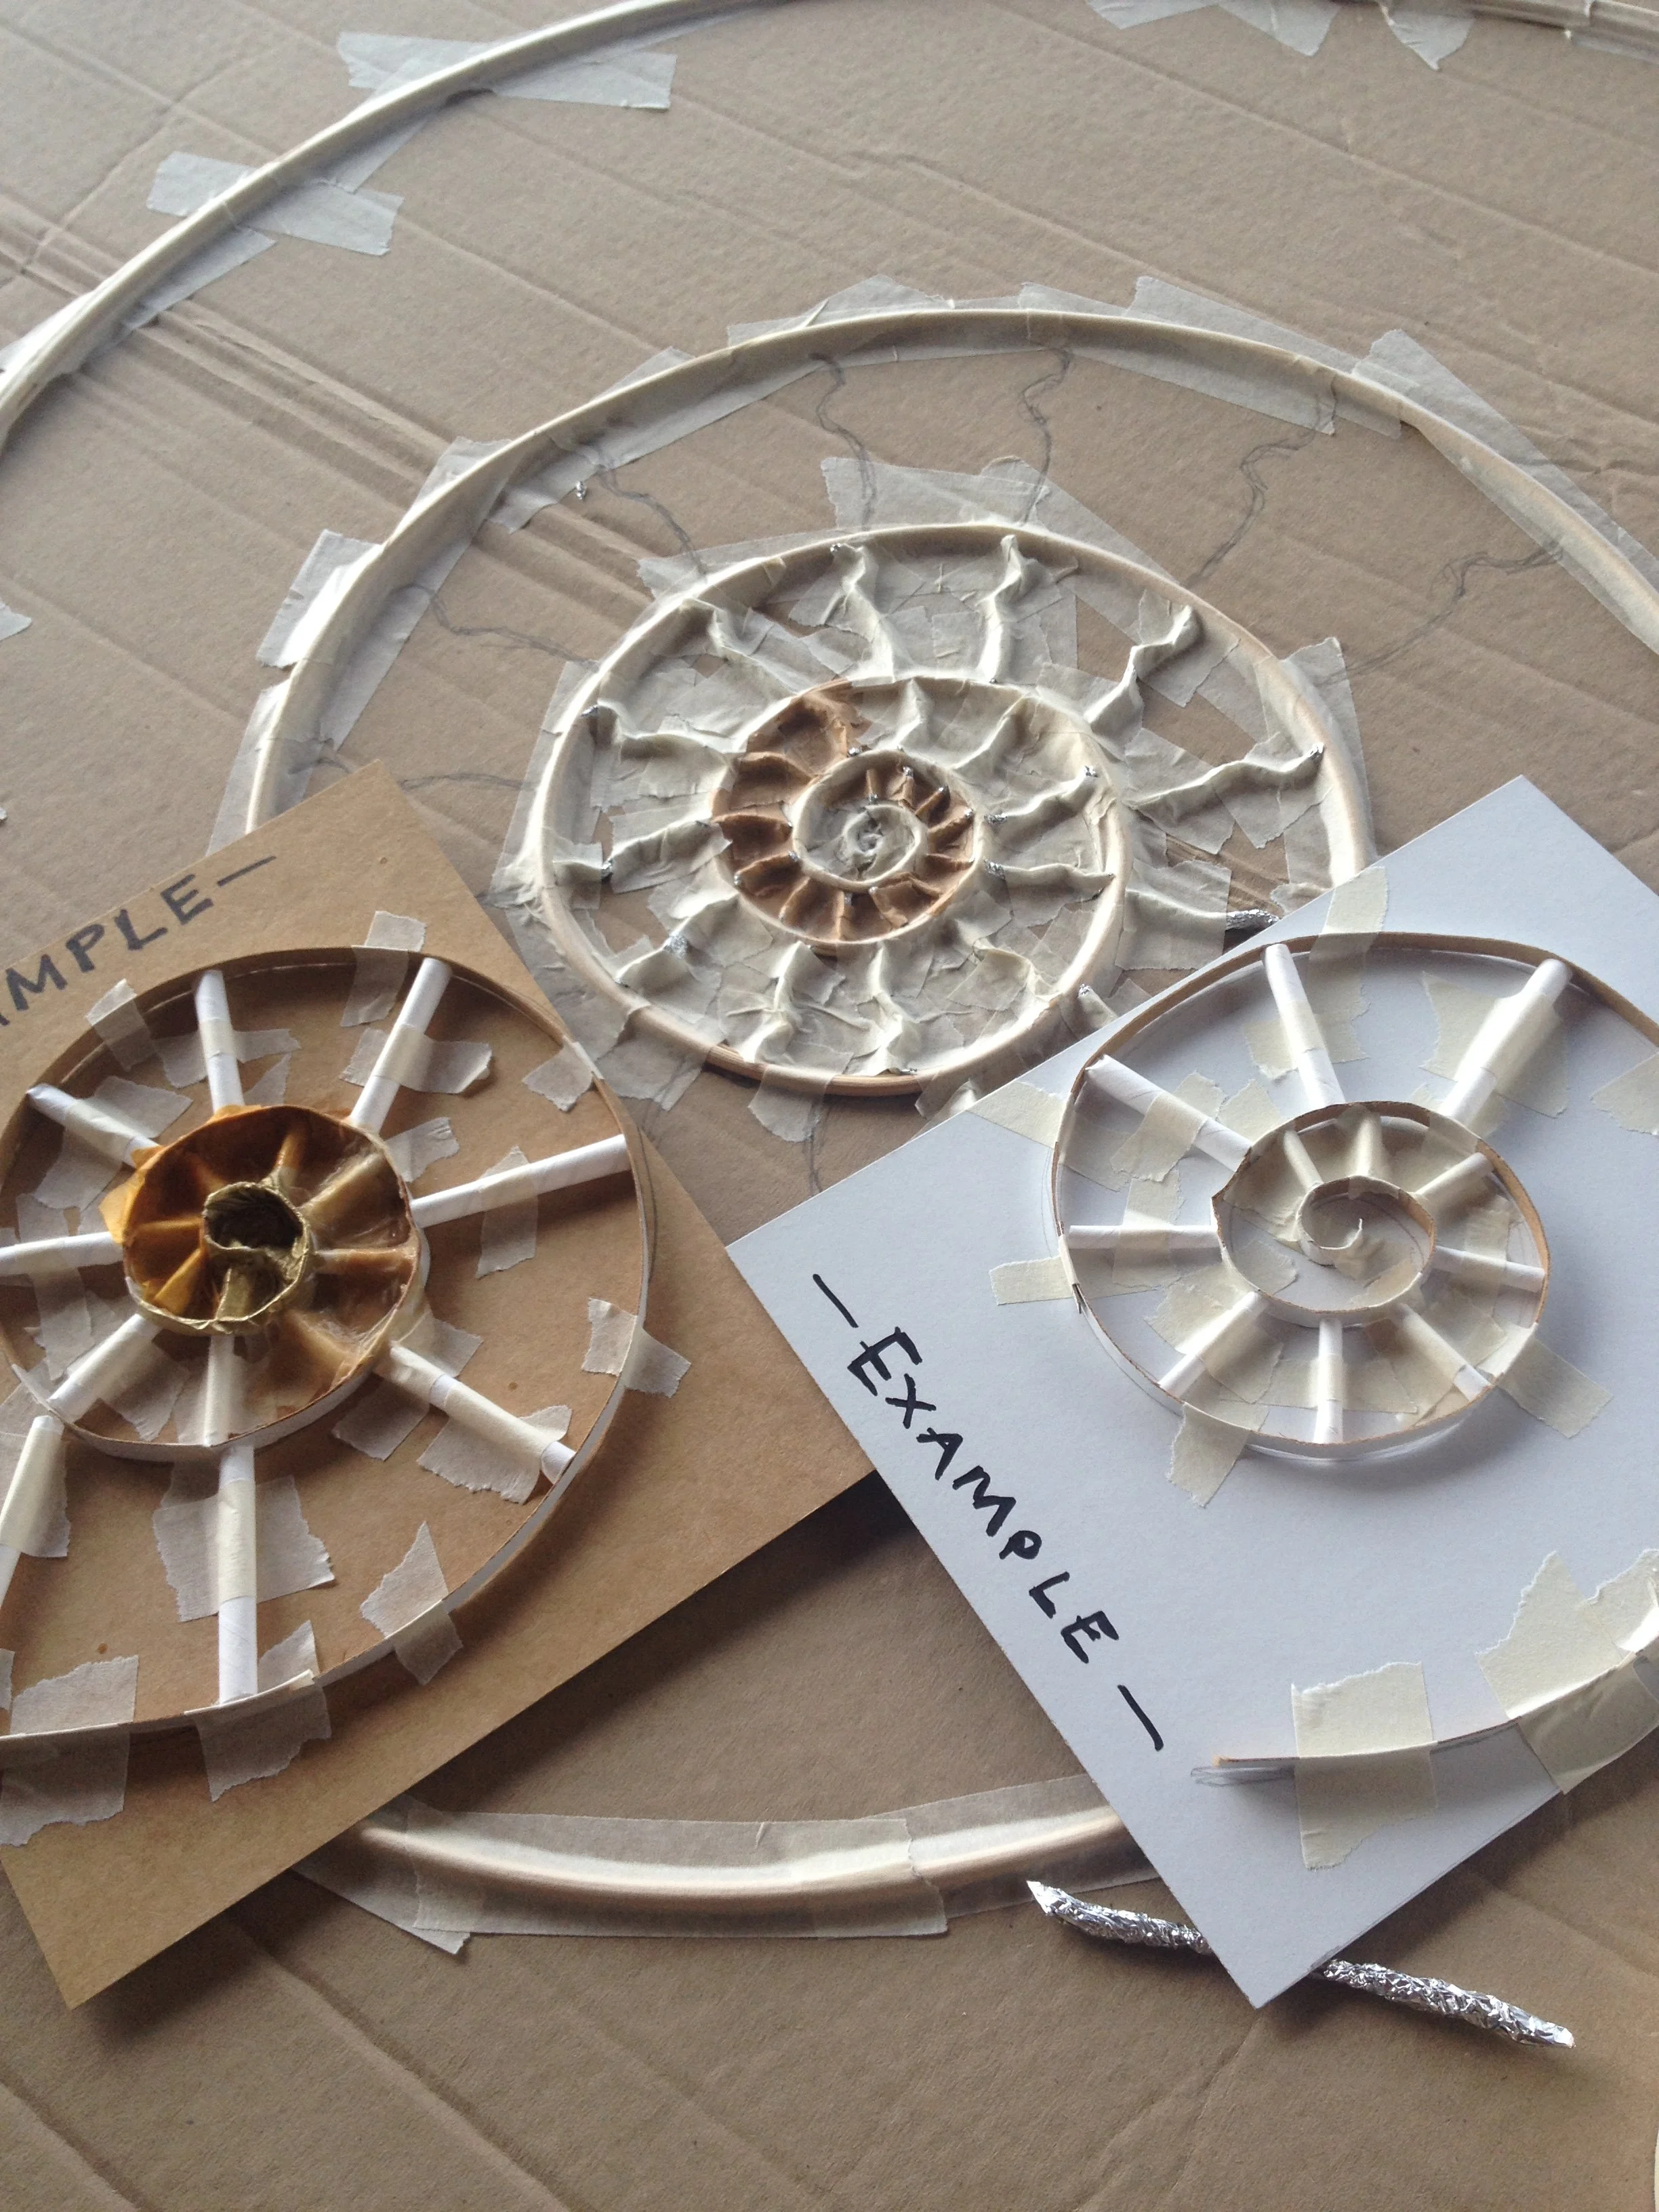
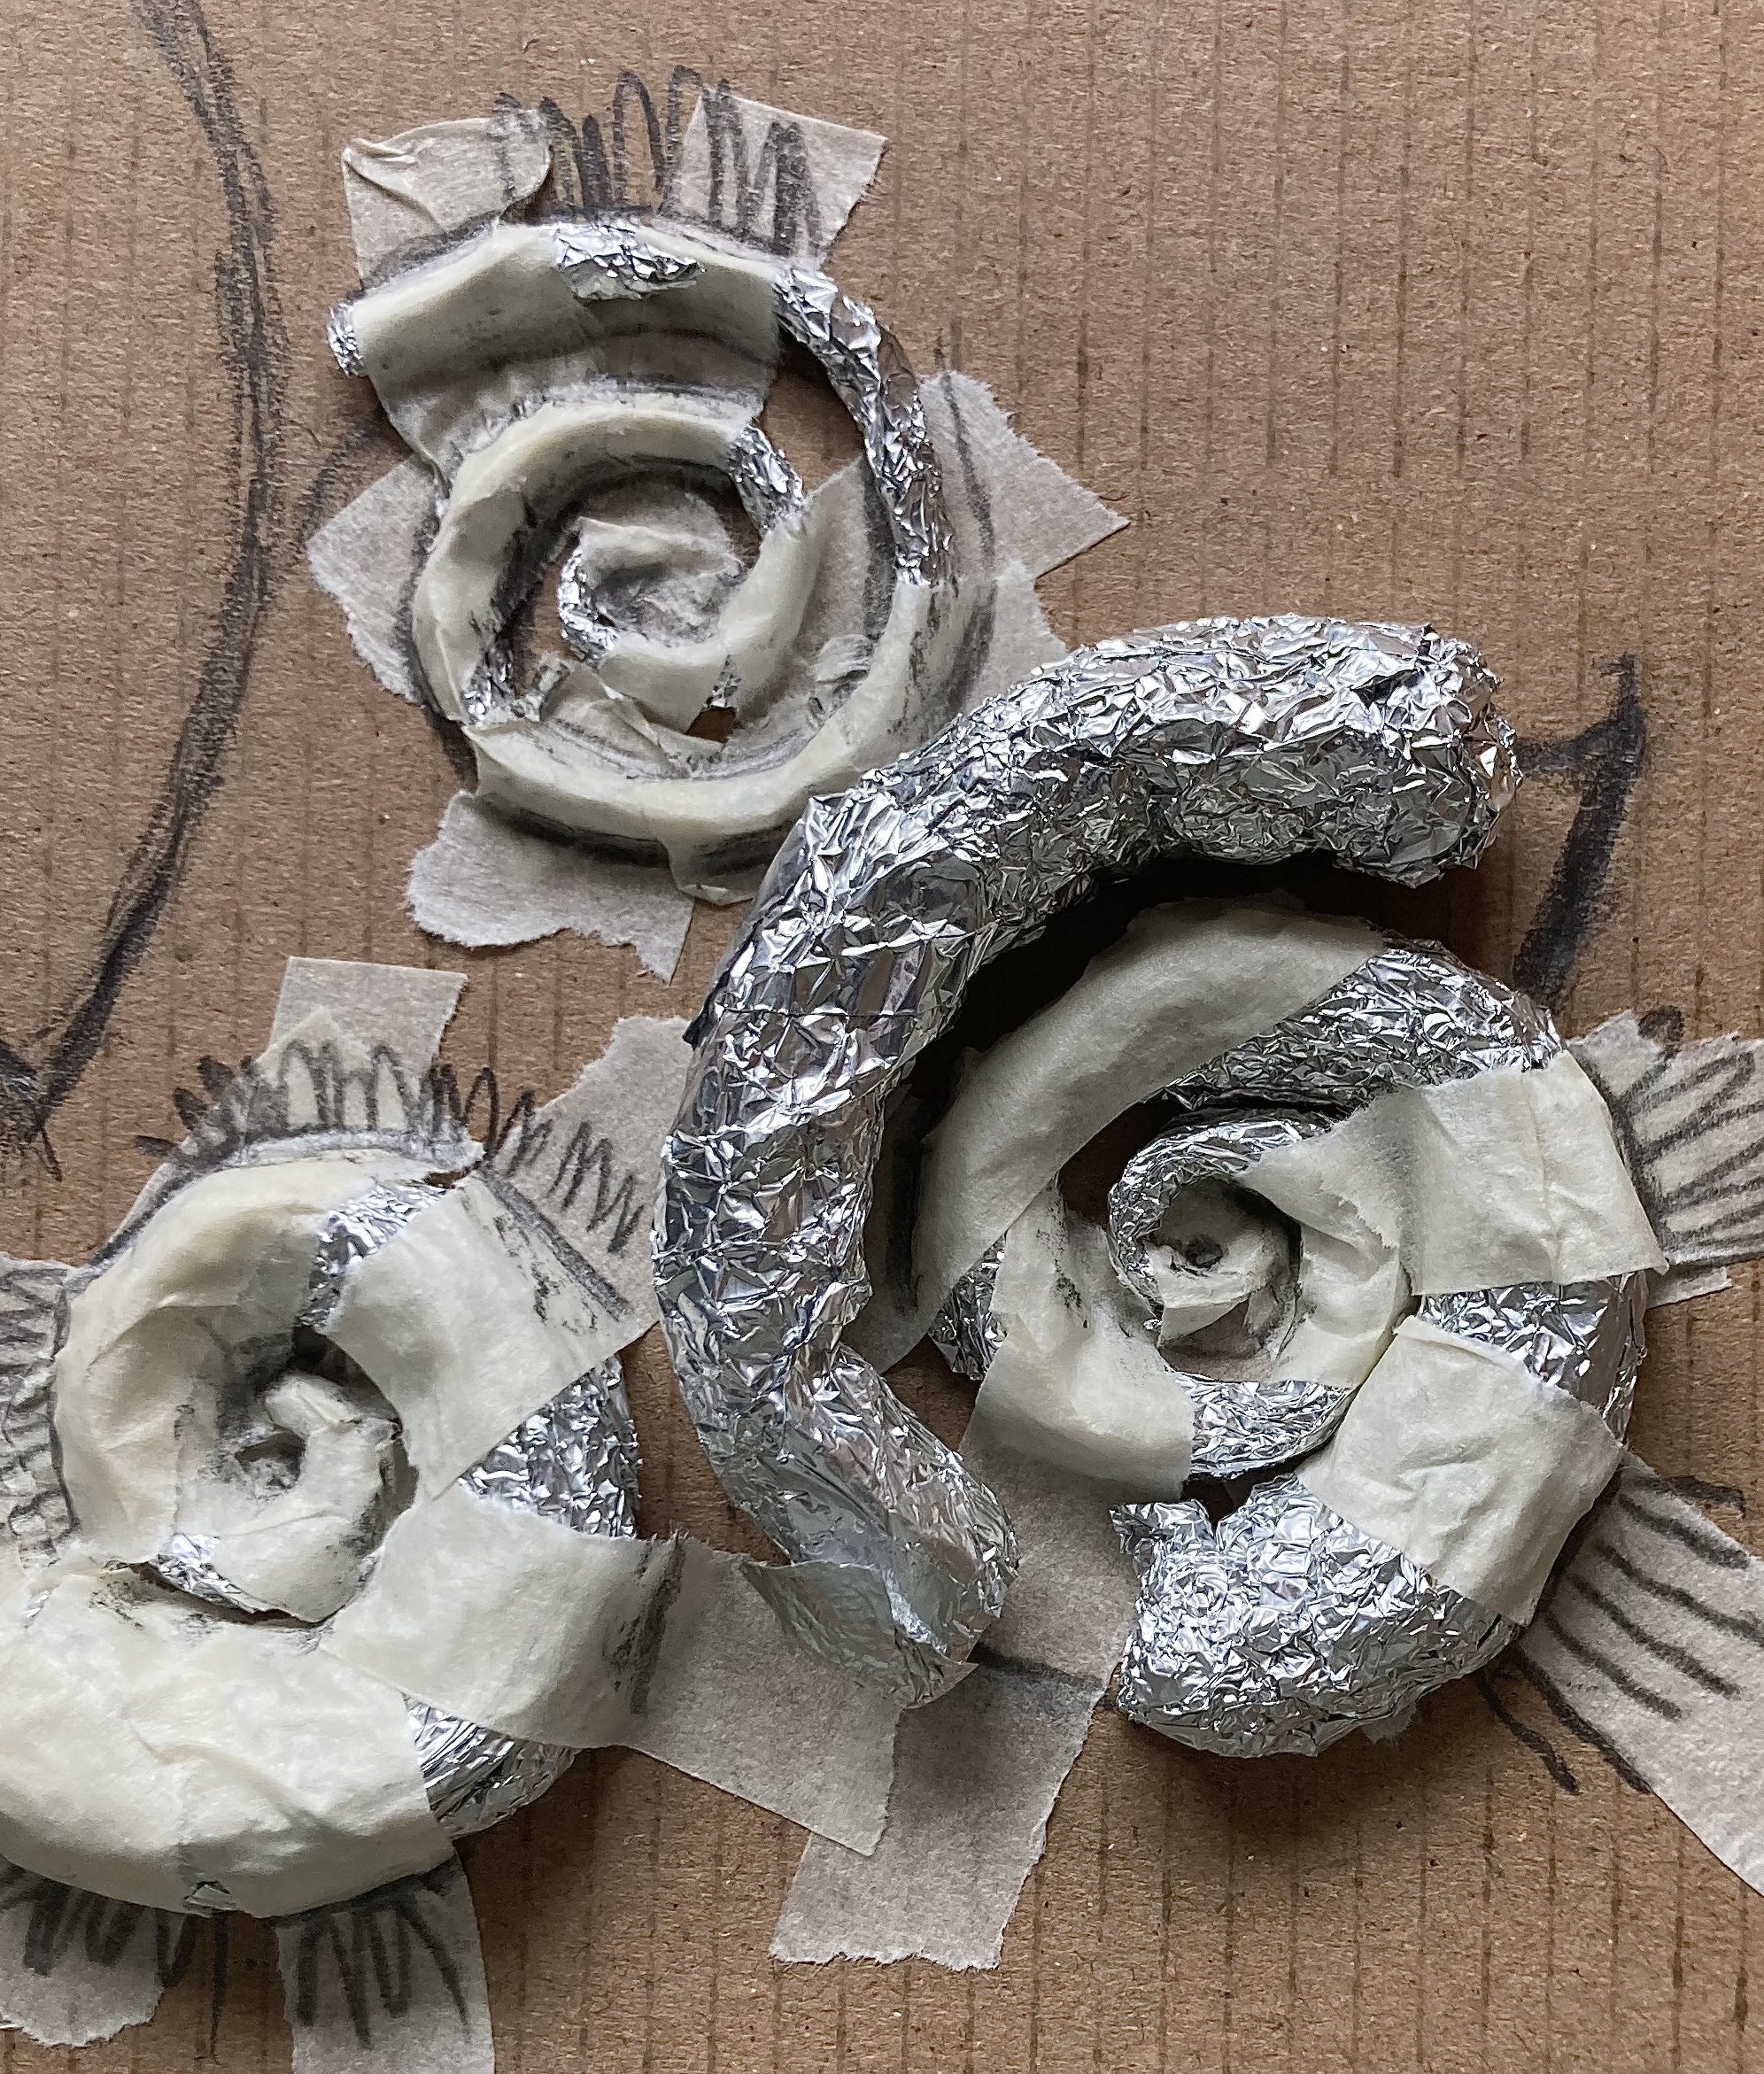
Examples of different ways to create the ‘segments’ using paper straws or rolled up tin foil.
If I’m working with very young children I’ll take some spiral templates with me so they can easily draw the initial shape. If you leave it to them to draw this, they will draw a spiral that is either too complex (too many swirls to build) or the spiral shape will be unequal. It’s very difficult for children to draw one freehand. (it would be for most adults)
I then get them to cut some narrow strips of thin card (cereal box thickness) They then choose the thinnest of these to build the centre of the spiral first. The makes it easier to build. As you work outwards, the previous part of the spiral doesn’t get damaged and, if you want to, you can make the thickness of each strip you use get slightly widerr, making a more 3D effect.
Segments.
You can use all sorts of materials for the segments. The obvious way is to just use more strips of the same cardboard, but you can use paper straws, or rolled-up tin foil to create a slightly more three-dimensional effect.
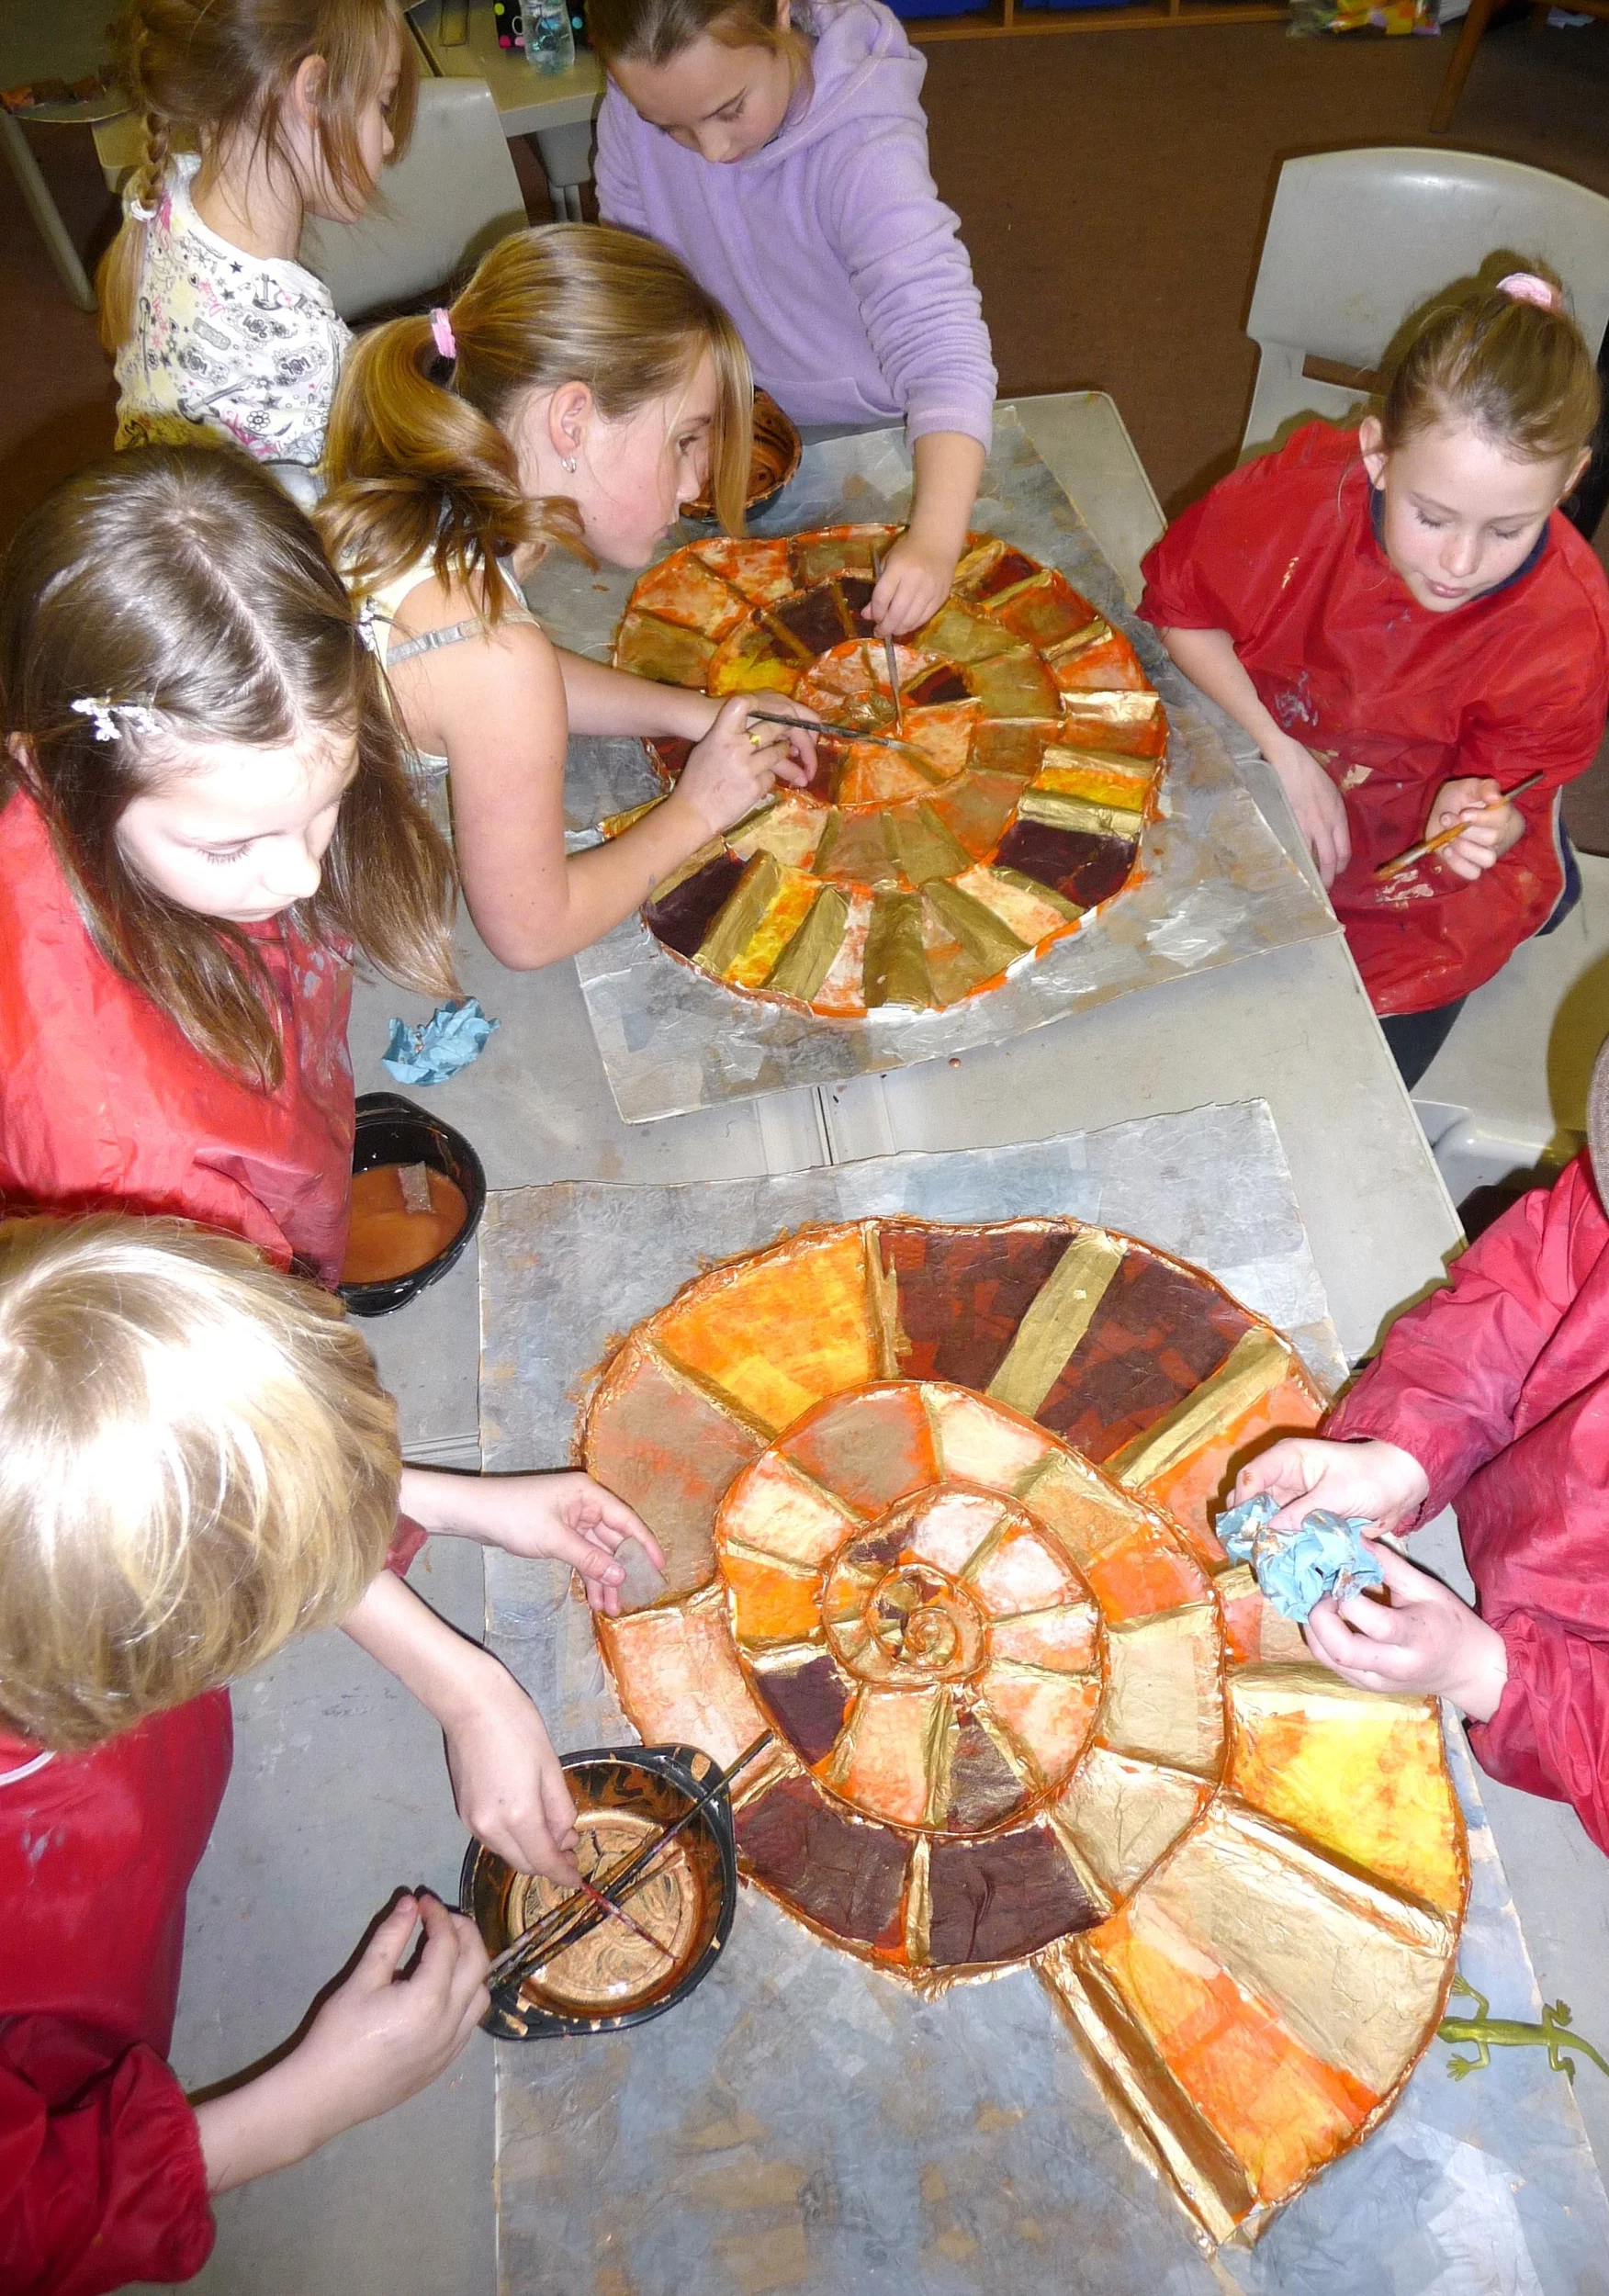
The children here have used cardboard strips and paper straws, then covered these with a layer of tissue paper (pasted on with a 50/50 mix of PVA glue/water) and then painted on top of their ammonites once dry.
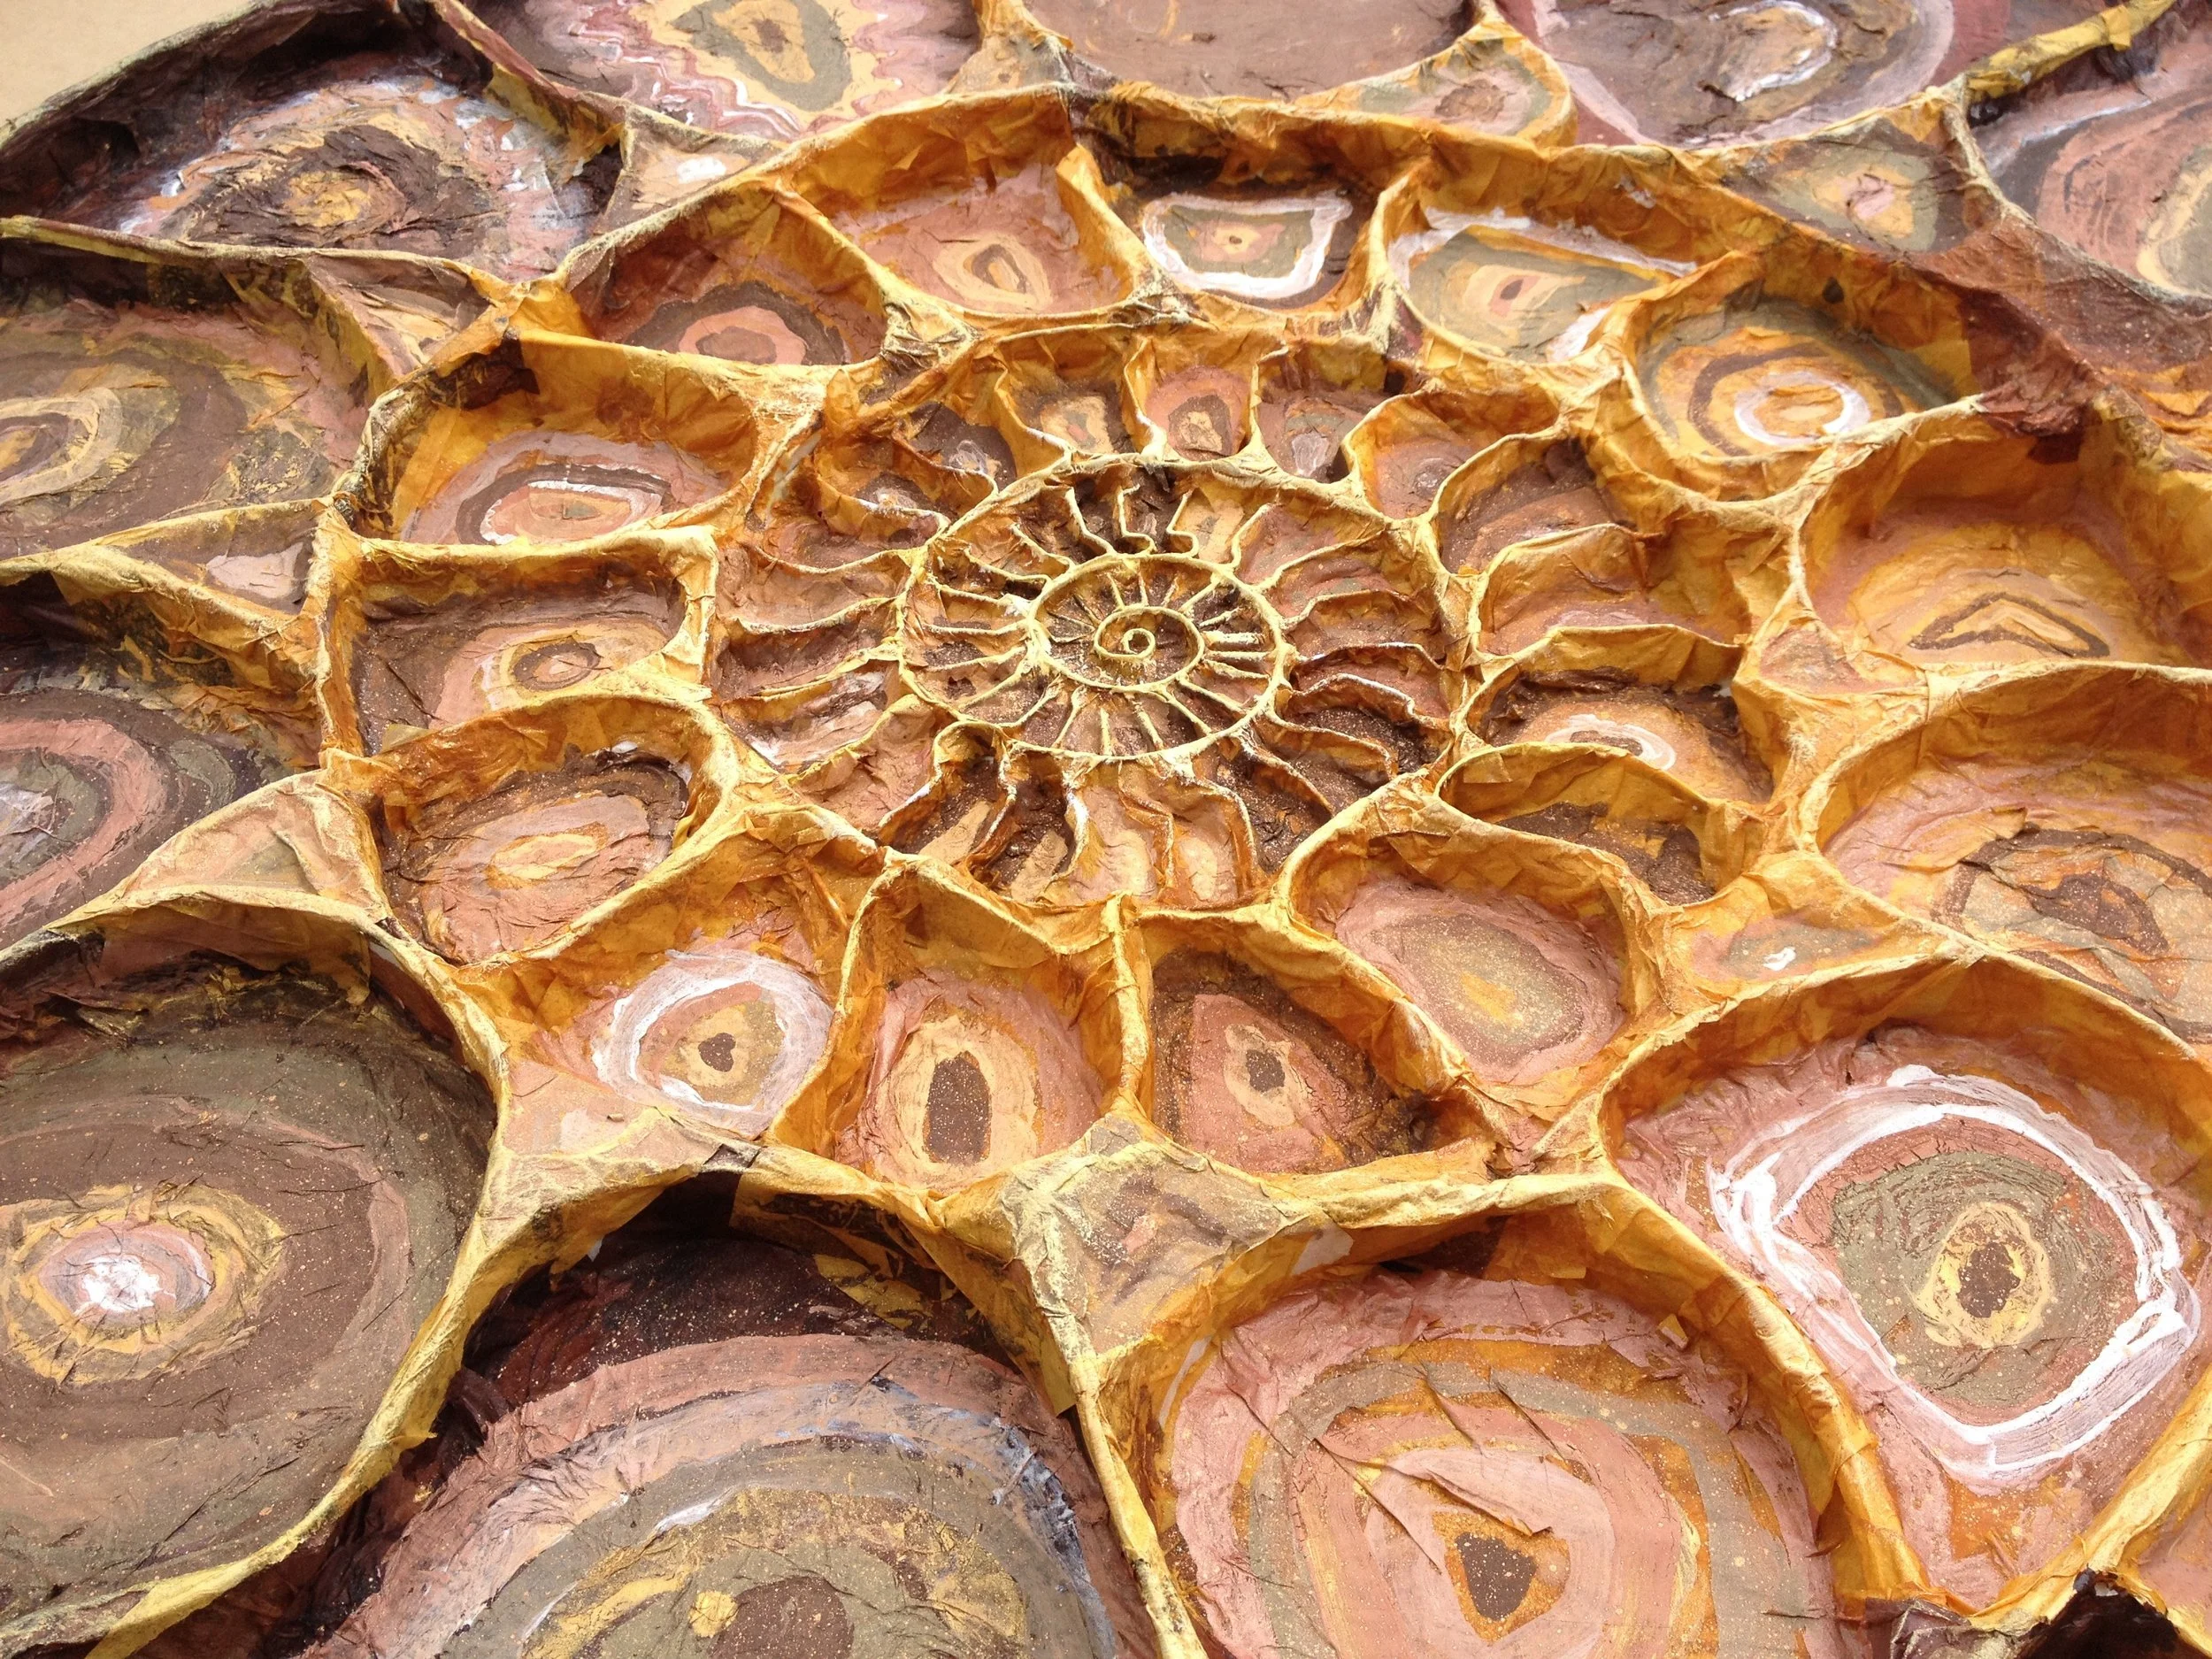
Here’s a more complex version created by lots of children attending a drop-in museum event.
Here are a few of my own examples, again these have been covered by a layer of tissue paper, and the bottom right example has been painted. You can also see where I’ve added some corrugated cardboard for texture.
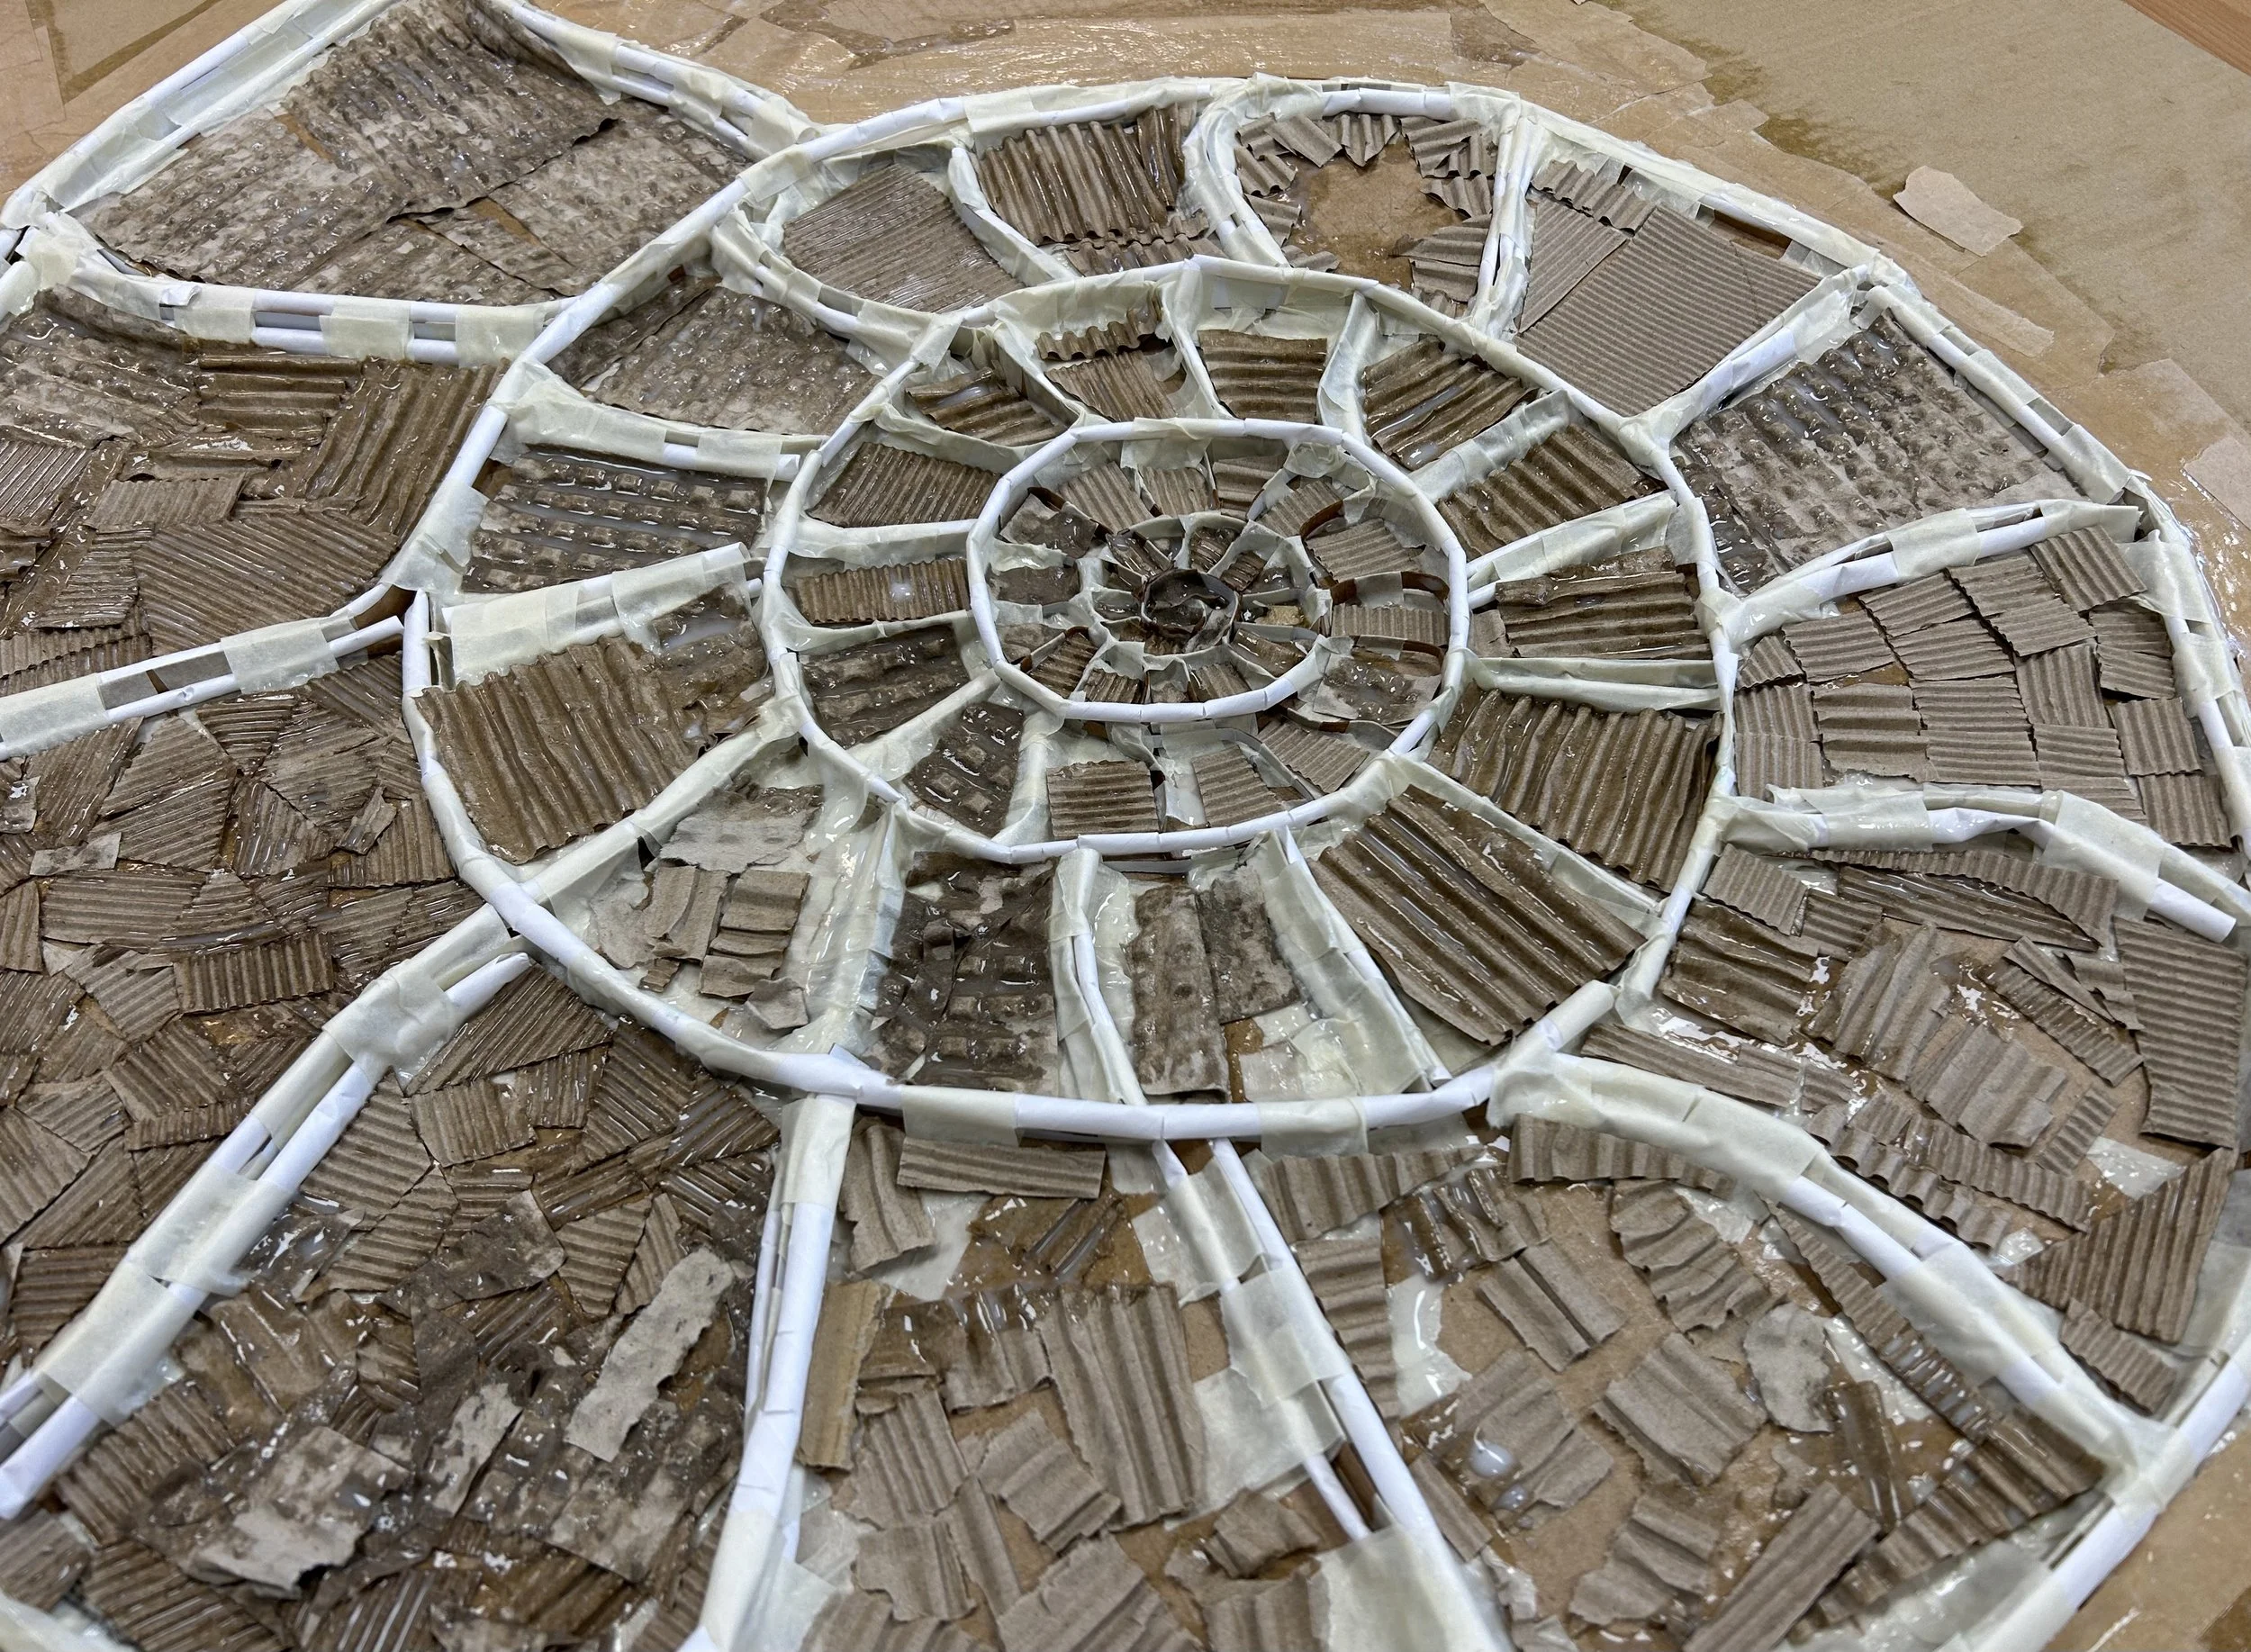
You could even fill in each section with different textures.
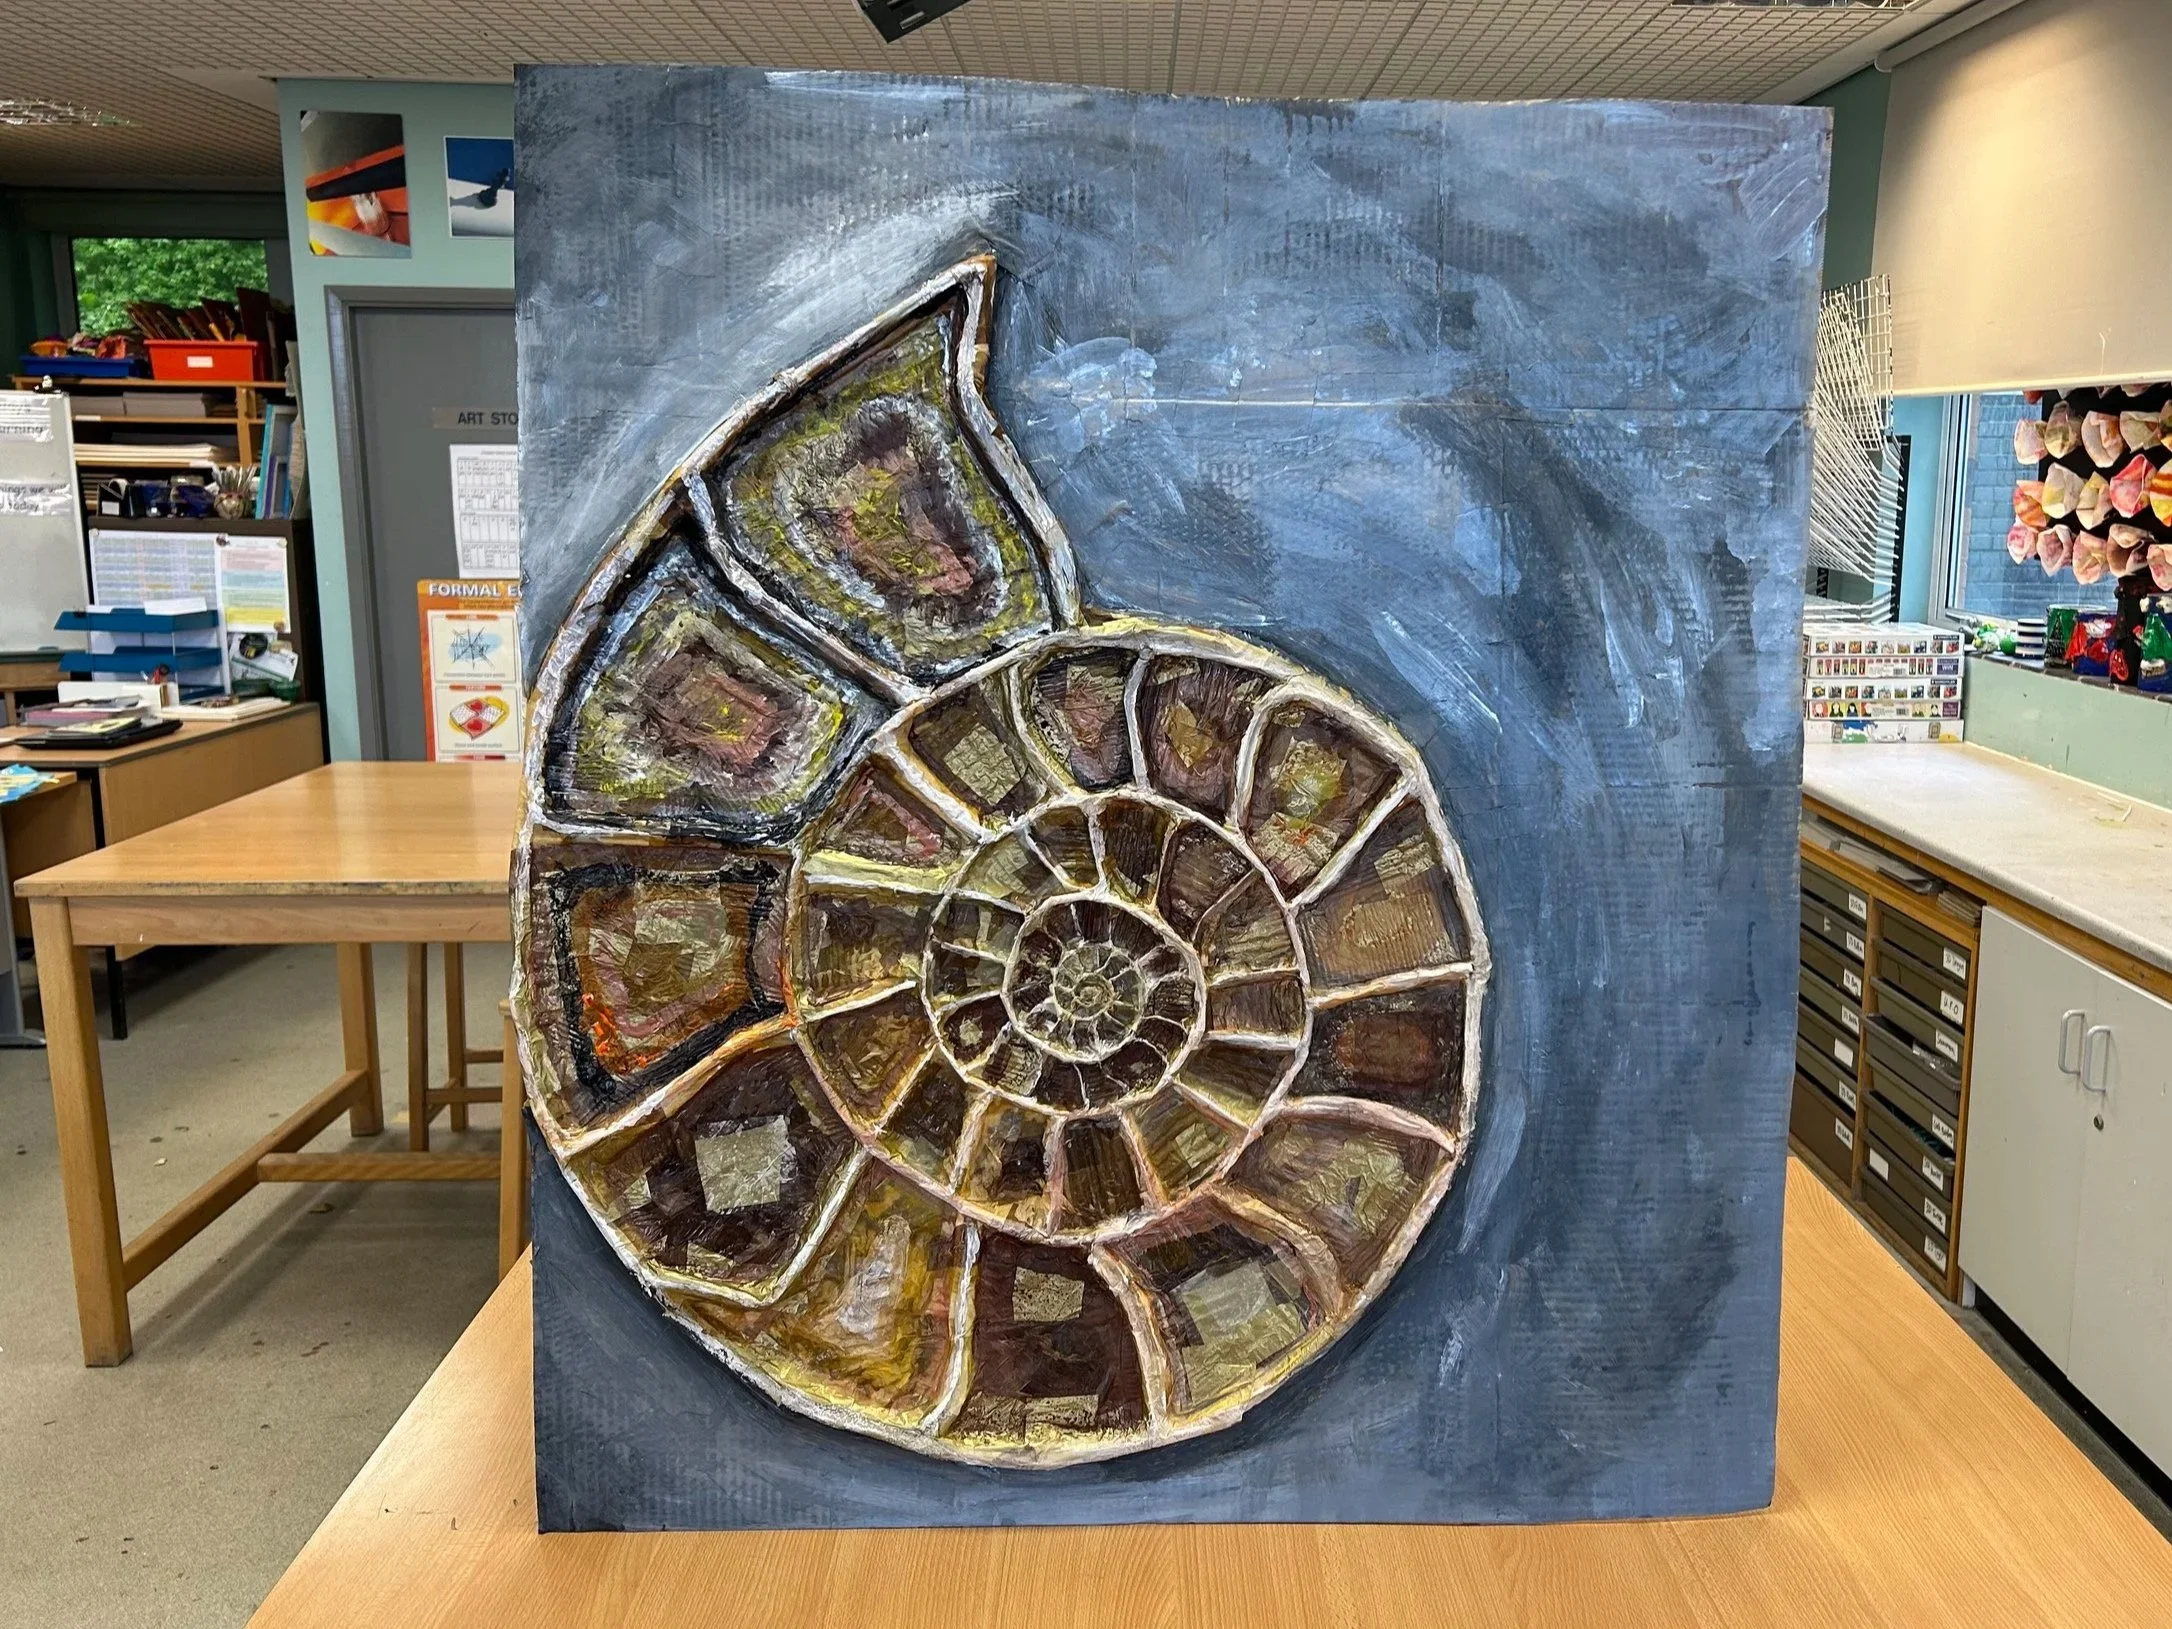
This example was made by a team of students and has been completed and painted. You can still see the different textures they have incorporated.
Ammonites come in all sorts of colours, this is due to the variety of minerals that make up their structure, so you can really experiment with colours and textures.
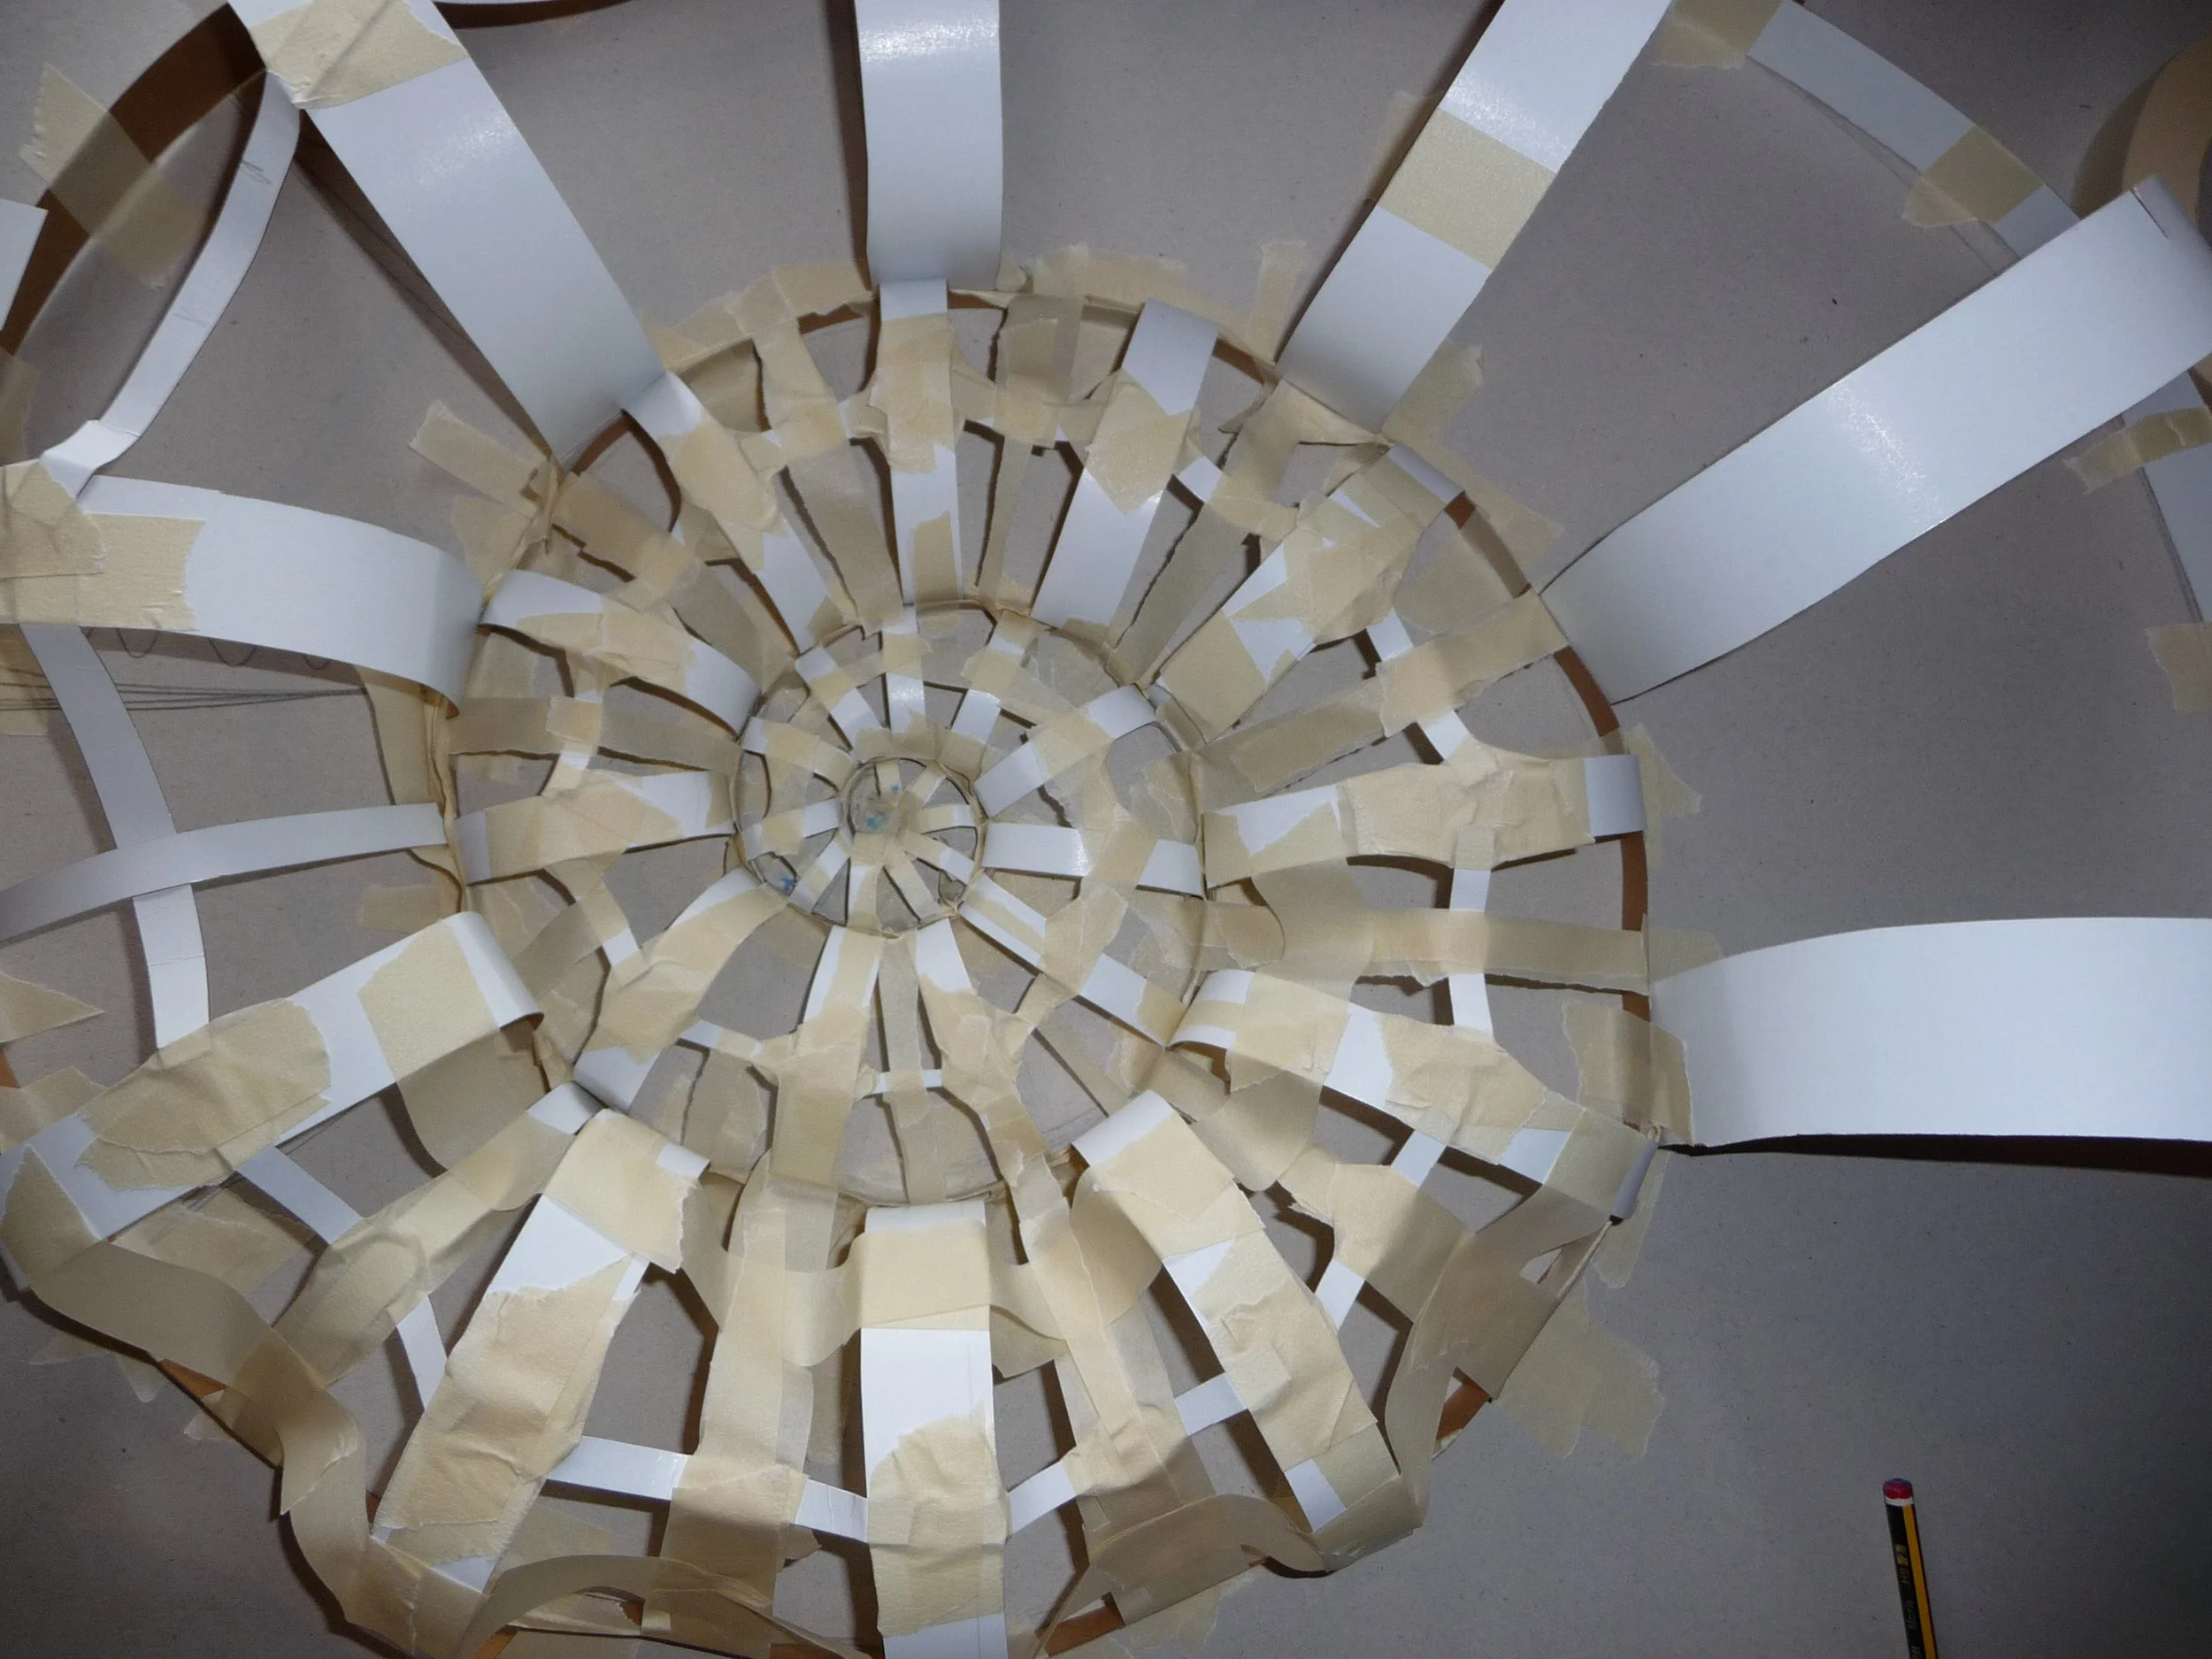
Okay, so the other basic way that you can begin the construction is to create a more three-dimensional design by building cardboard ‘bridges’ across the surface. This method begins in exactly the same way as the flatter version, with a thin cardboard spiral attached to the cardboard base.
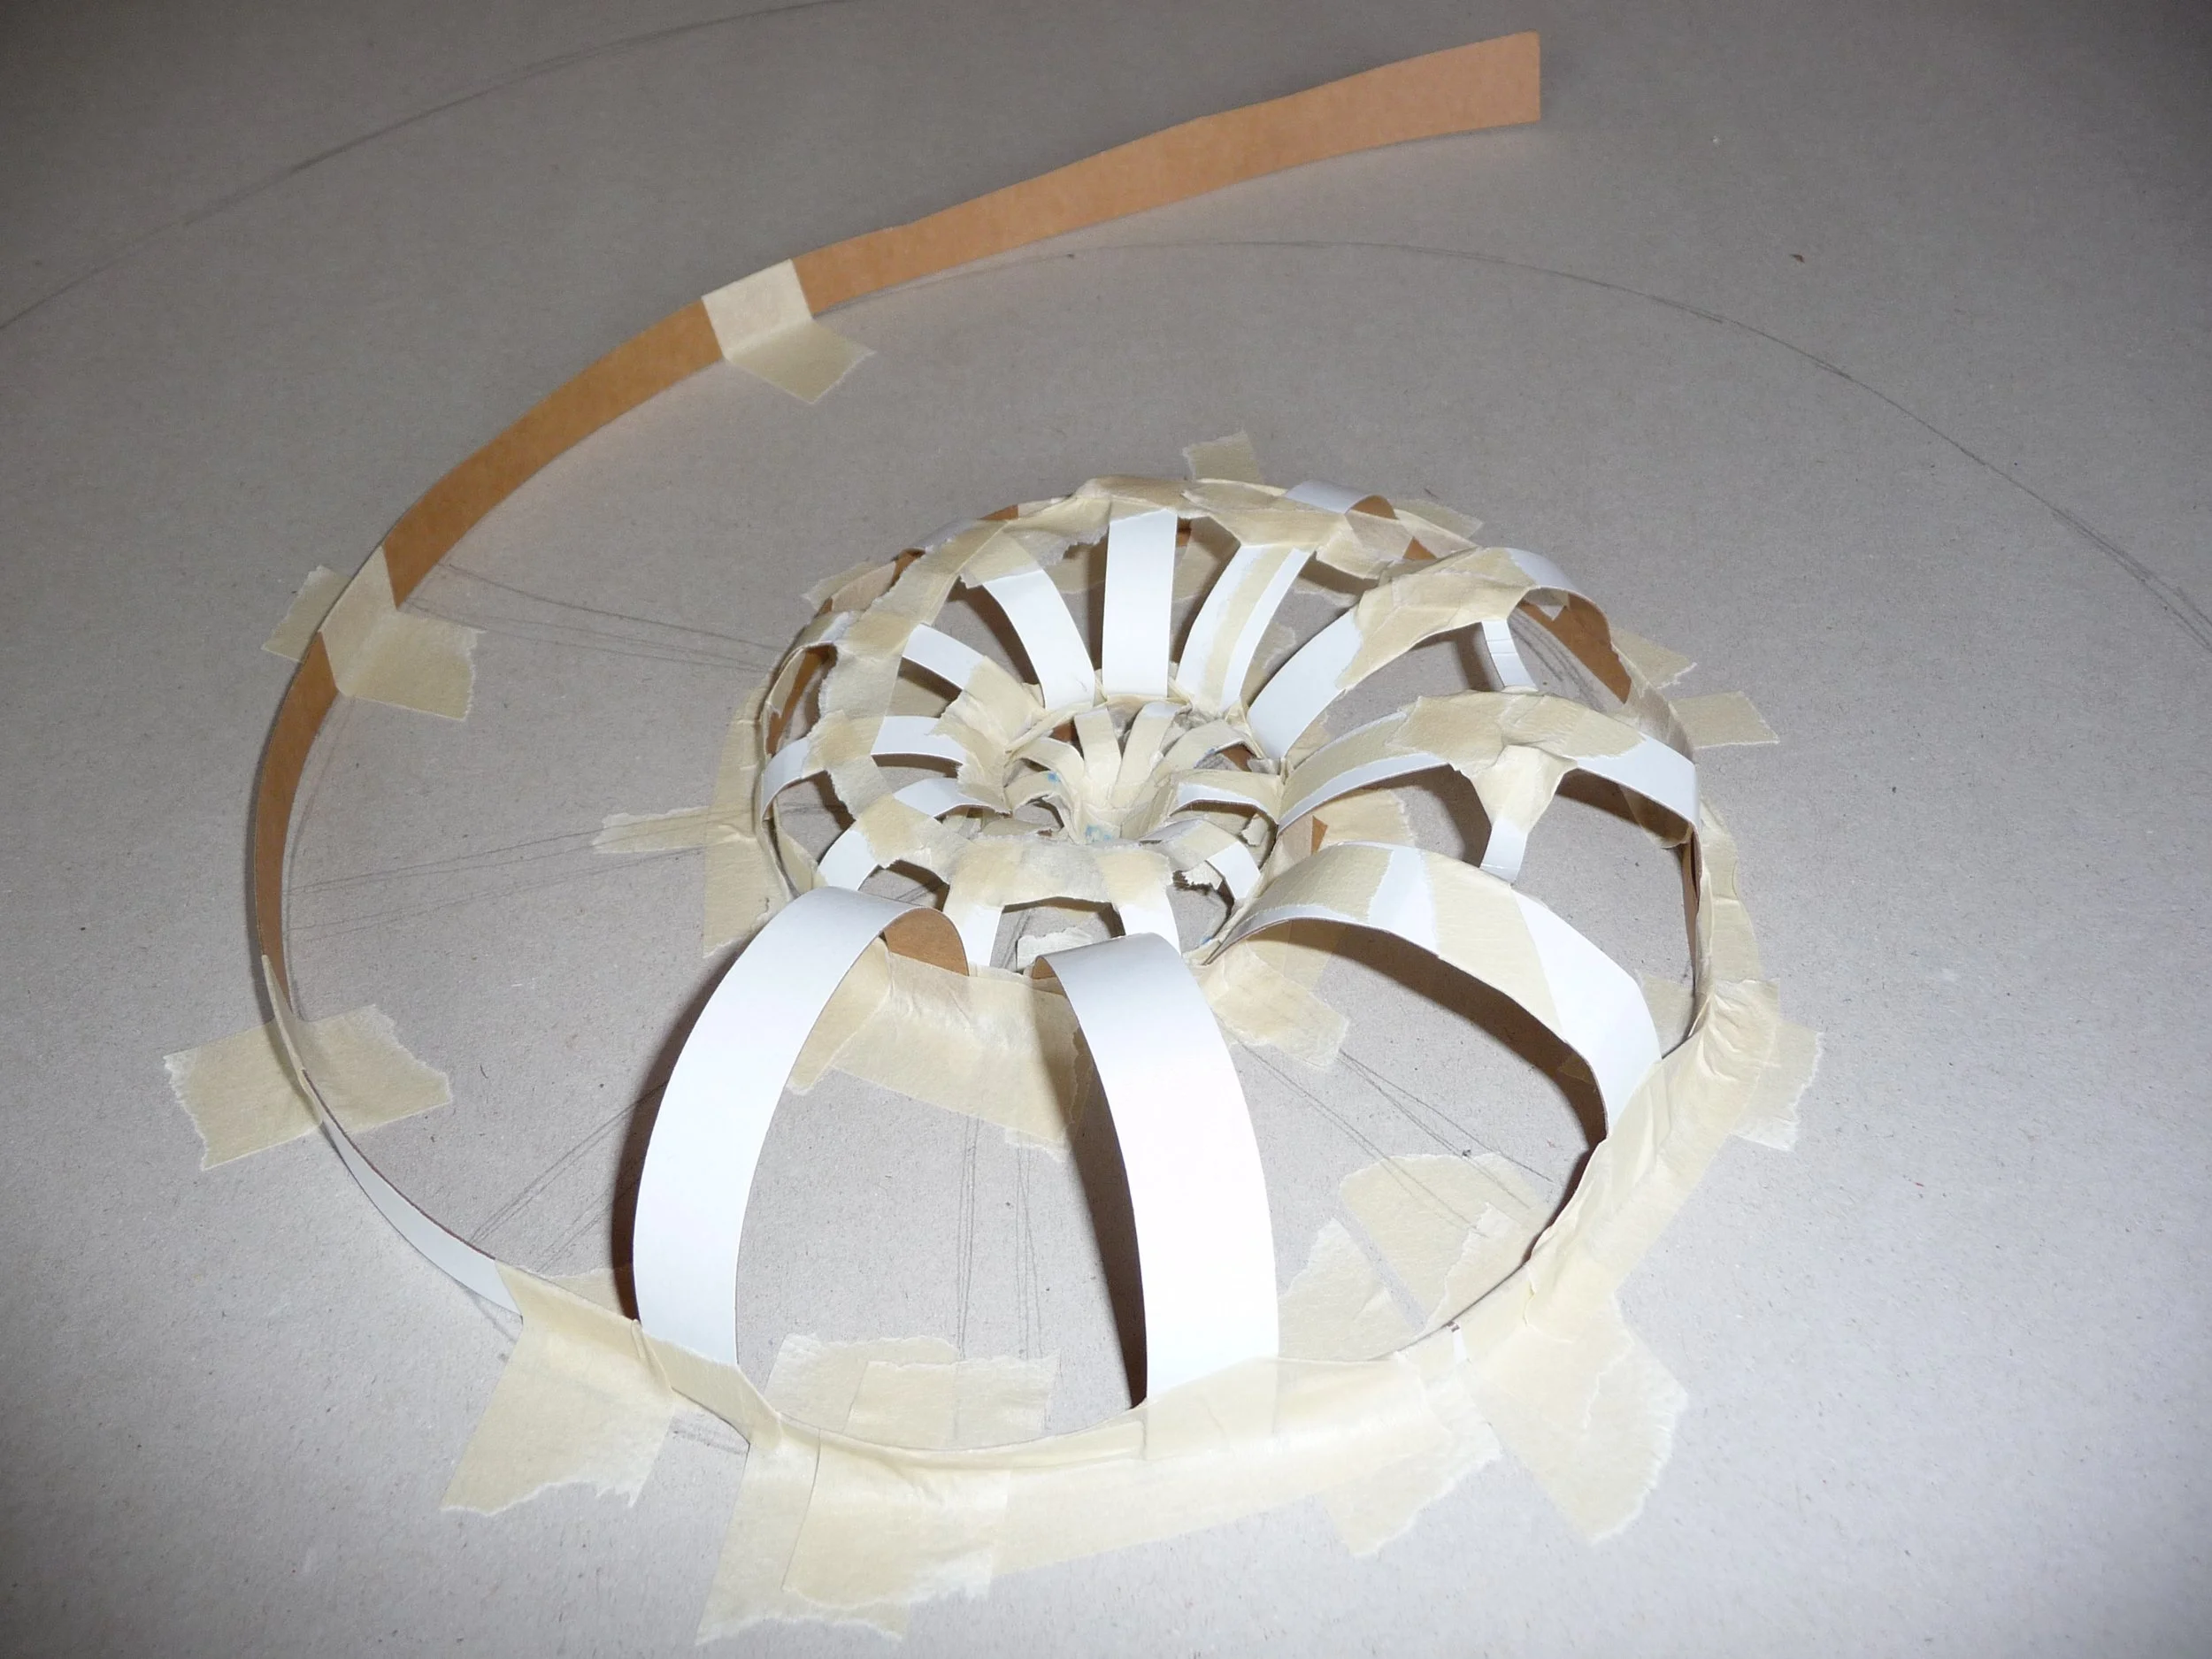
The start of a 3D version.
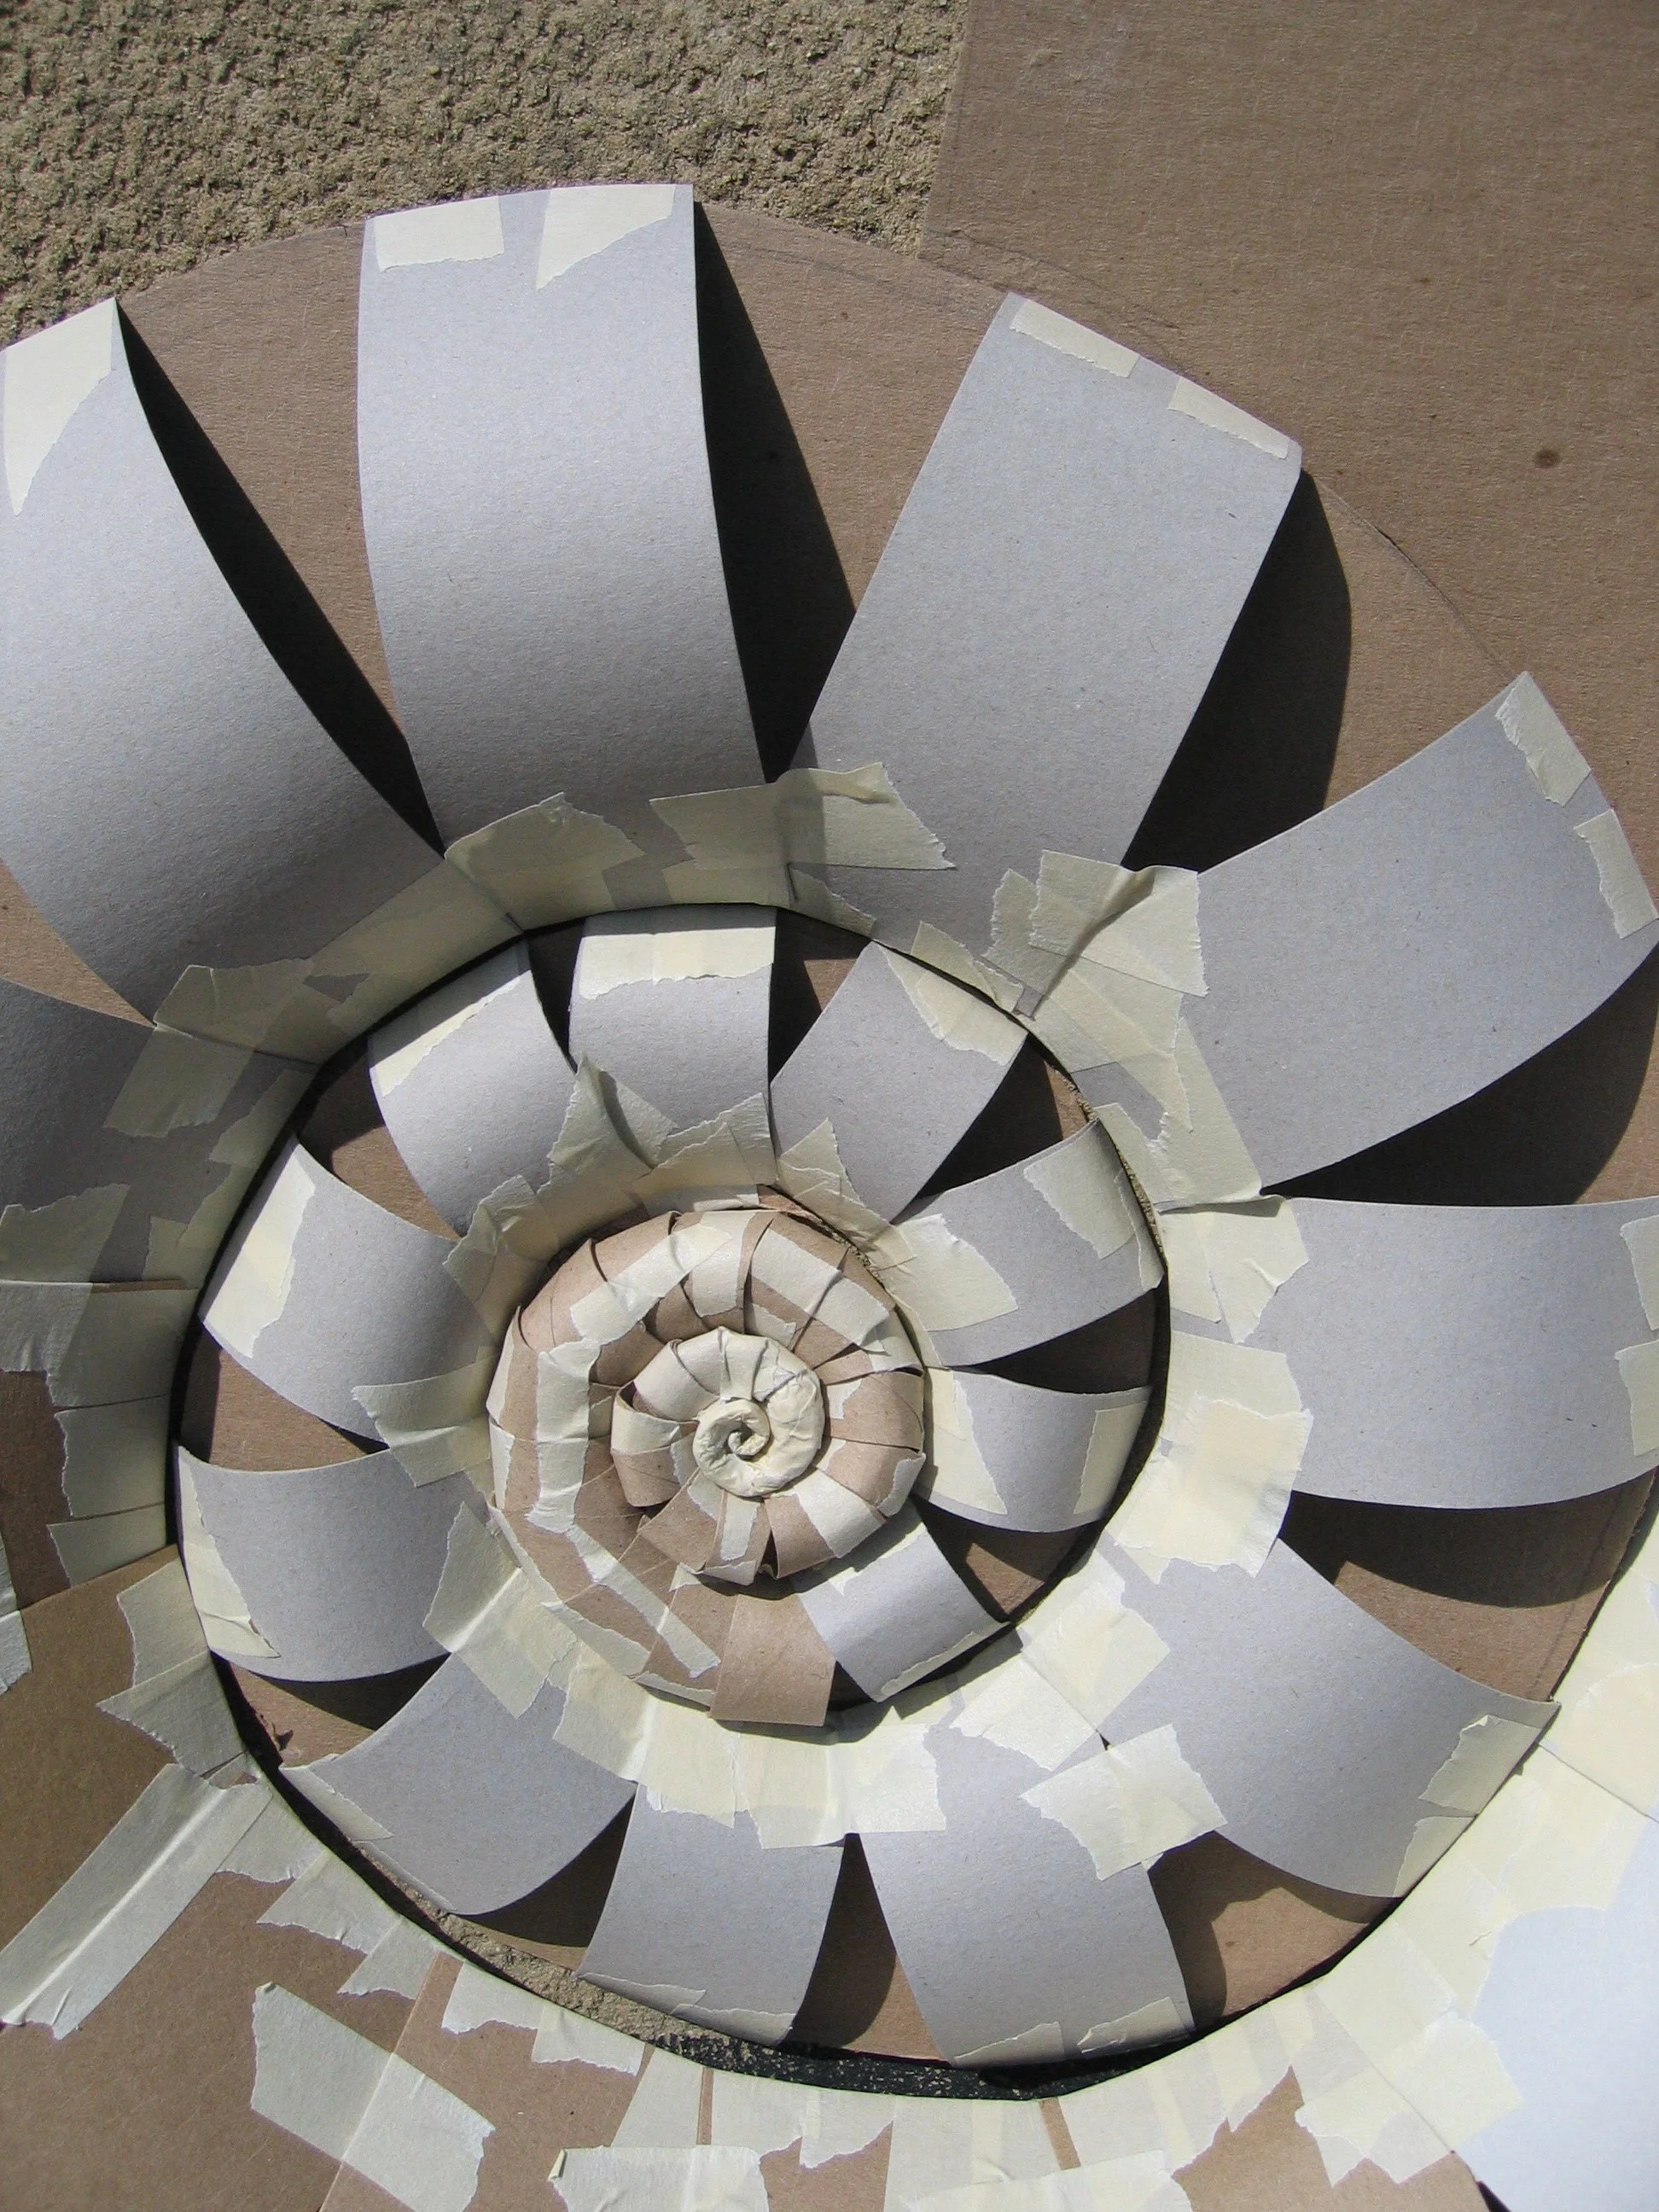
You then need lots of cardboard strips of different thicknesses. Once again, it’s easier to start from the centre and work your way out. Young children will struggle to build really close to the centre, it’s hard for them to manipulate, so often, if they want a ‘centre’ I help them to make one by rolling up a small spiral from tin foil. But, once the cardboard strips get started, the repeat pattern means that most children will gradually get the hang of it, and as they work their way outwards it actually gets easier. The strips (and gaps) become larger, and each new spiral covers over the previous smaller one and holds it more firmly in position.
Thicker strips.
This is quite a complex version, where the top of each strip has also been connected to the previous one with a smaller, thinner piece of card.
Here’s a larger version with thicker sections (this also has a simple ‘tin-foil’ centre as described earlier)
Here’s a close-up photo from my book showing how foil can work for smaller details.
Here’s a larger, more complex version made by children at a drop-in museum event. This has been covered with a layer of tissue paper and then painted.
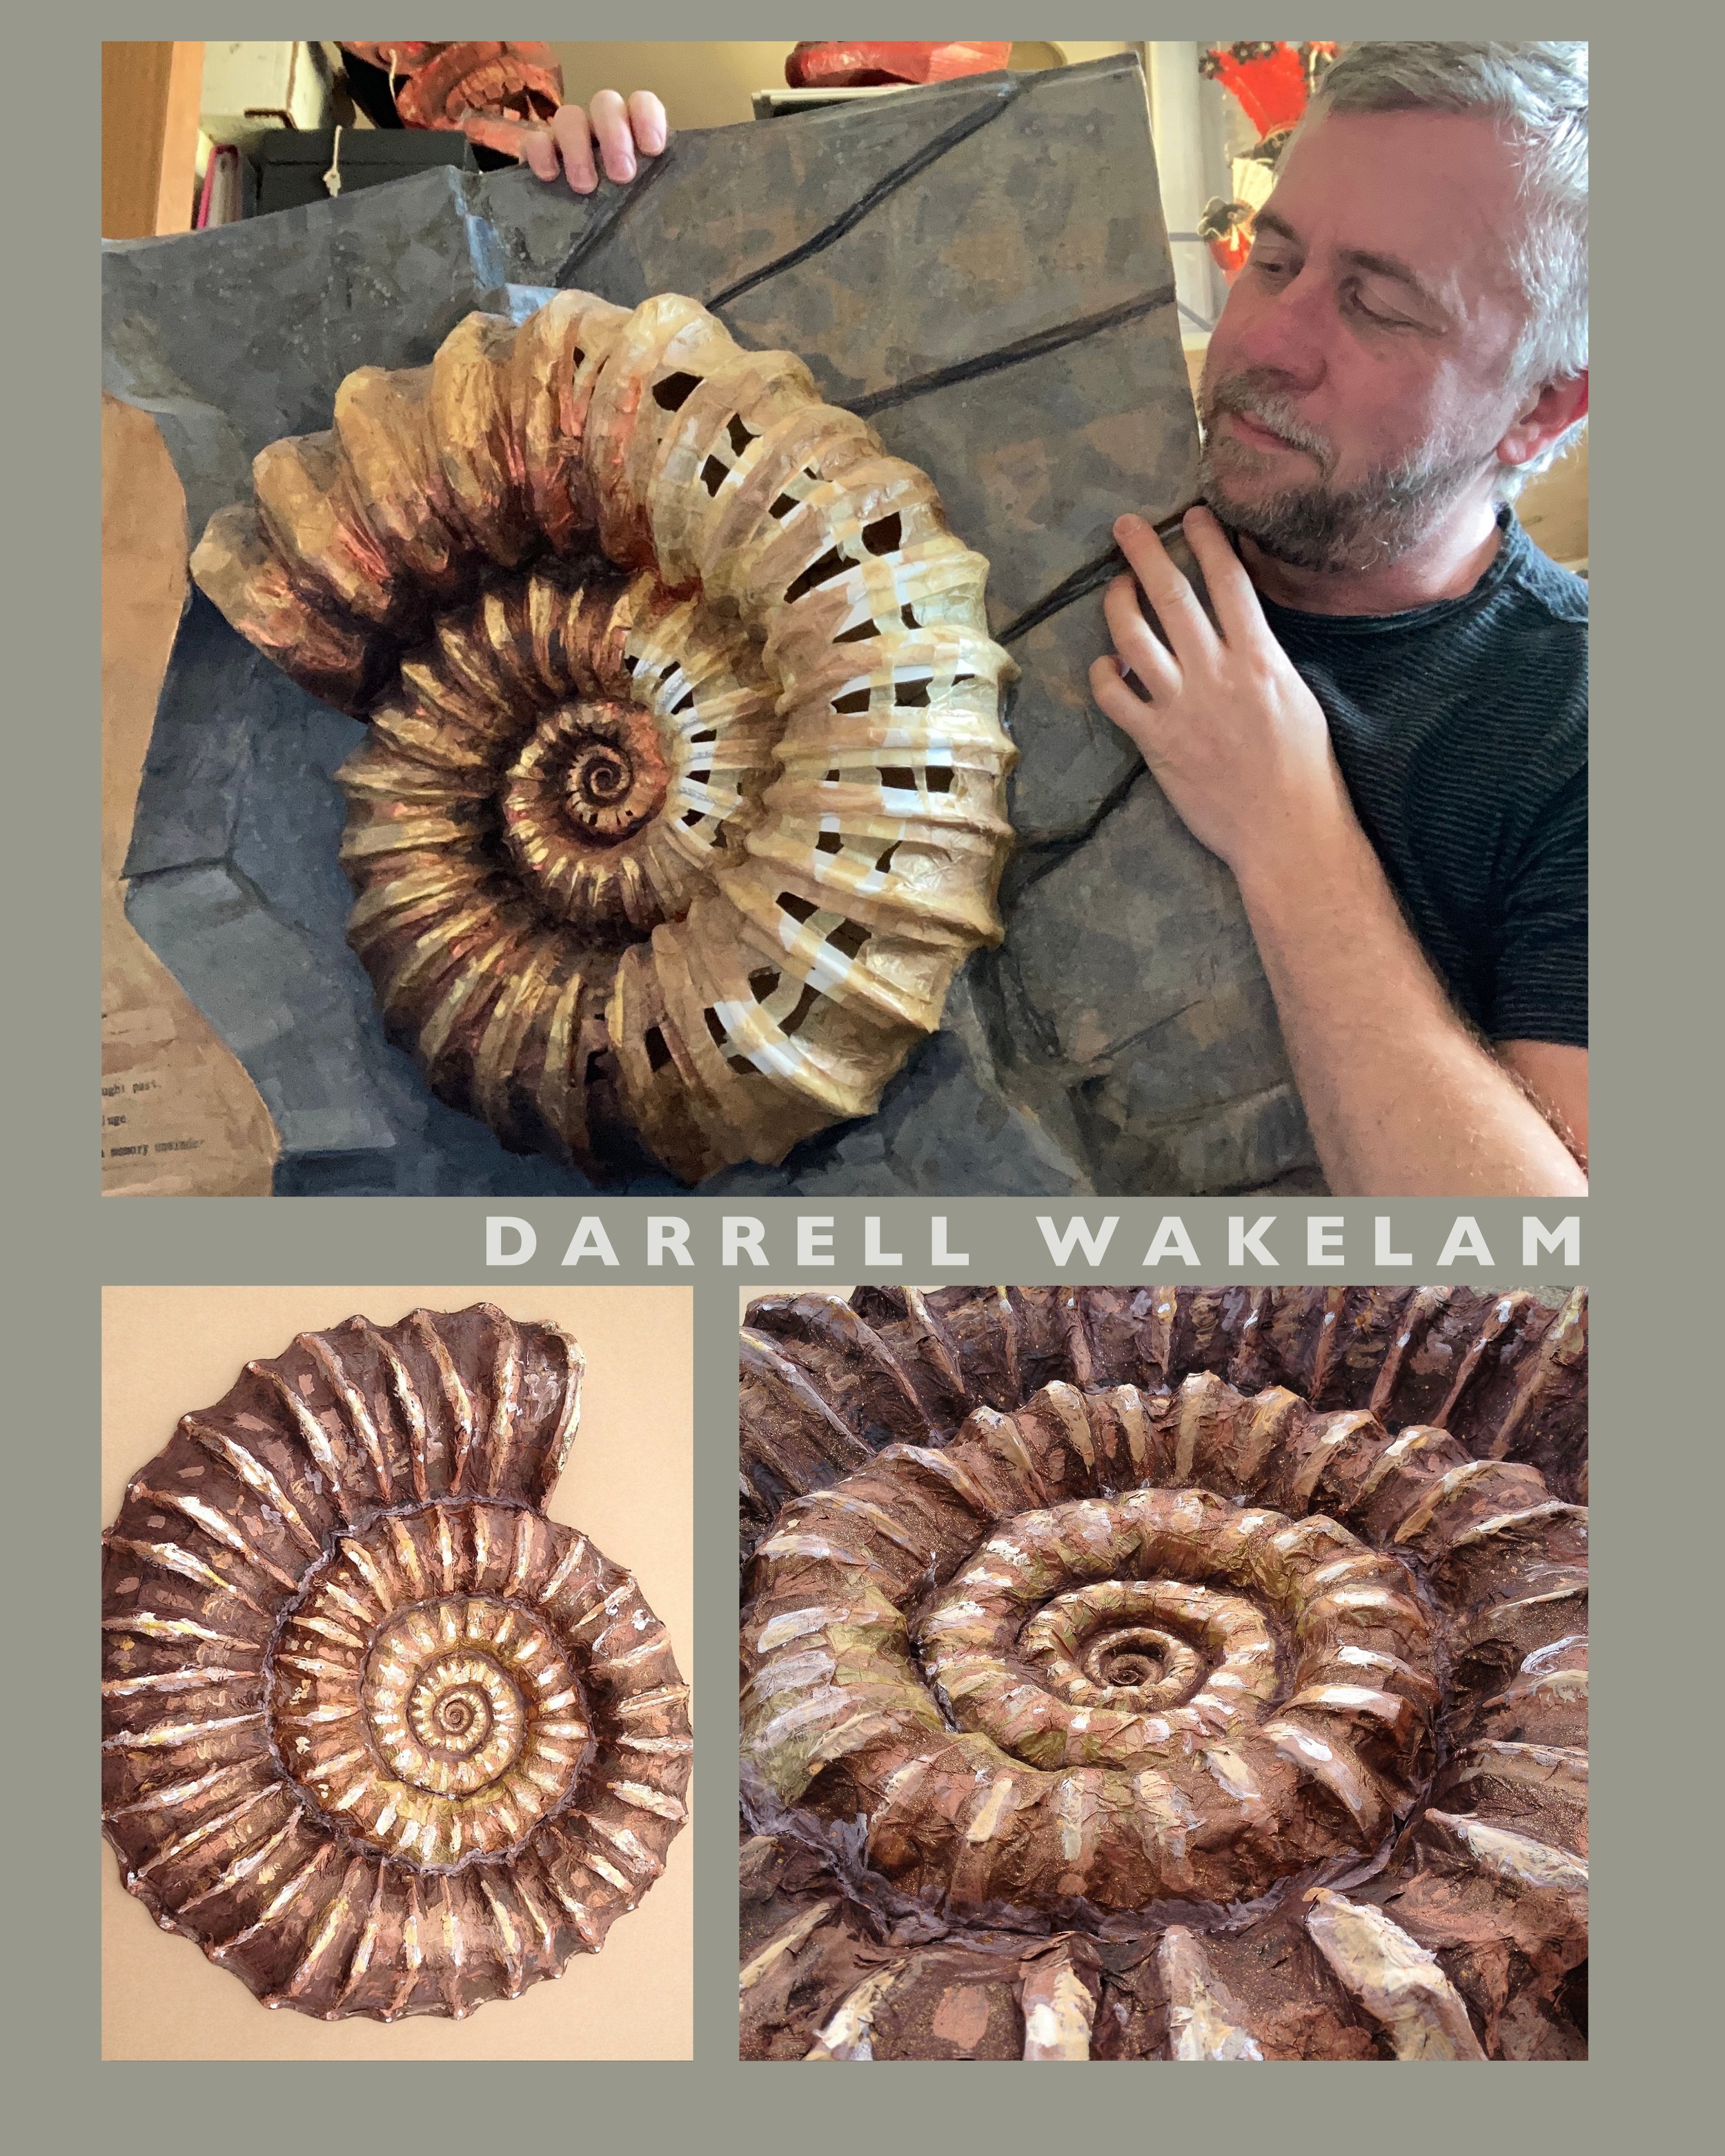
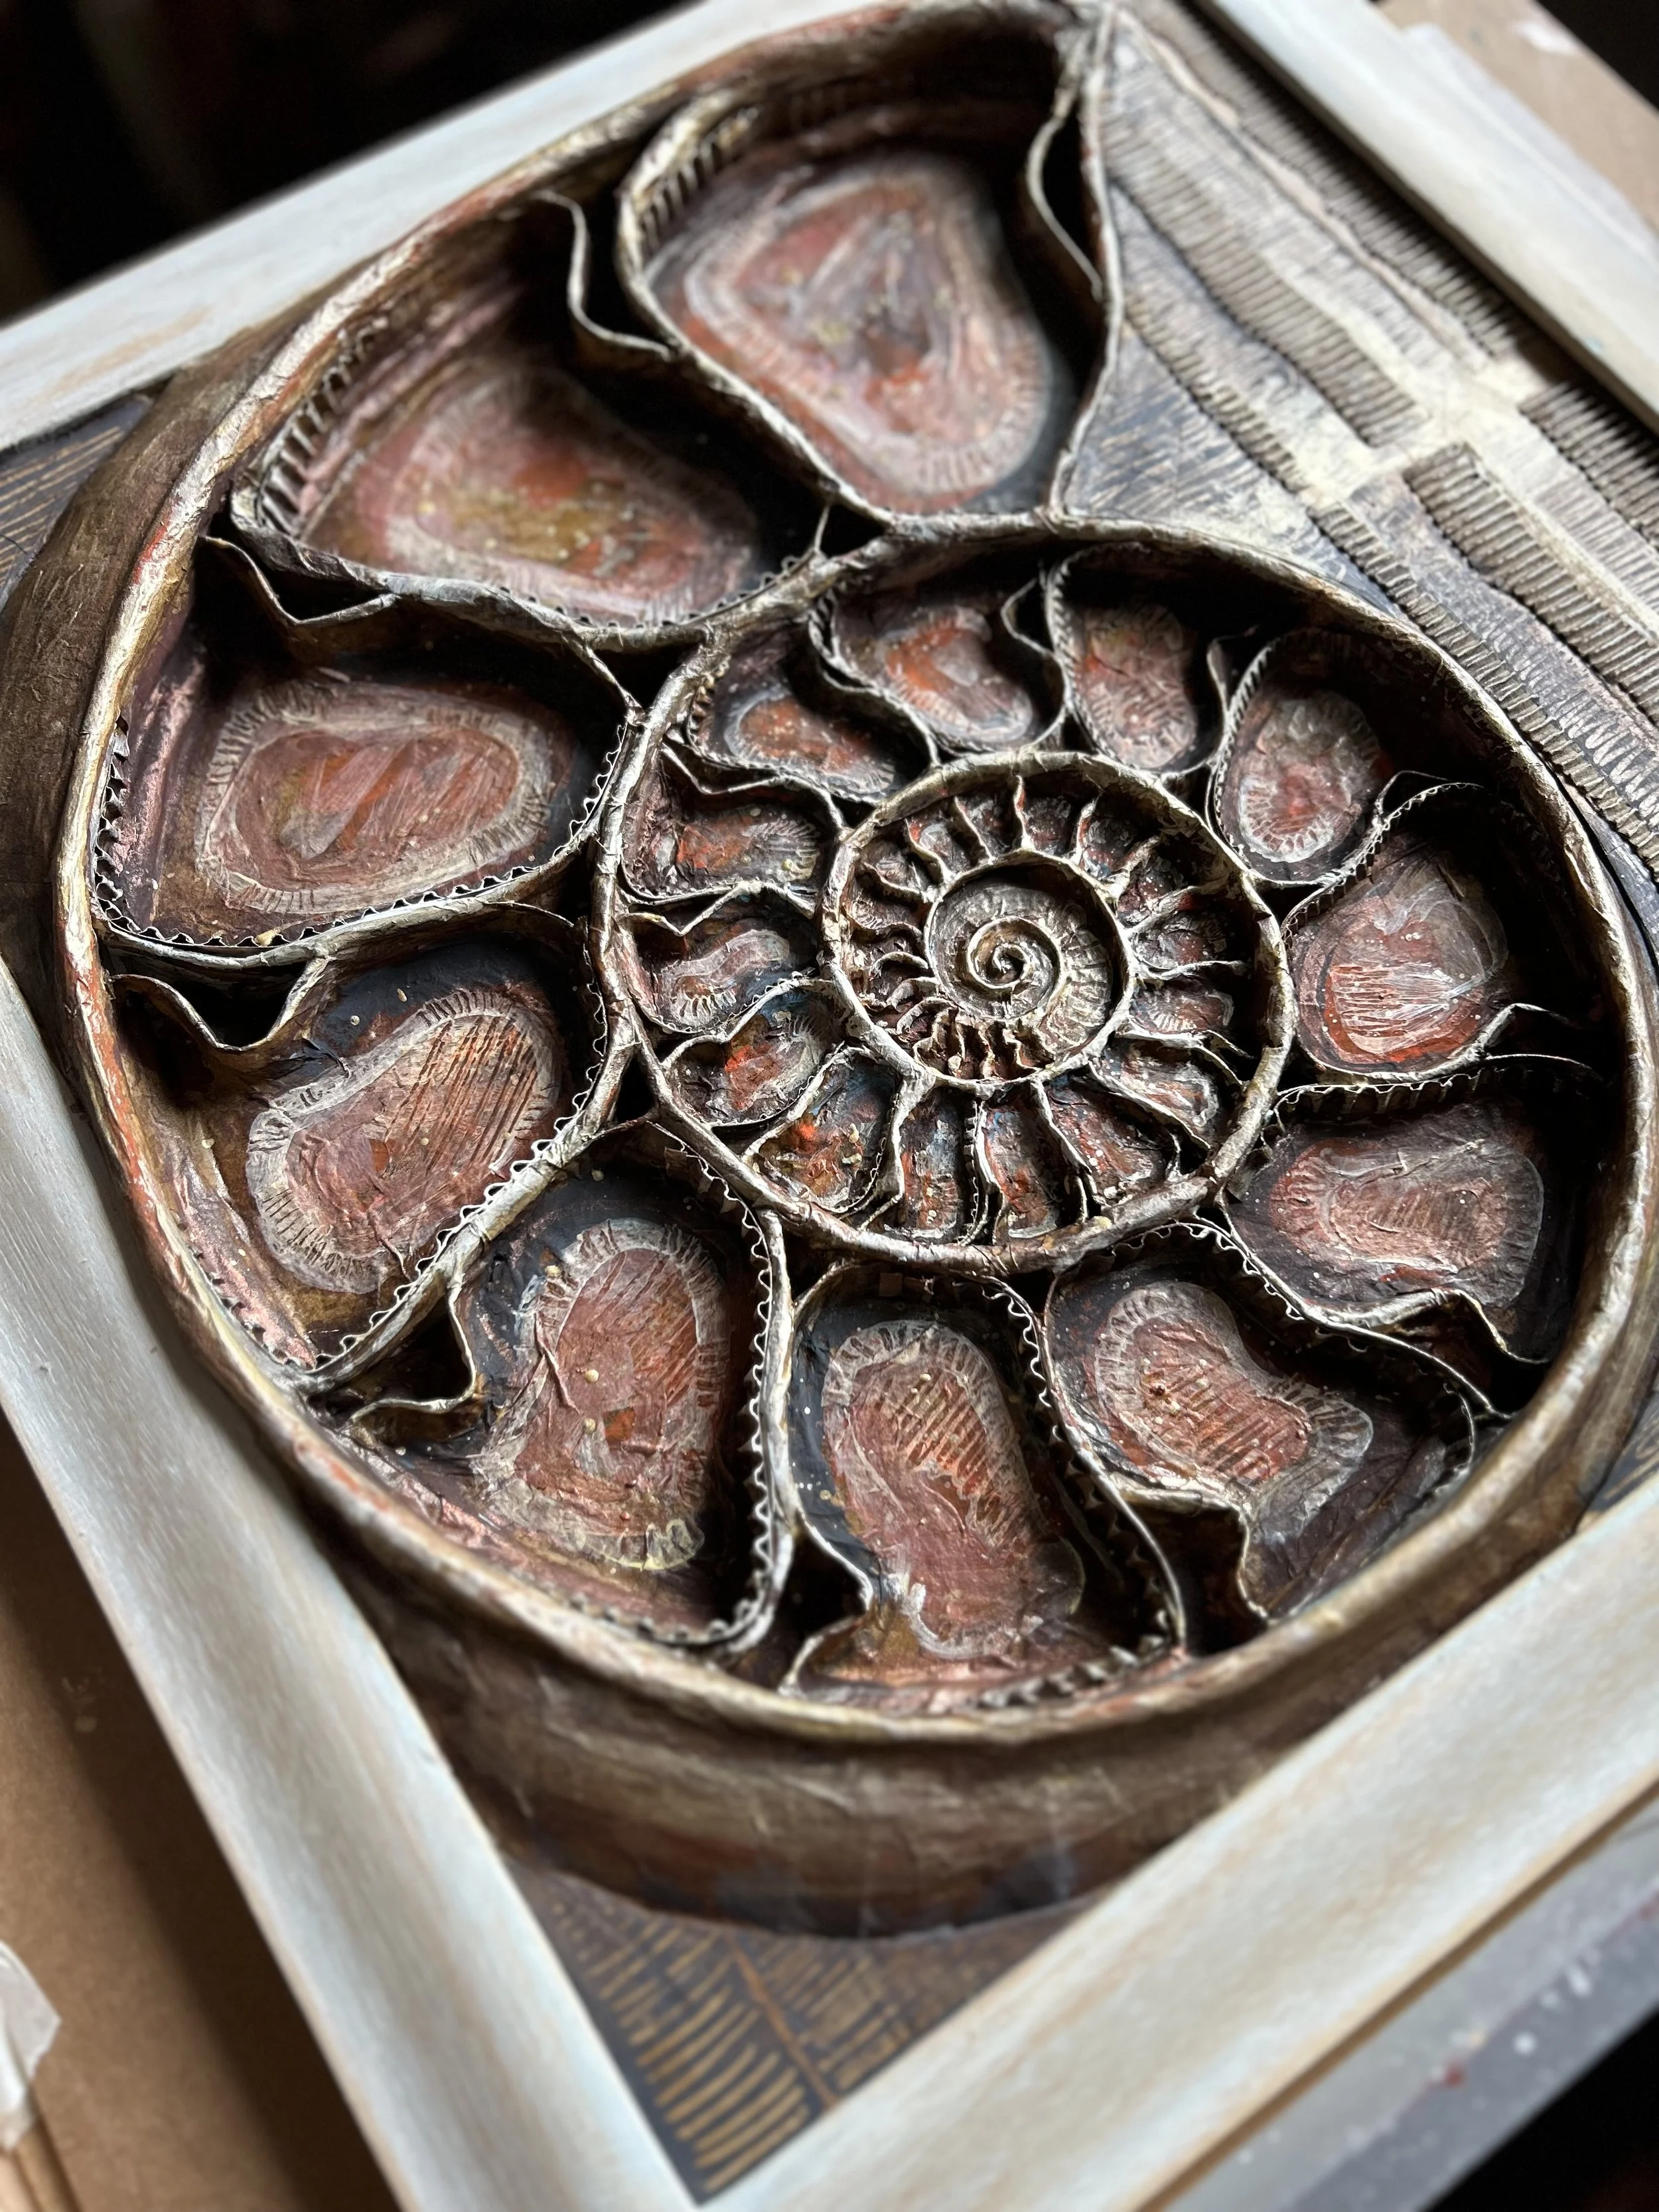
A couple of my own sculptures created for displays and exhibitions. On these I’ve added extra paper straws to make each segment even more three-dimensional. You can see this clearly on the top photo.
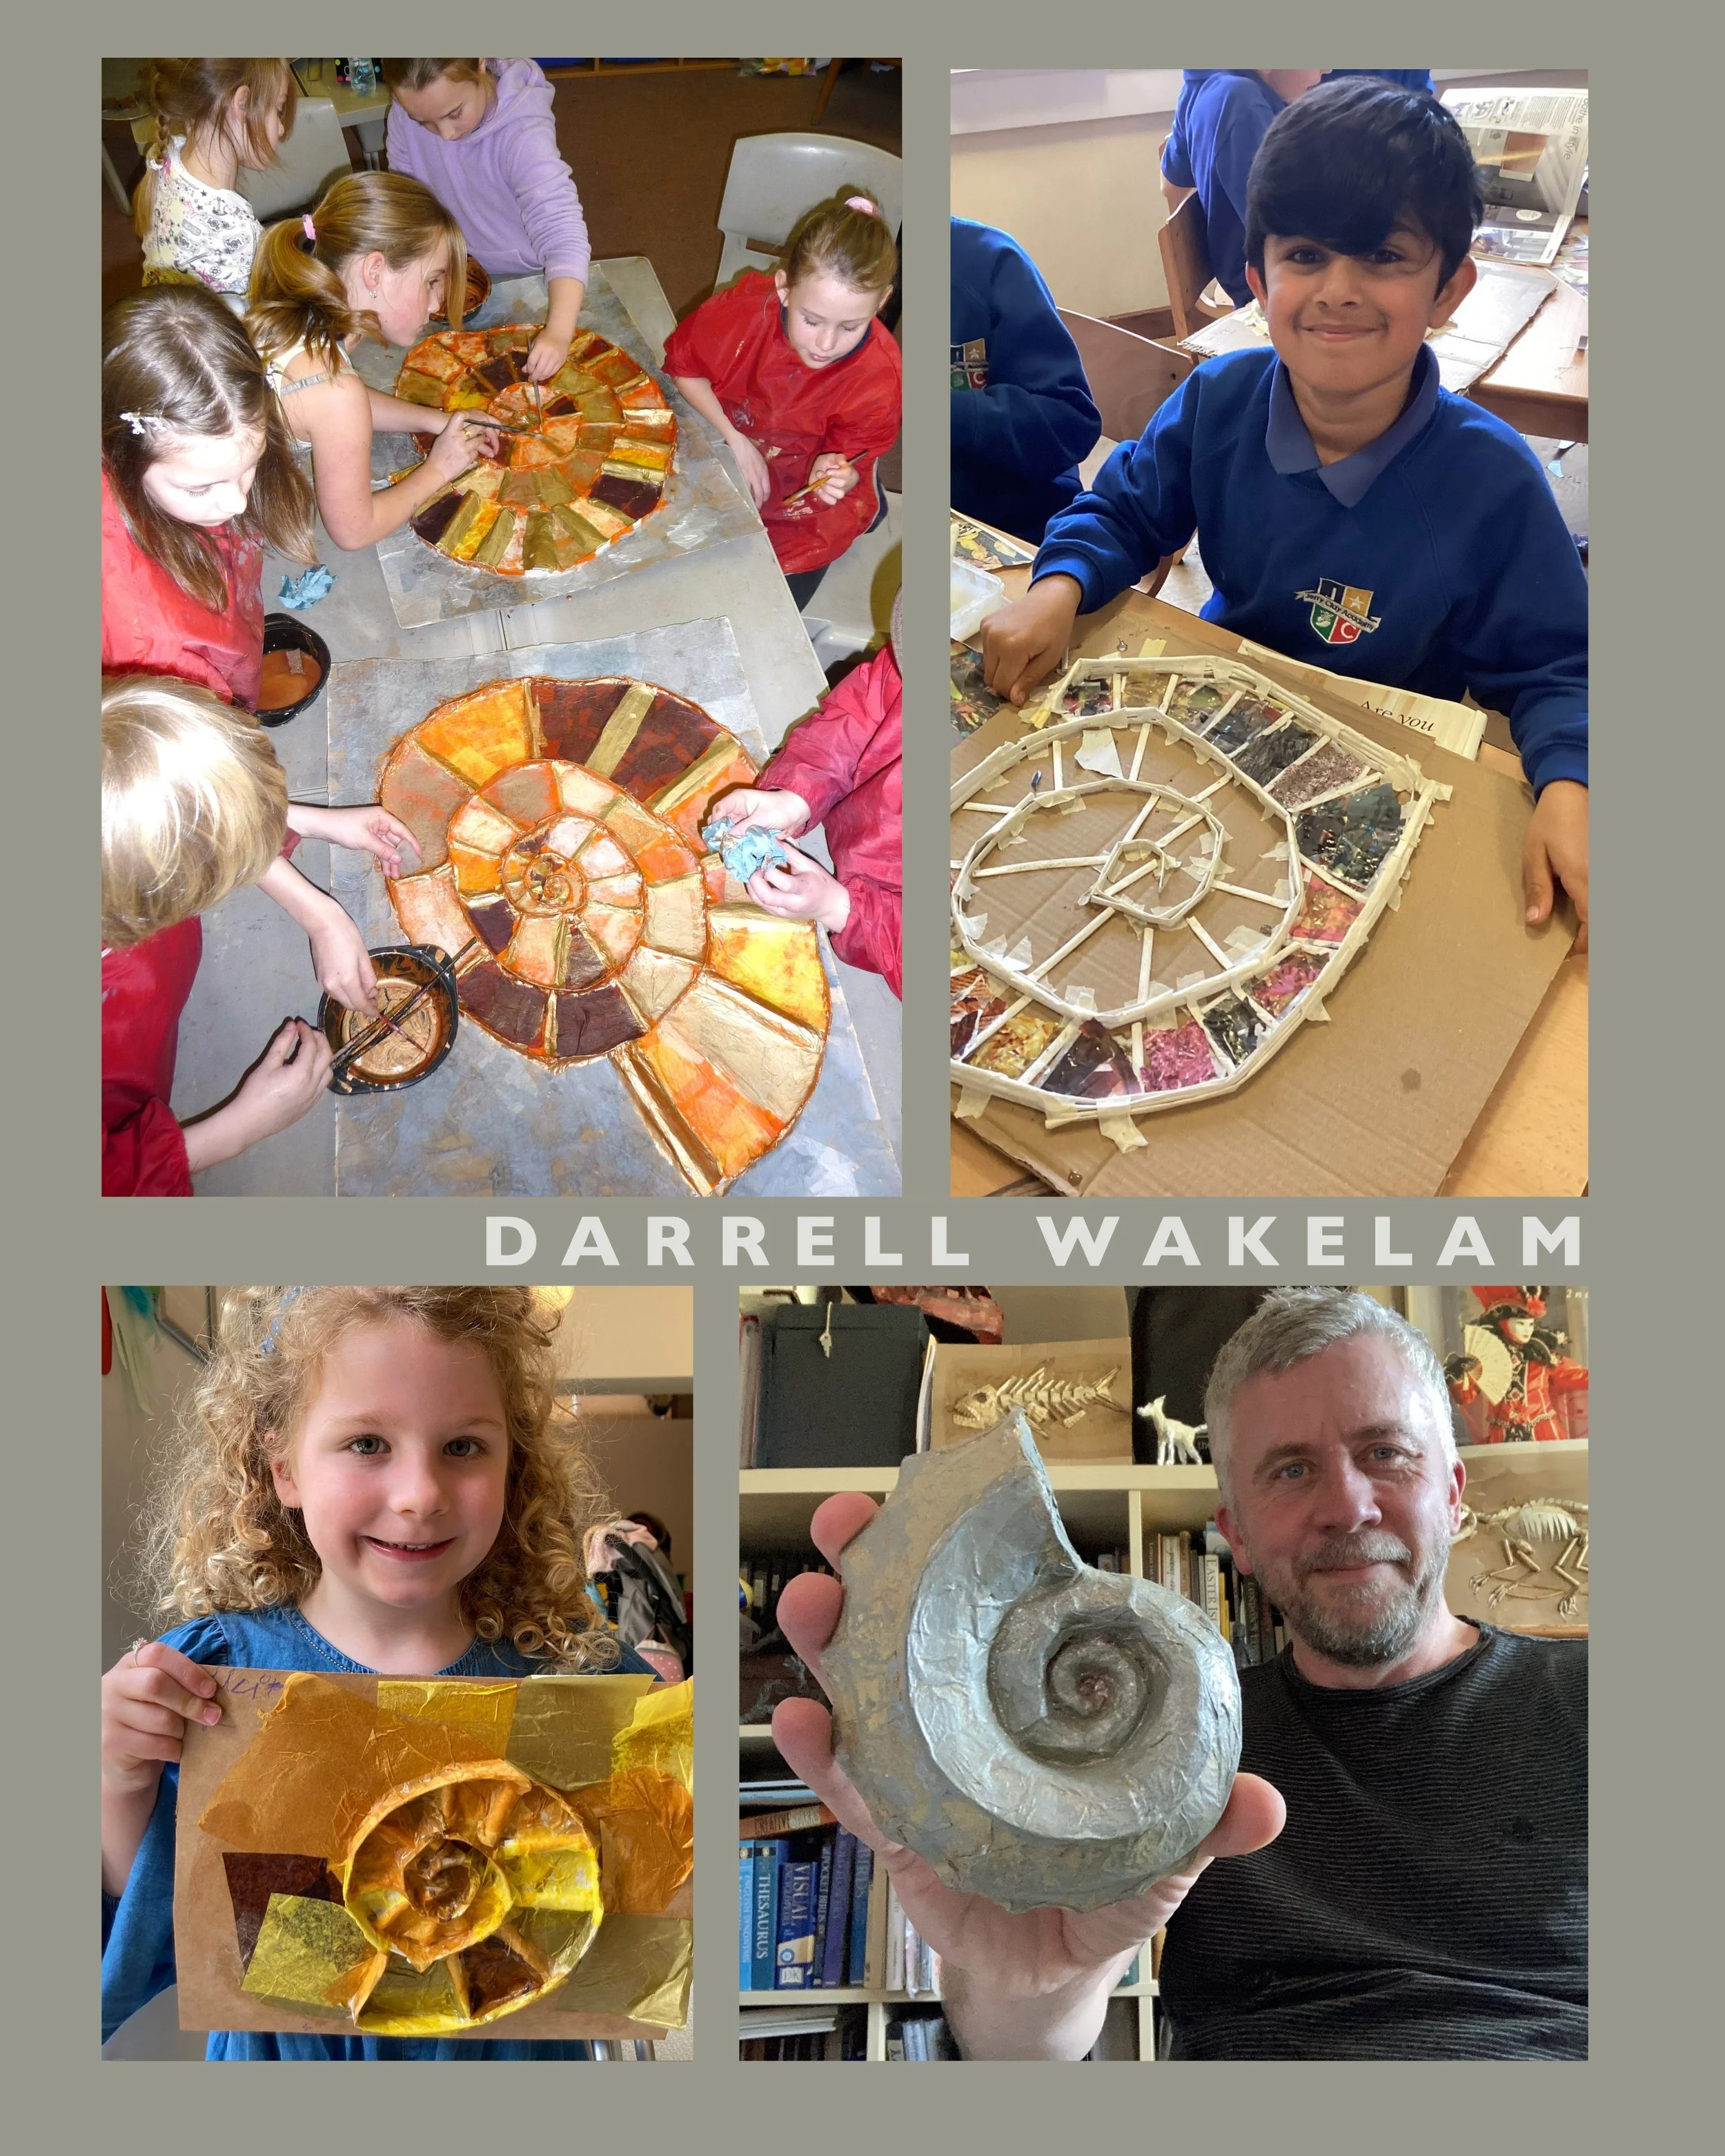
A few examples with happy artists.
A whole range of examples.
One of my favourites. A sculpture I made for a friends wedding present!
Can you tell I’ve done this a few times?
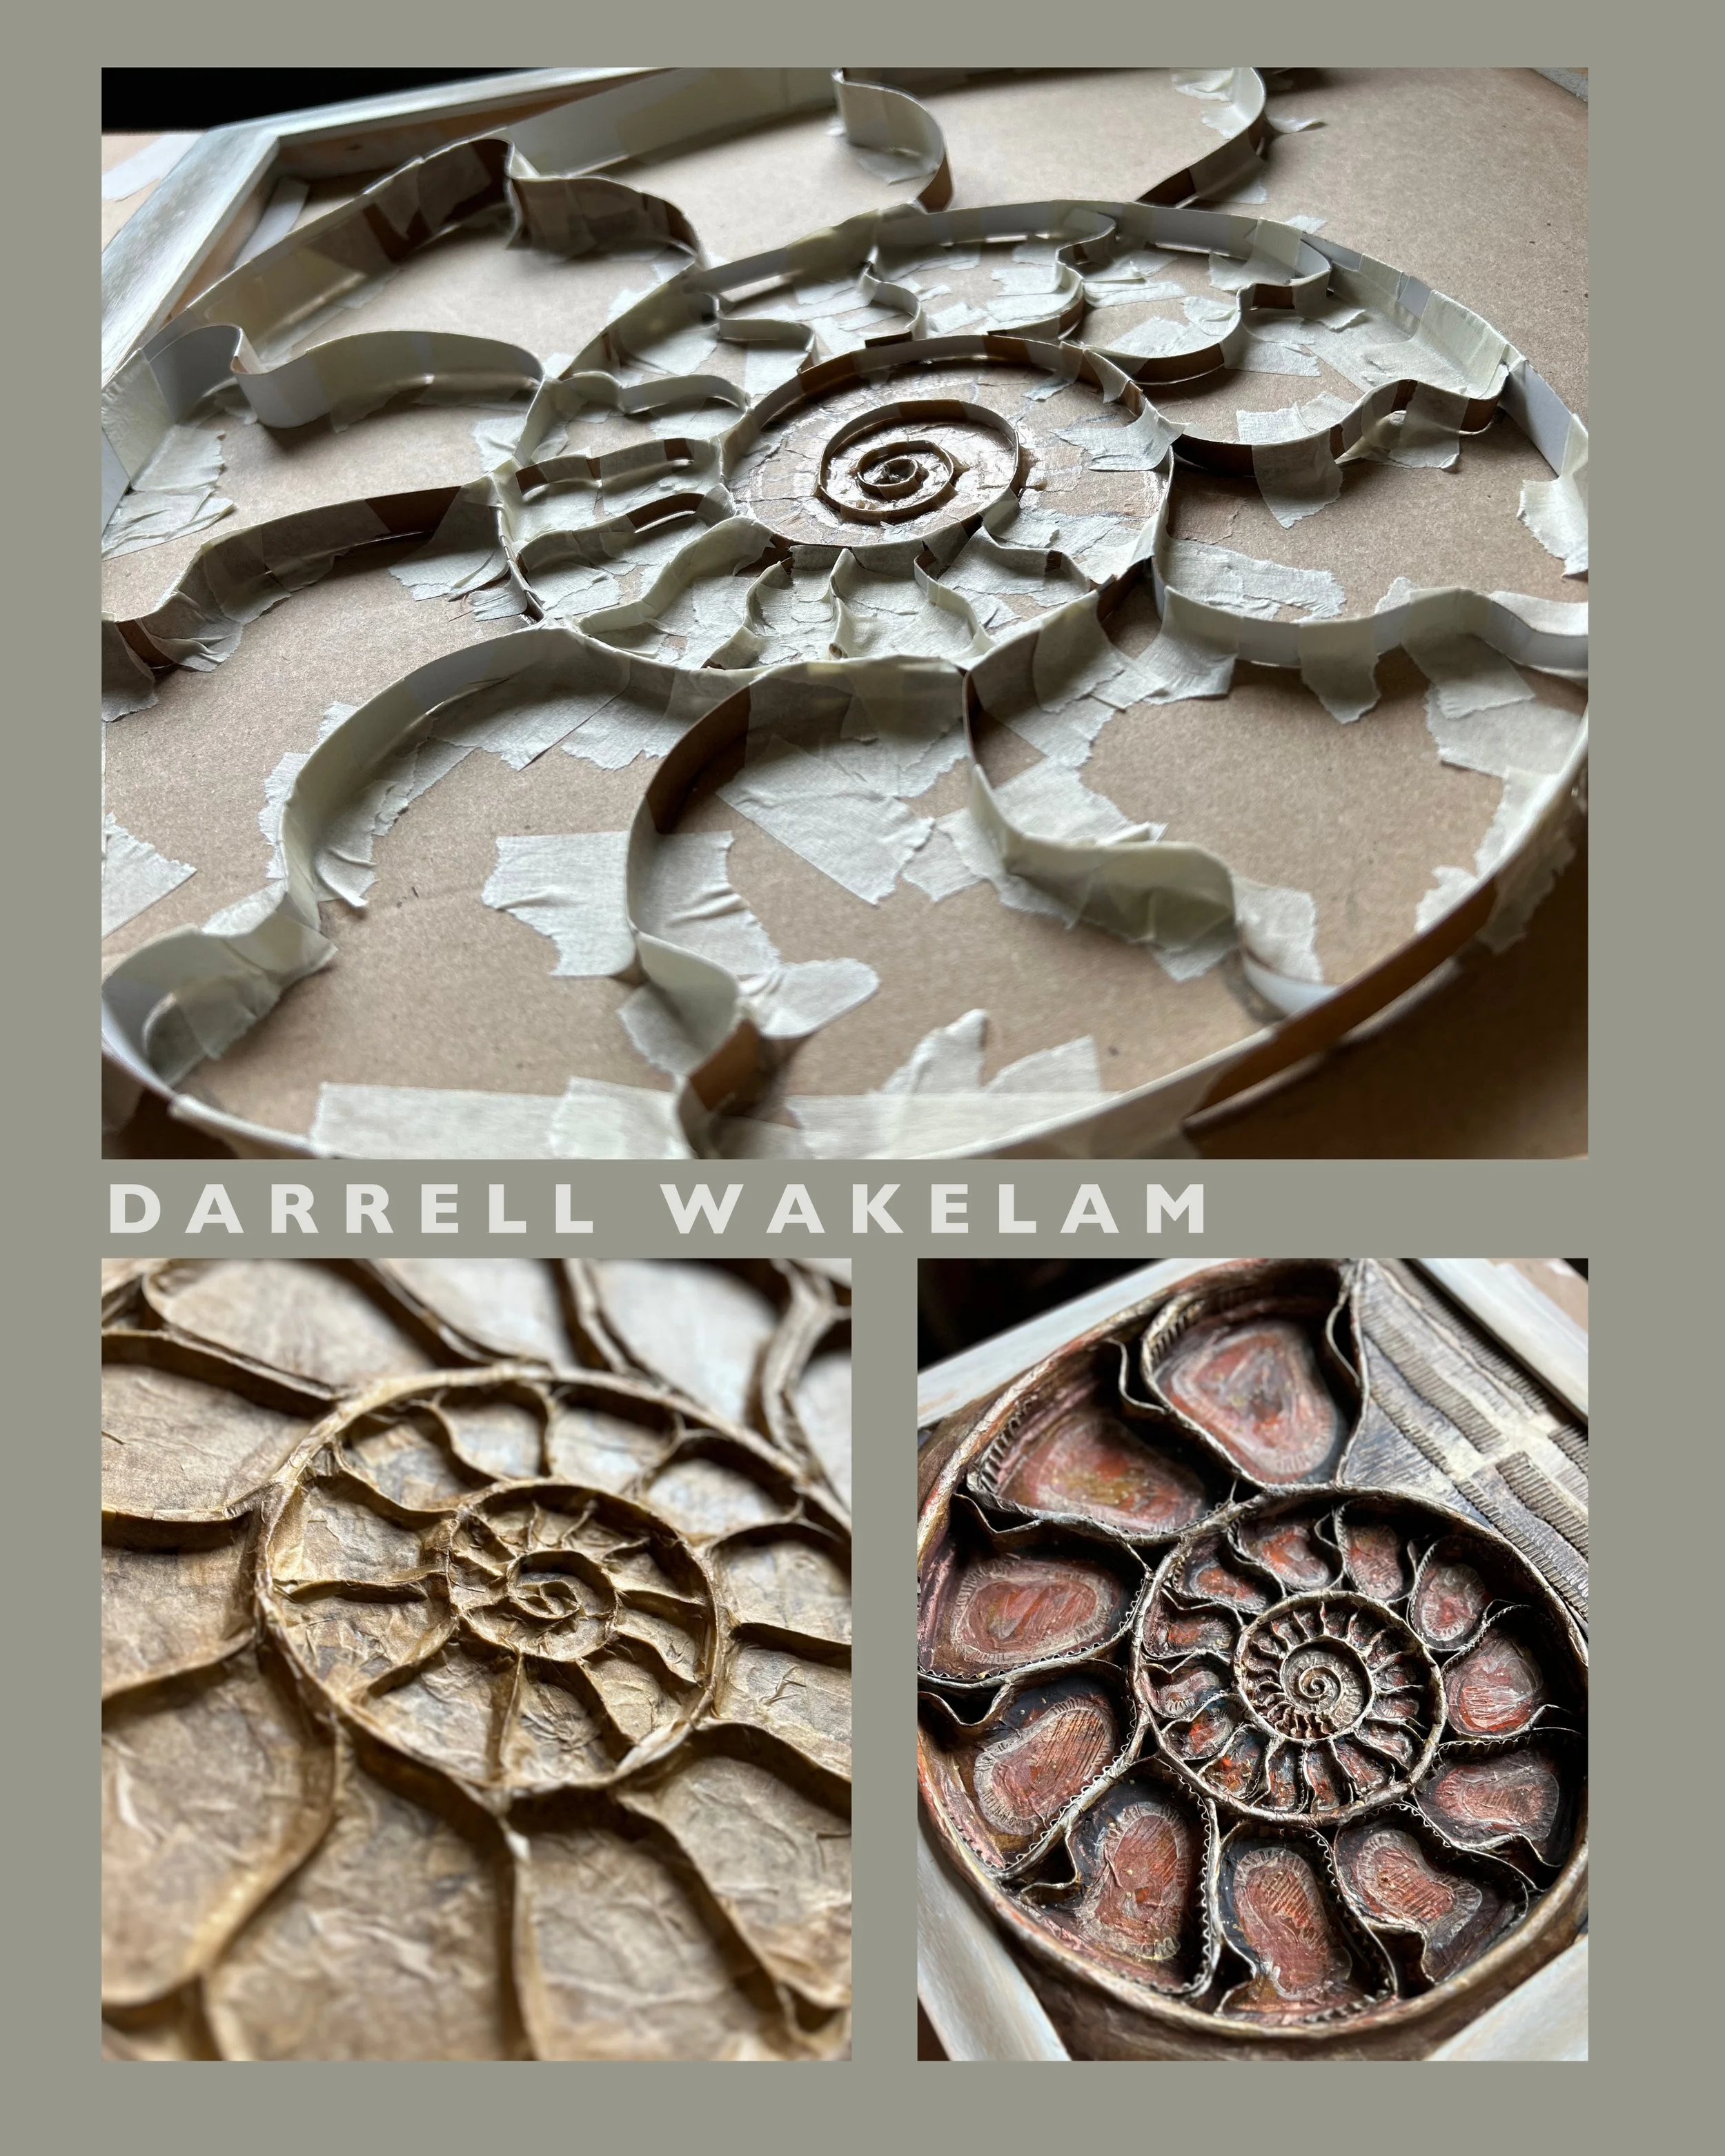
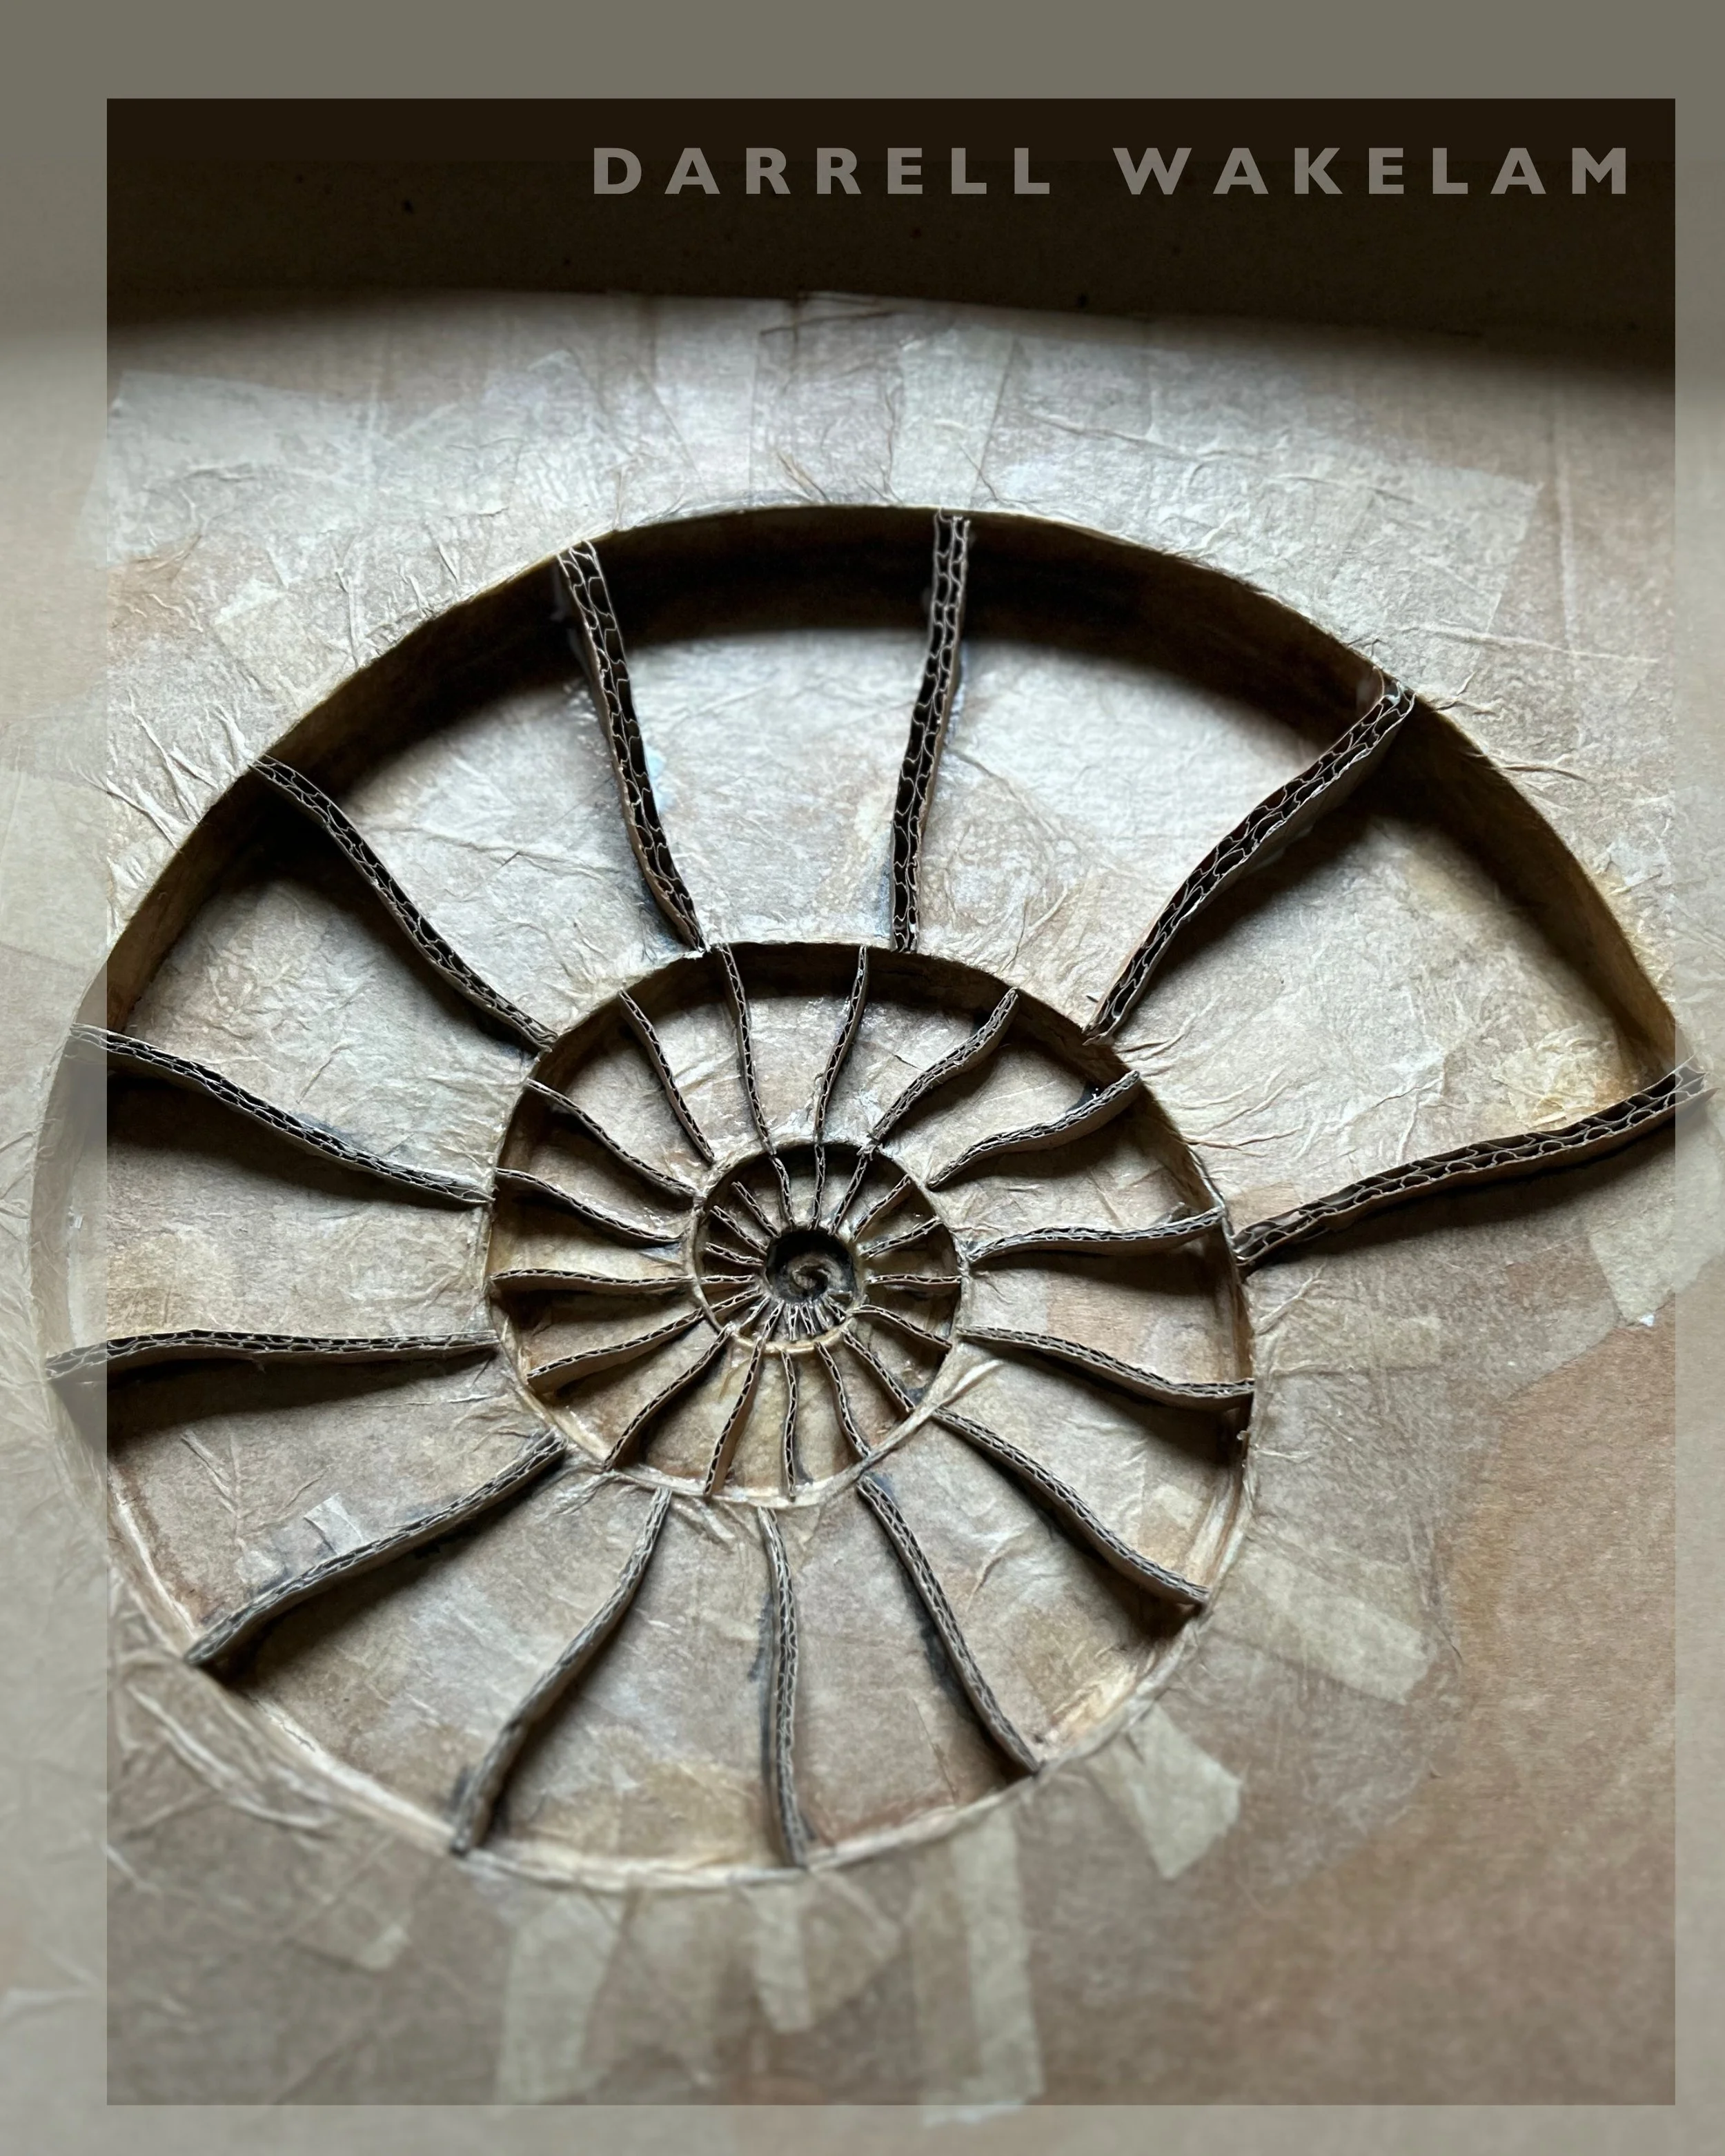
Recently, I’ve gone back to these techniques once more. This time, creating a simple 3D spiral in a slightly different way by cutting the initial spiral into a cardboard base and ‘pushing’ it in. This can give you an even more naturalistic effect, but it can be slightly more complicated for young children to make themselves. You could use it, but you’d probably need to cut the initial spiral yourself.
I’ve used a thin layer of tissue paper, pasted on to make this piece stronger. Then, once it was dry, I’ve gradually glued on thin cardboard triangles to create the segments, working my way out from the centre.
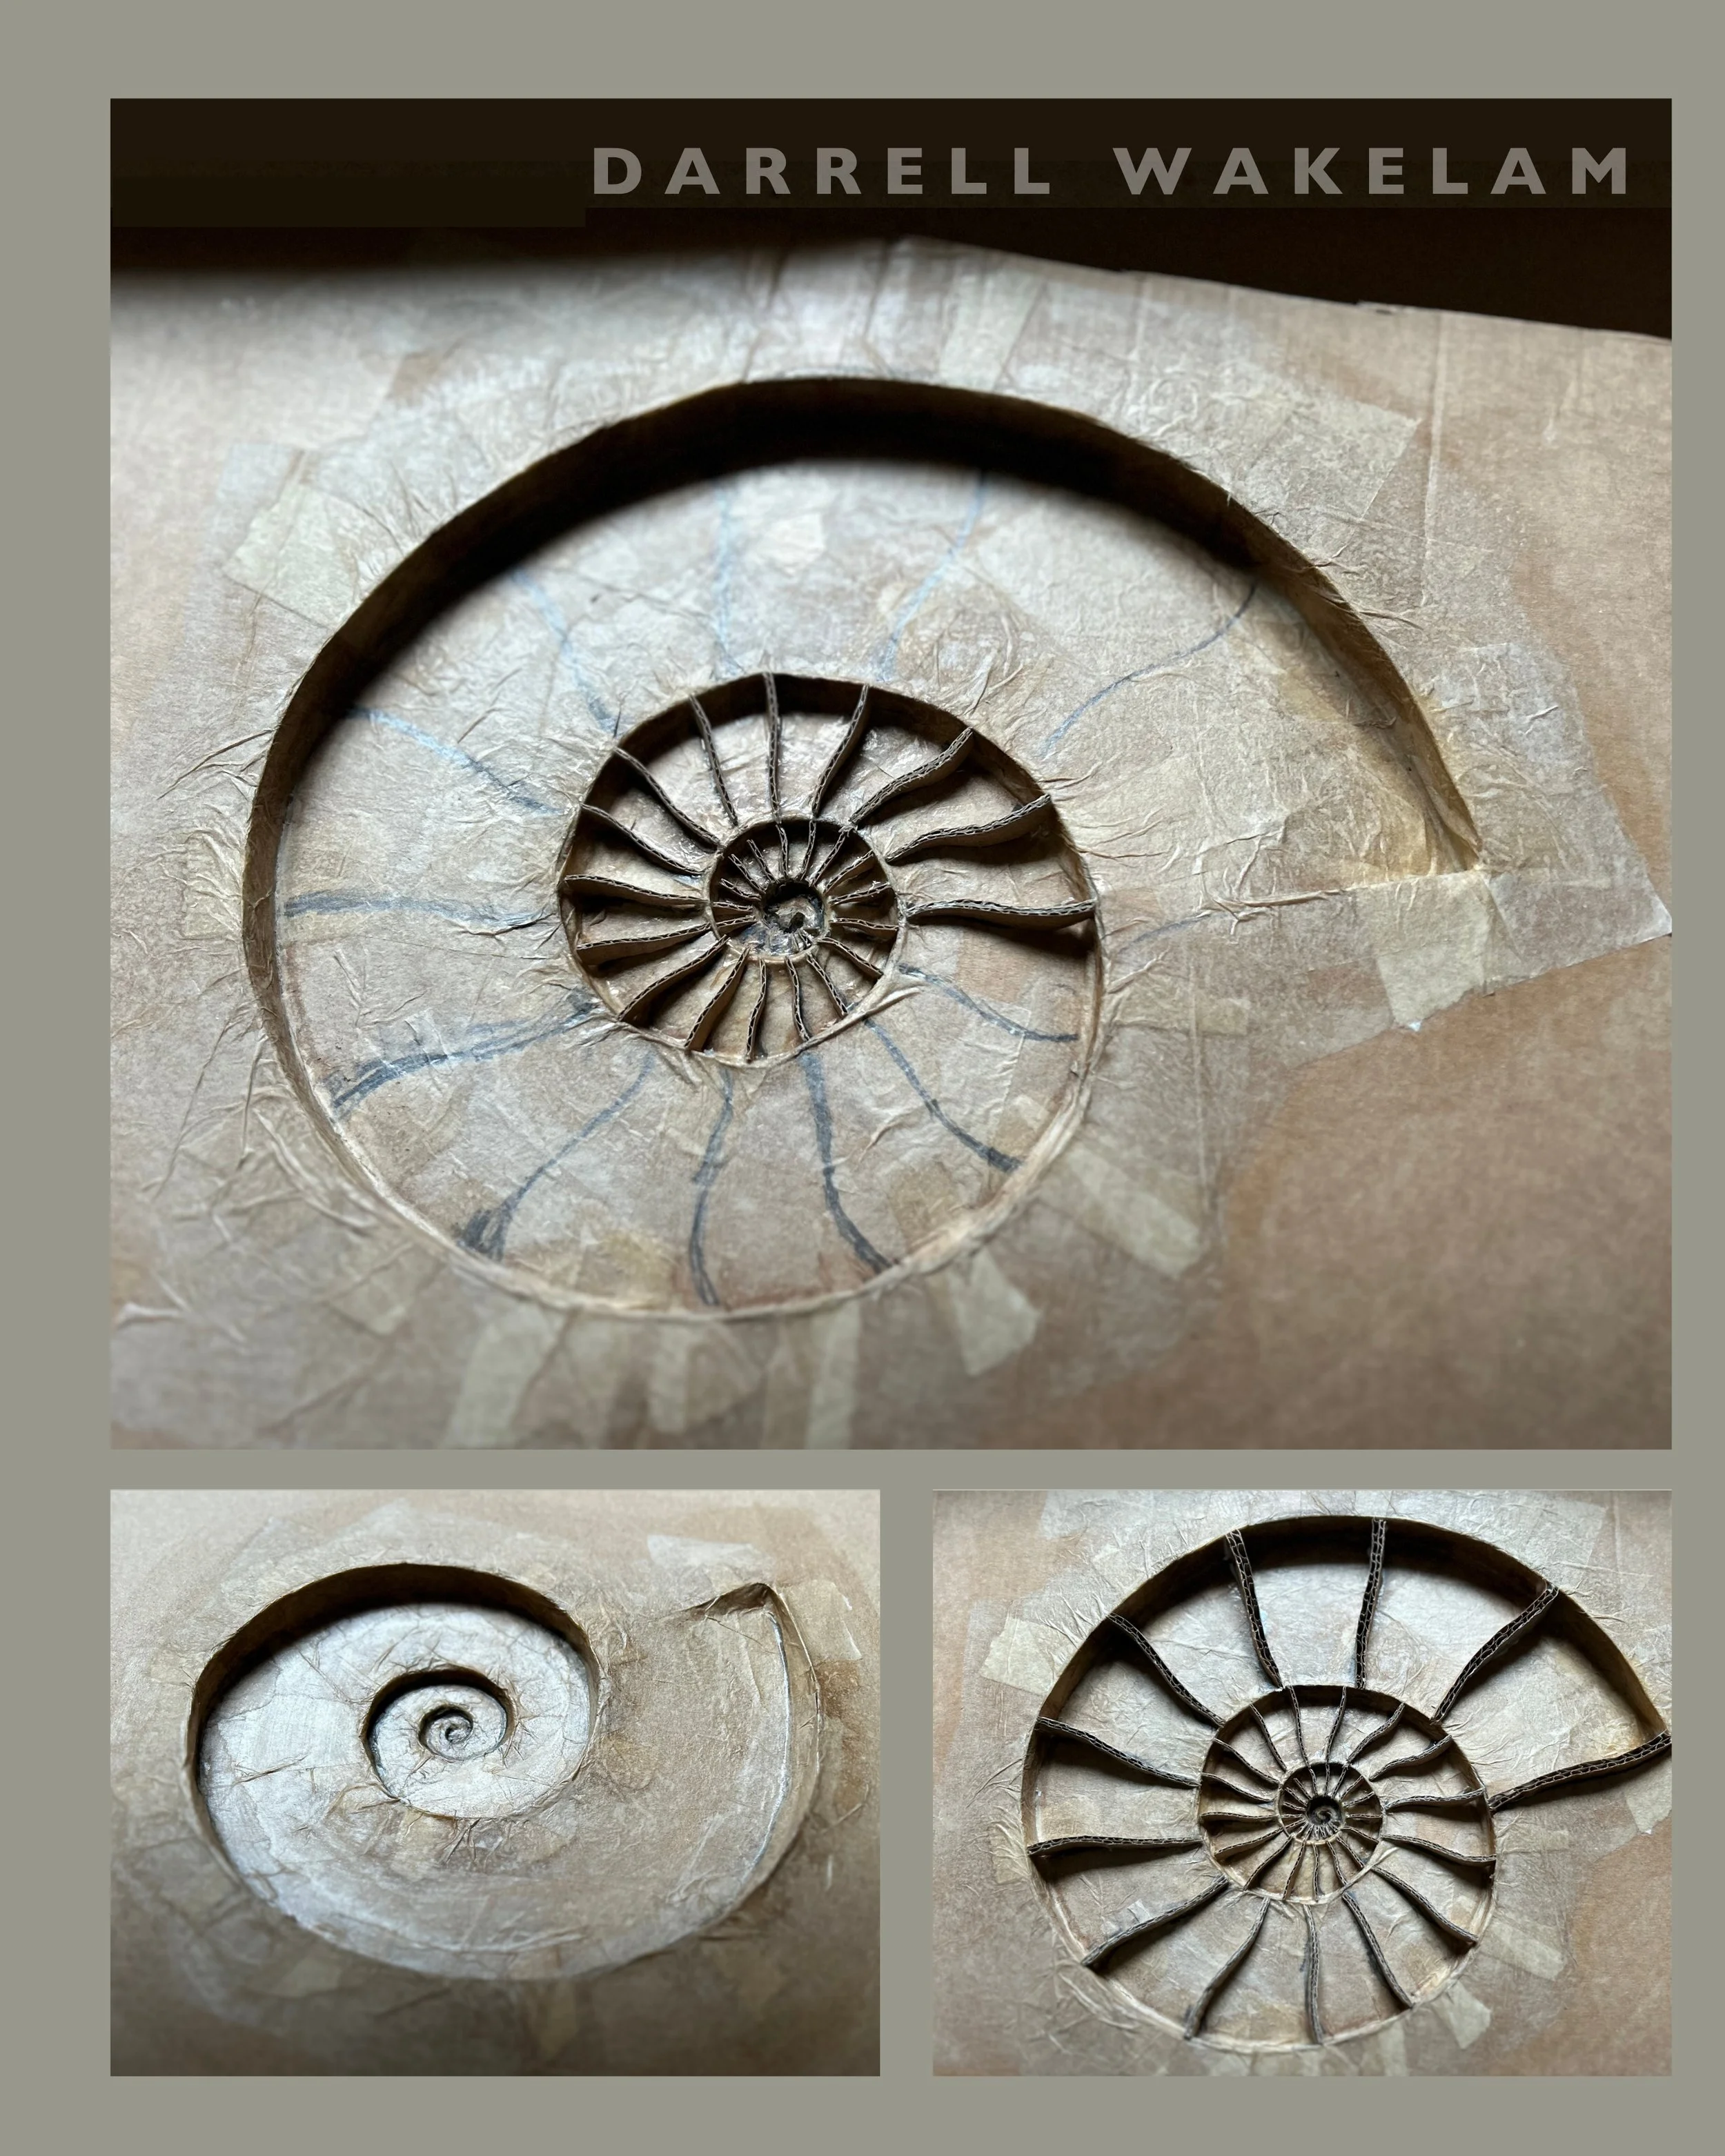
A spiral that has been ‘pushed in’.
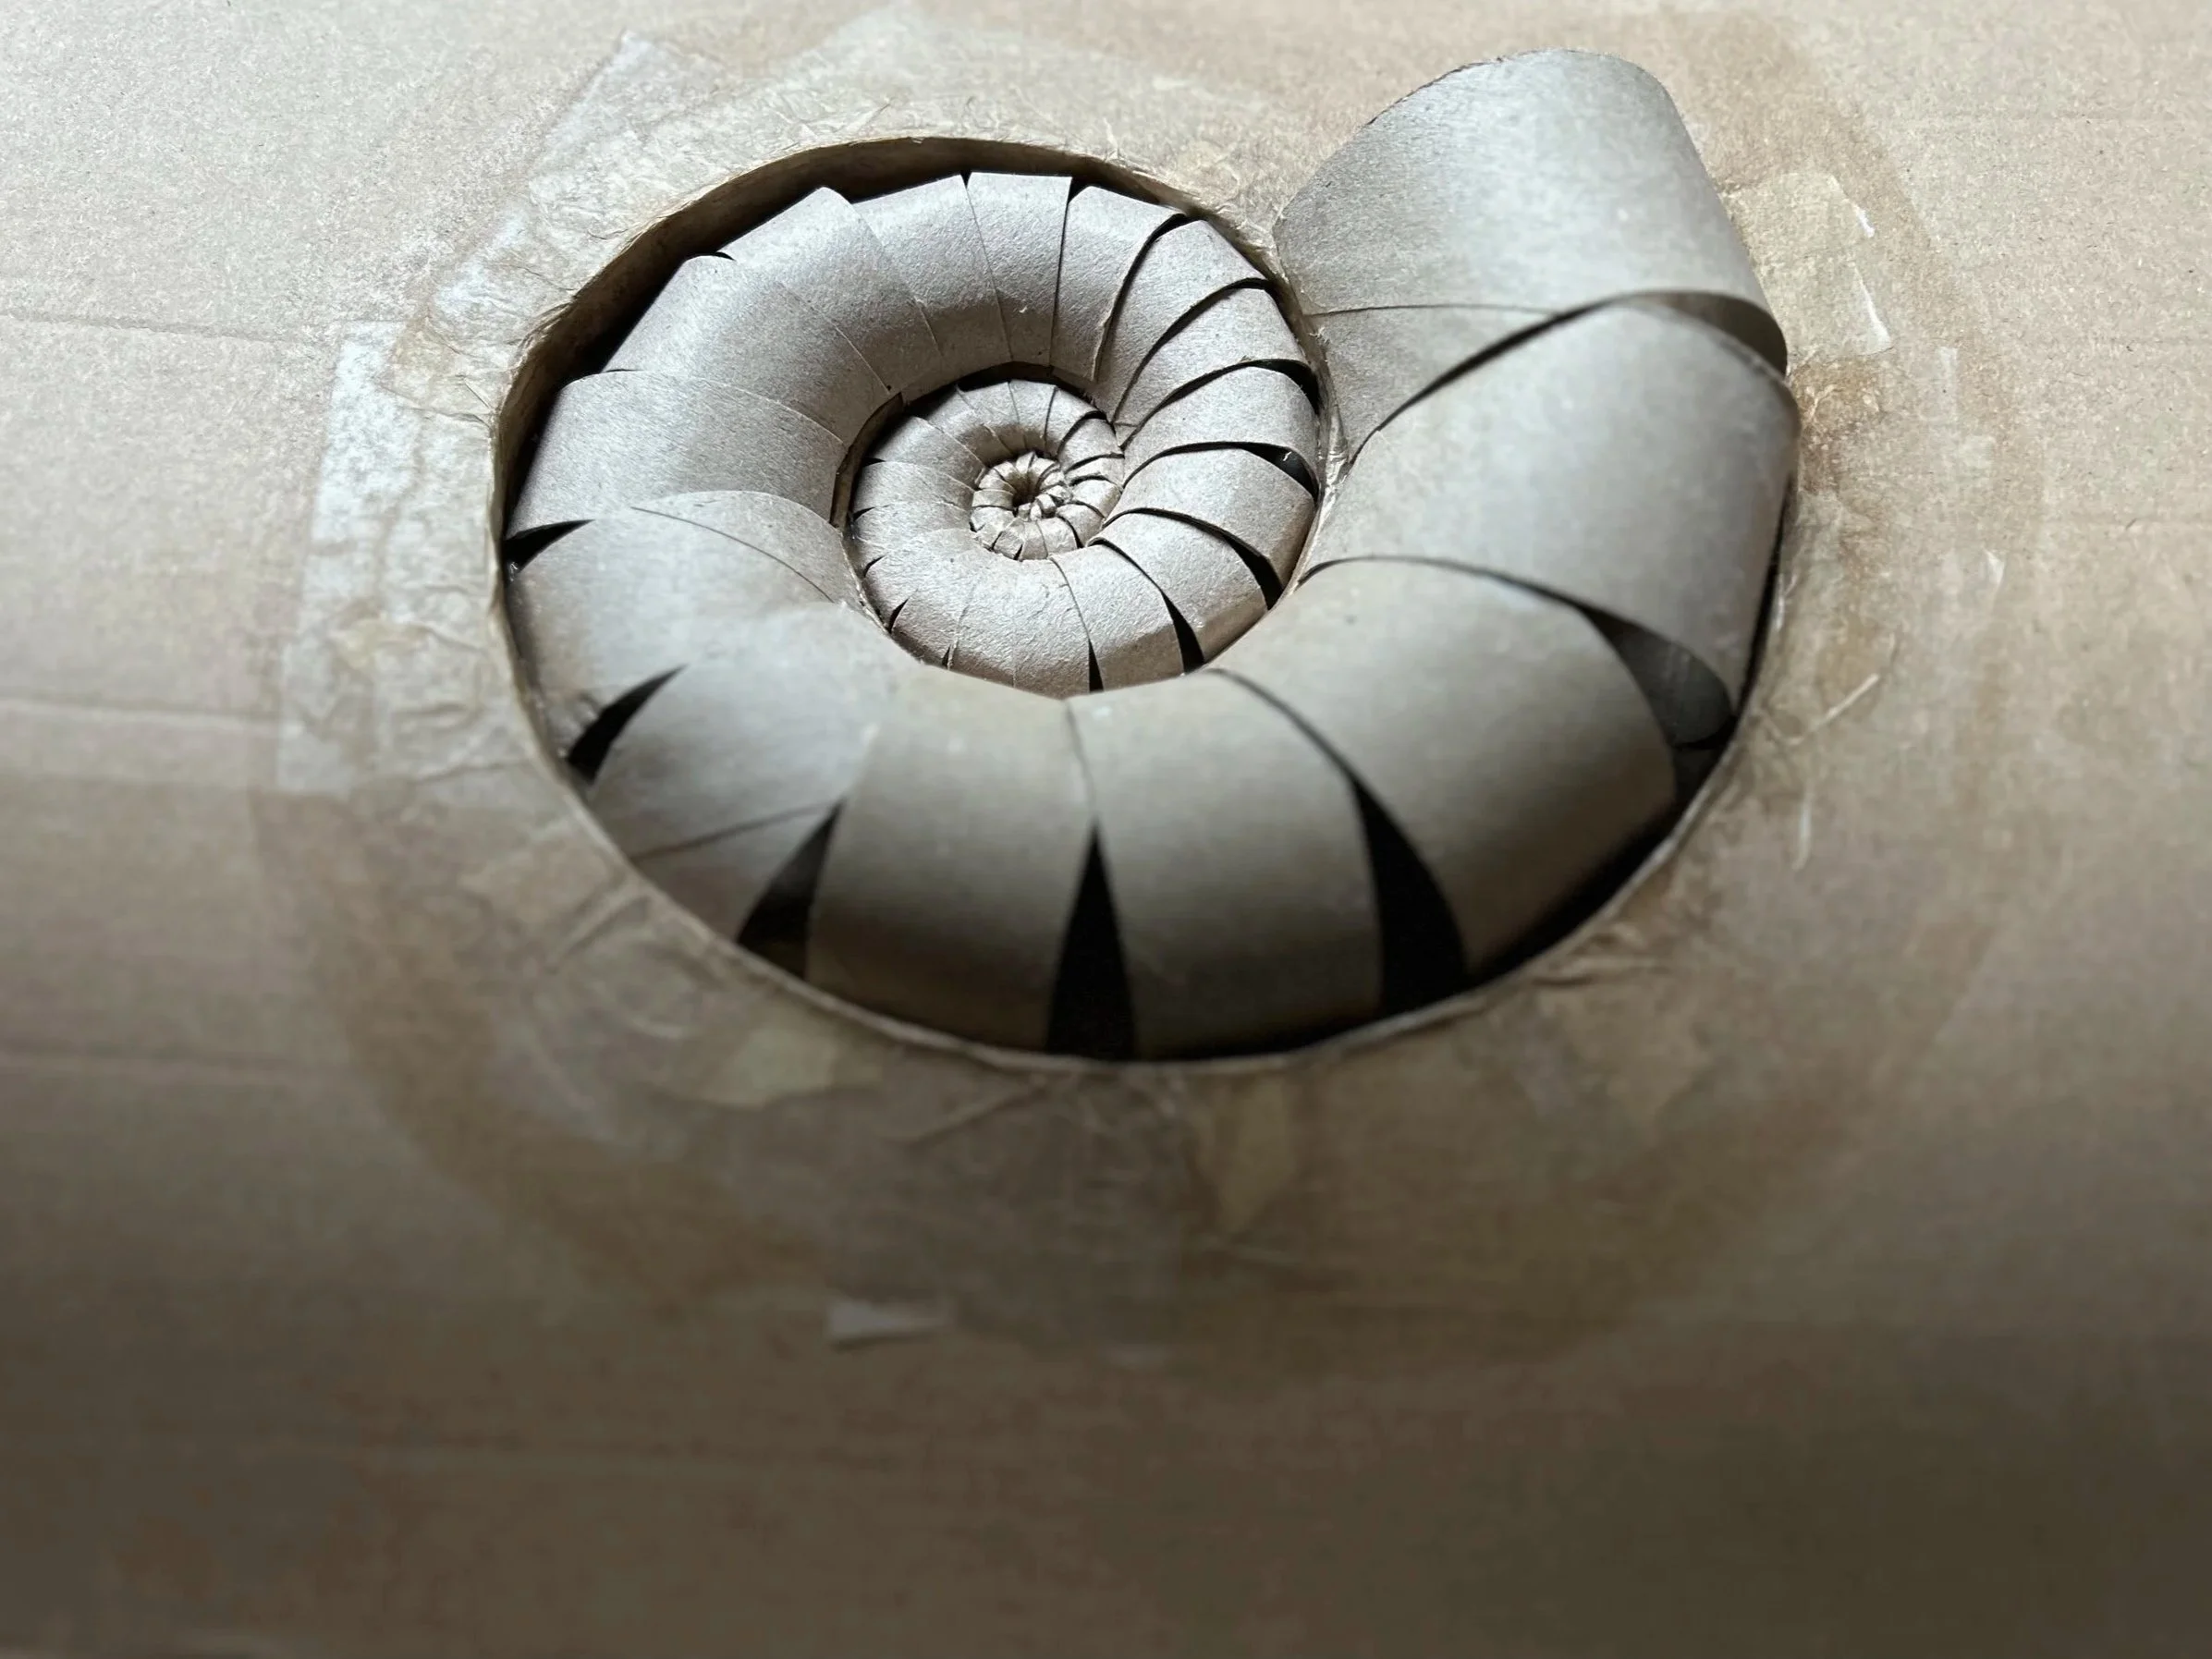
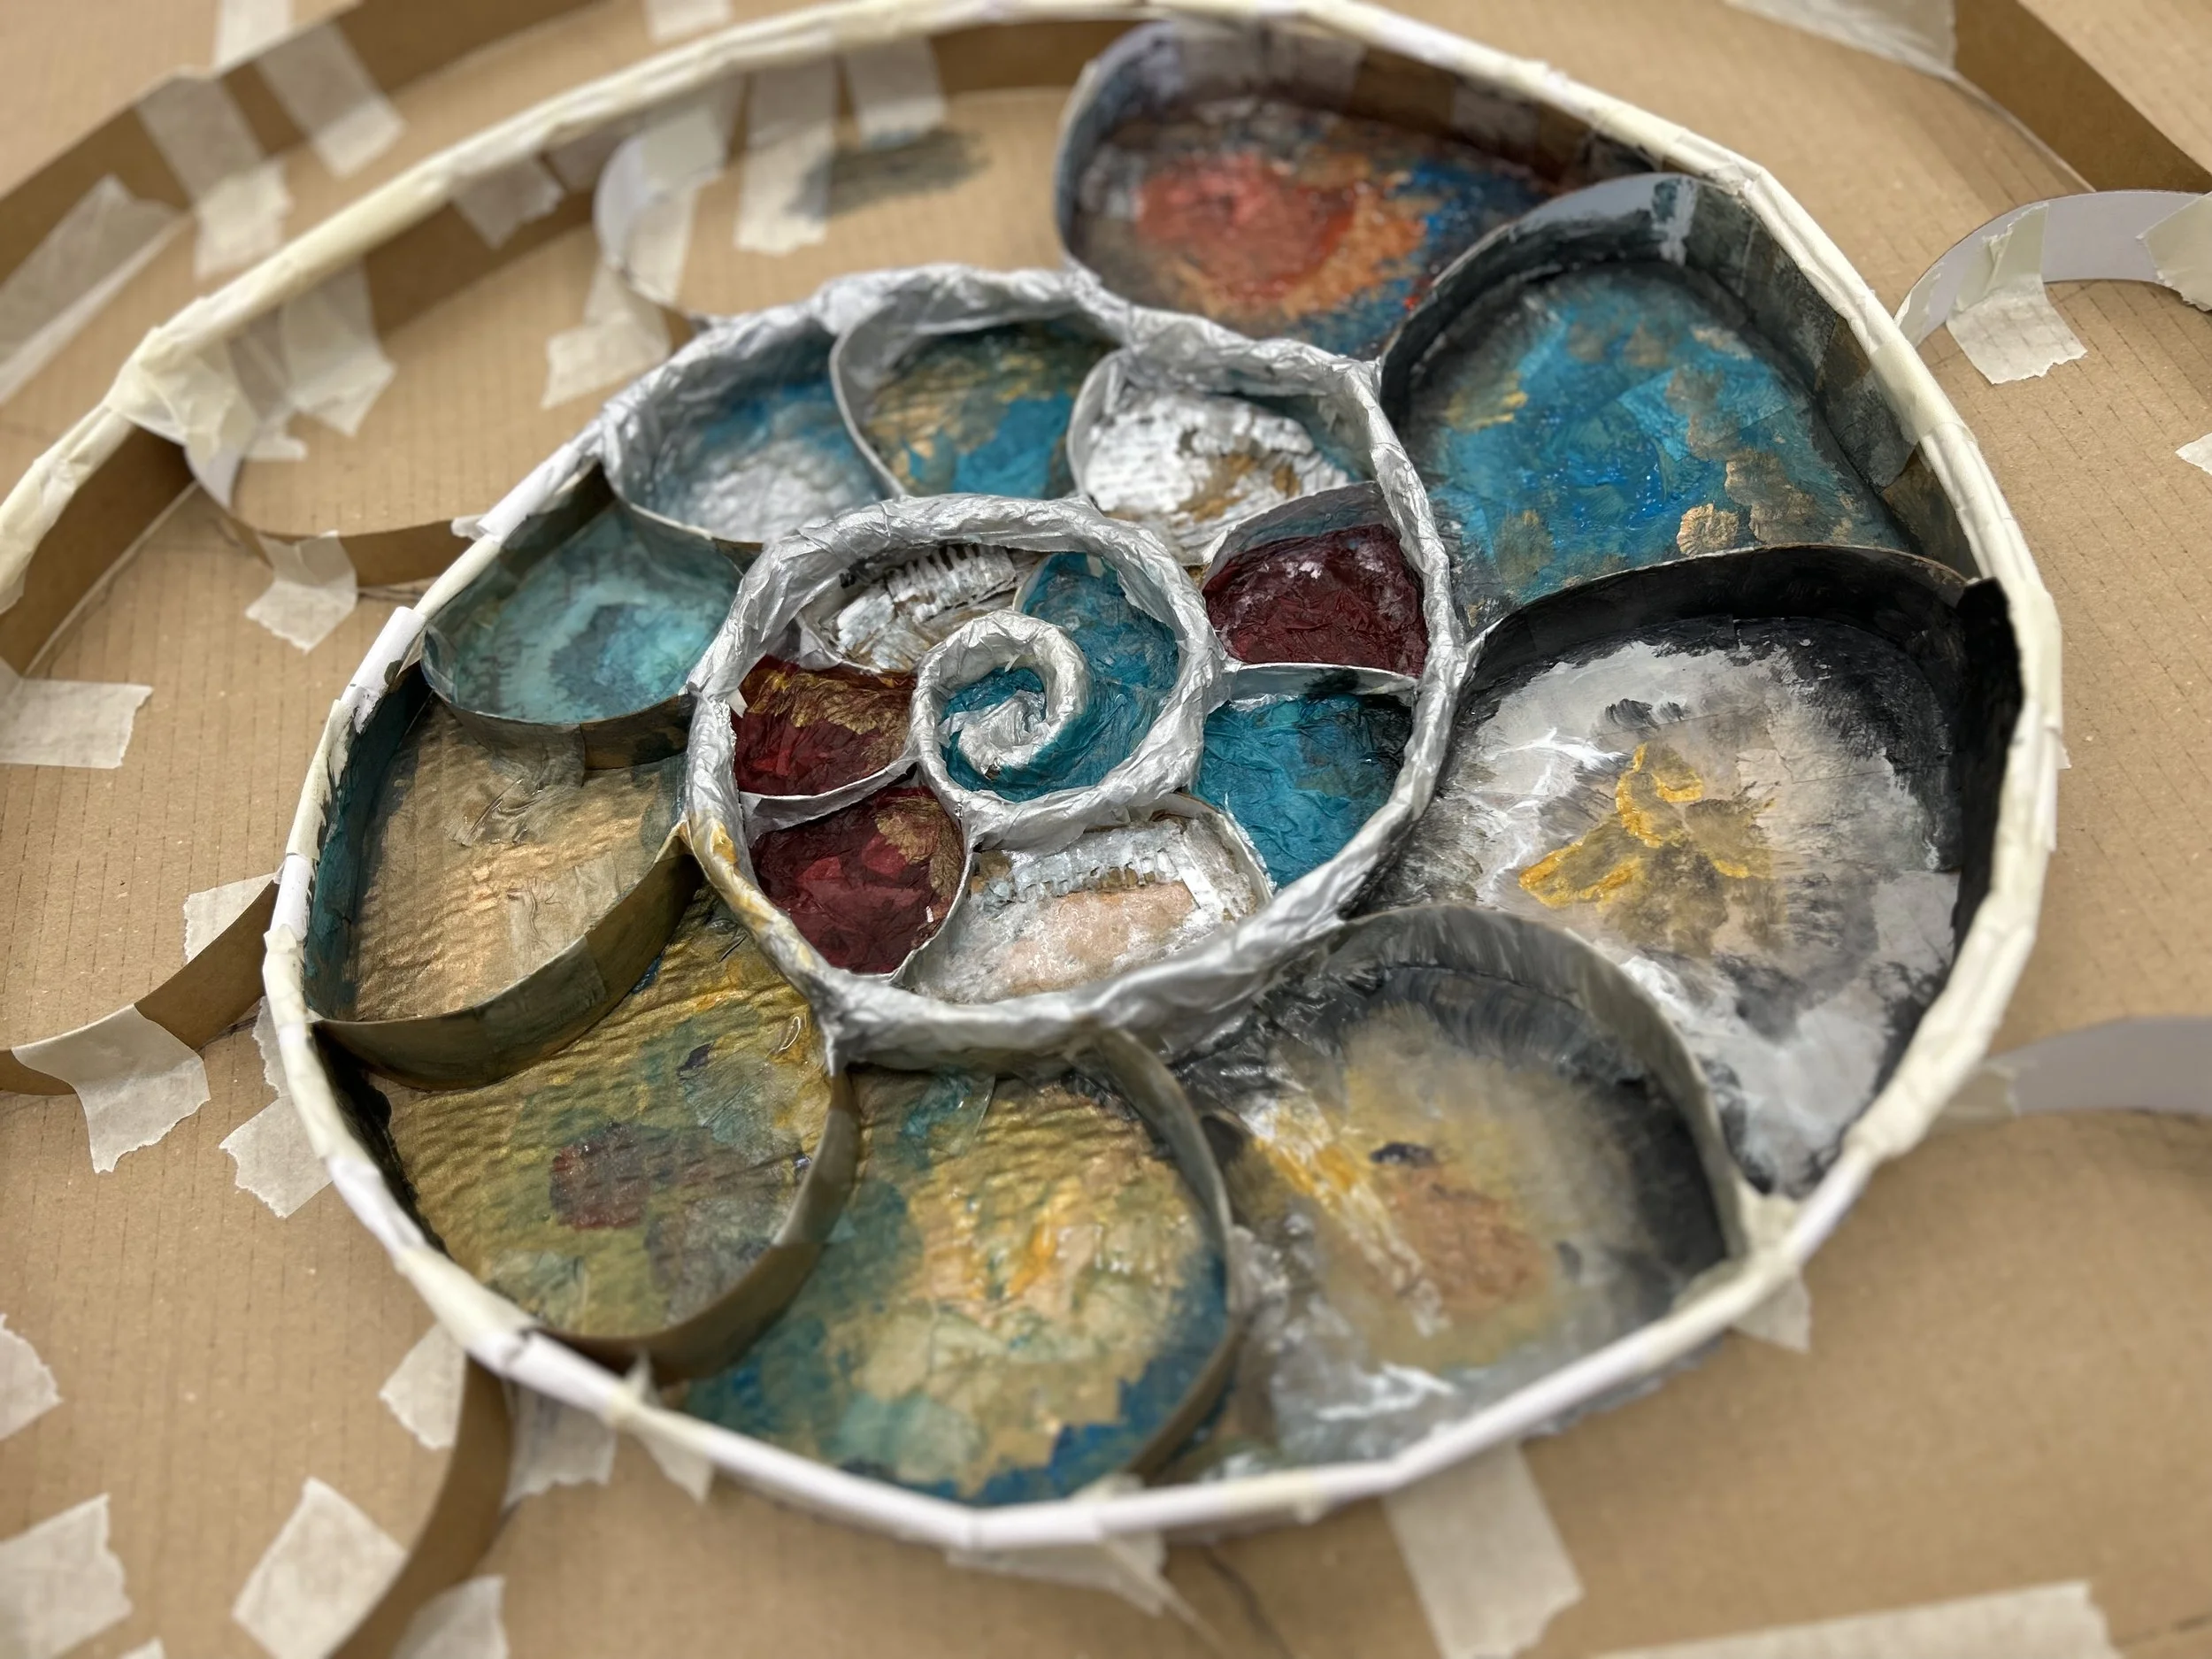
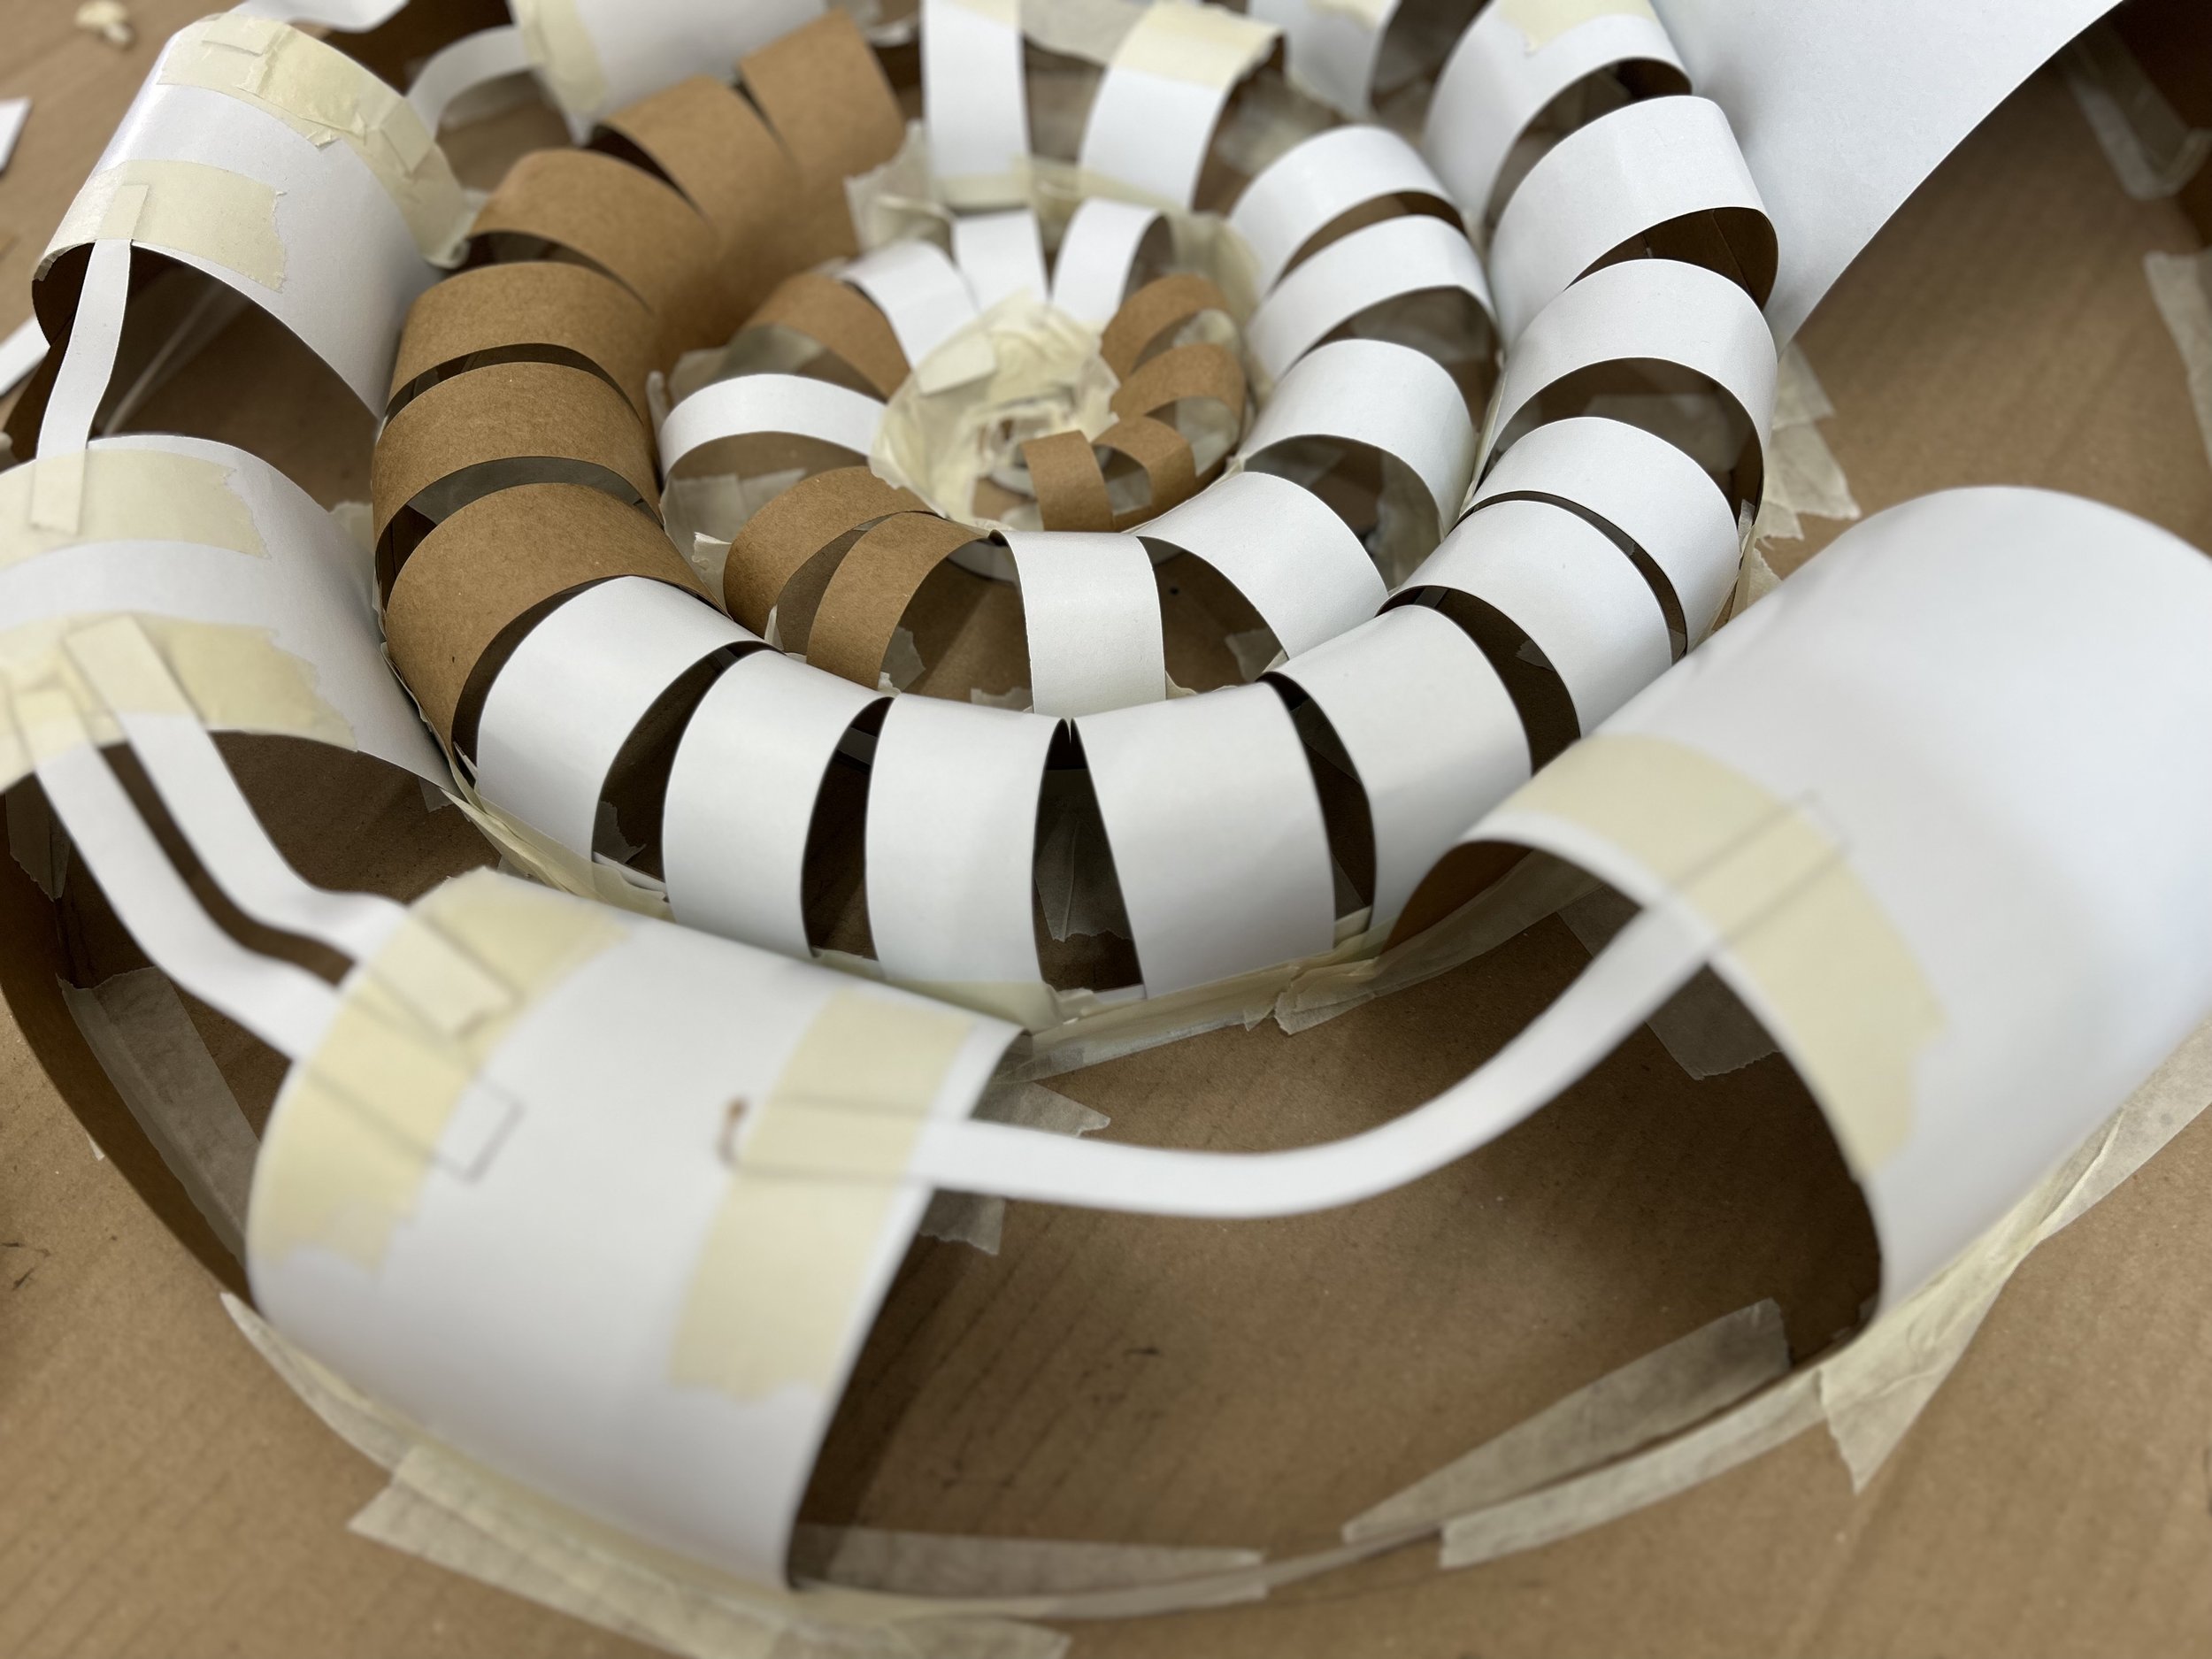
You can also use and of the techniques described earlier to build ammonites ‘inside’ of this pushed-in spiral. This one has been built simply using pieces of recycled cardboard tubes (toilet/kitchen roll tubes) which have been arranged so that they get gradually larger as they move outwards from the centre.
The beauty of these designs always draws me back to them, I’m guessing I’ll be back again to add to this thread with yet more possibilities. Watch this space.