Cardboard Mosaic
This is a technique I came up with over 25 years ago, maybe even closer to 30! It’s a method I’ve used countless times with children, some as young as four, and it’s one that I’ve honed and adapted each time I’ve used it. I’ve seen people do similar things, but for me, this technique is the most effective and authentic.
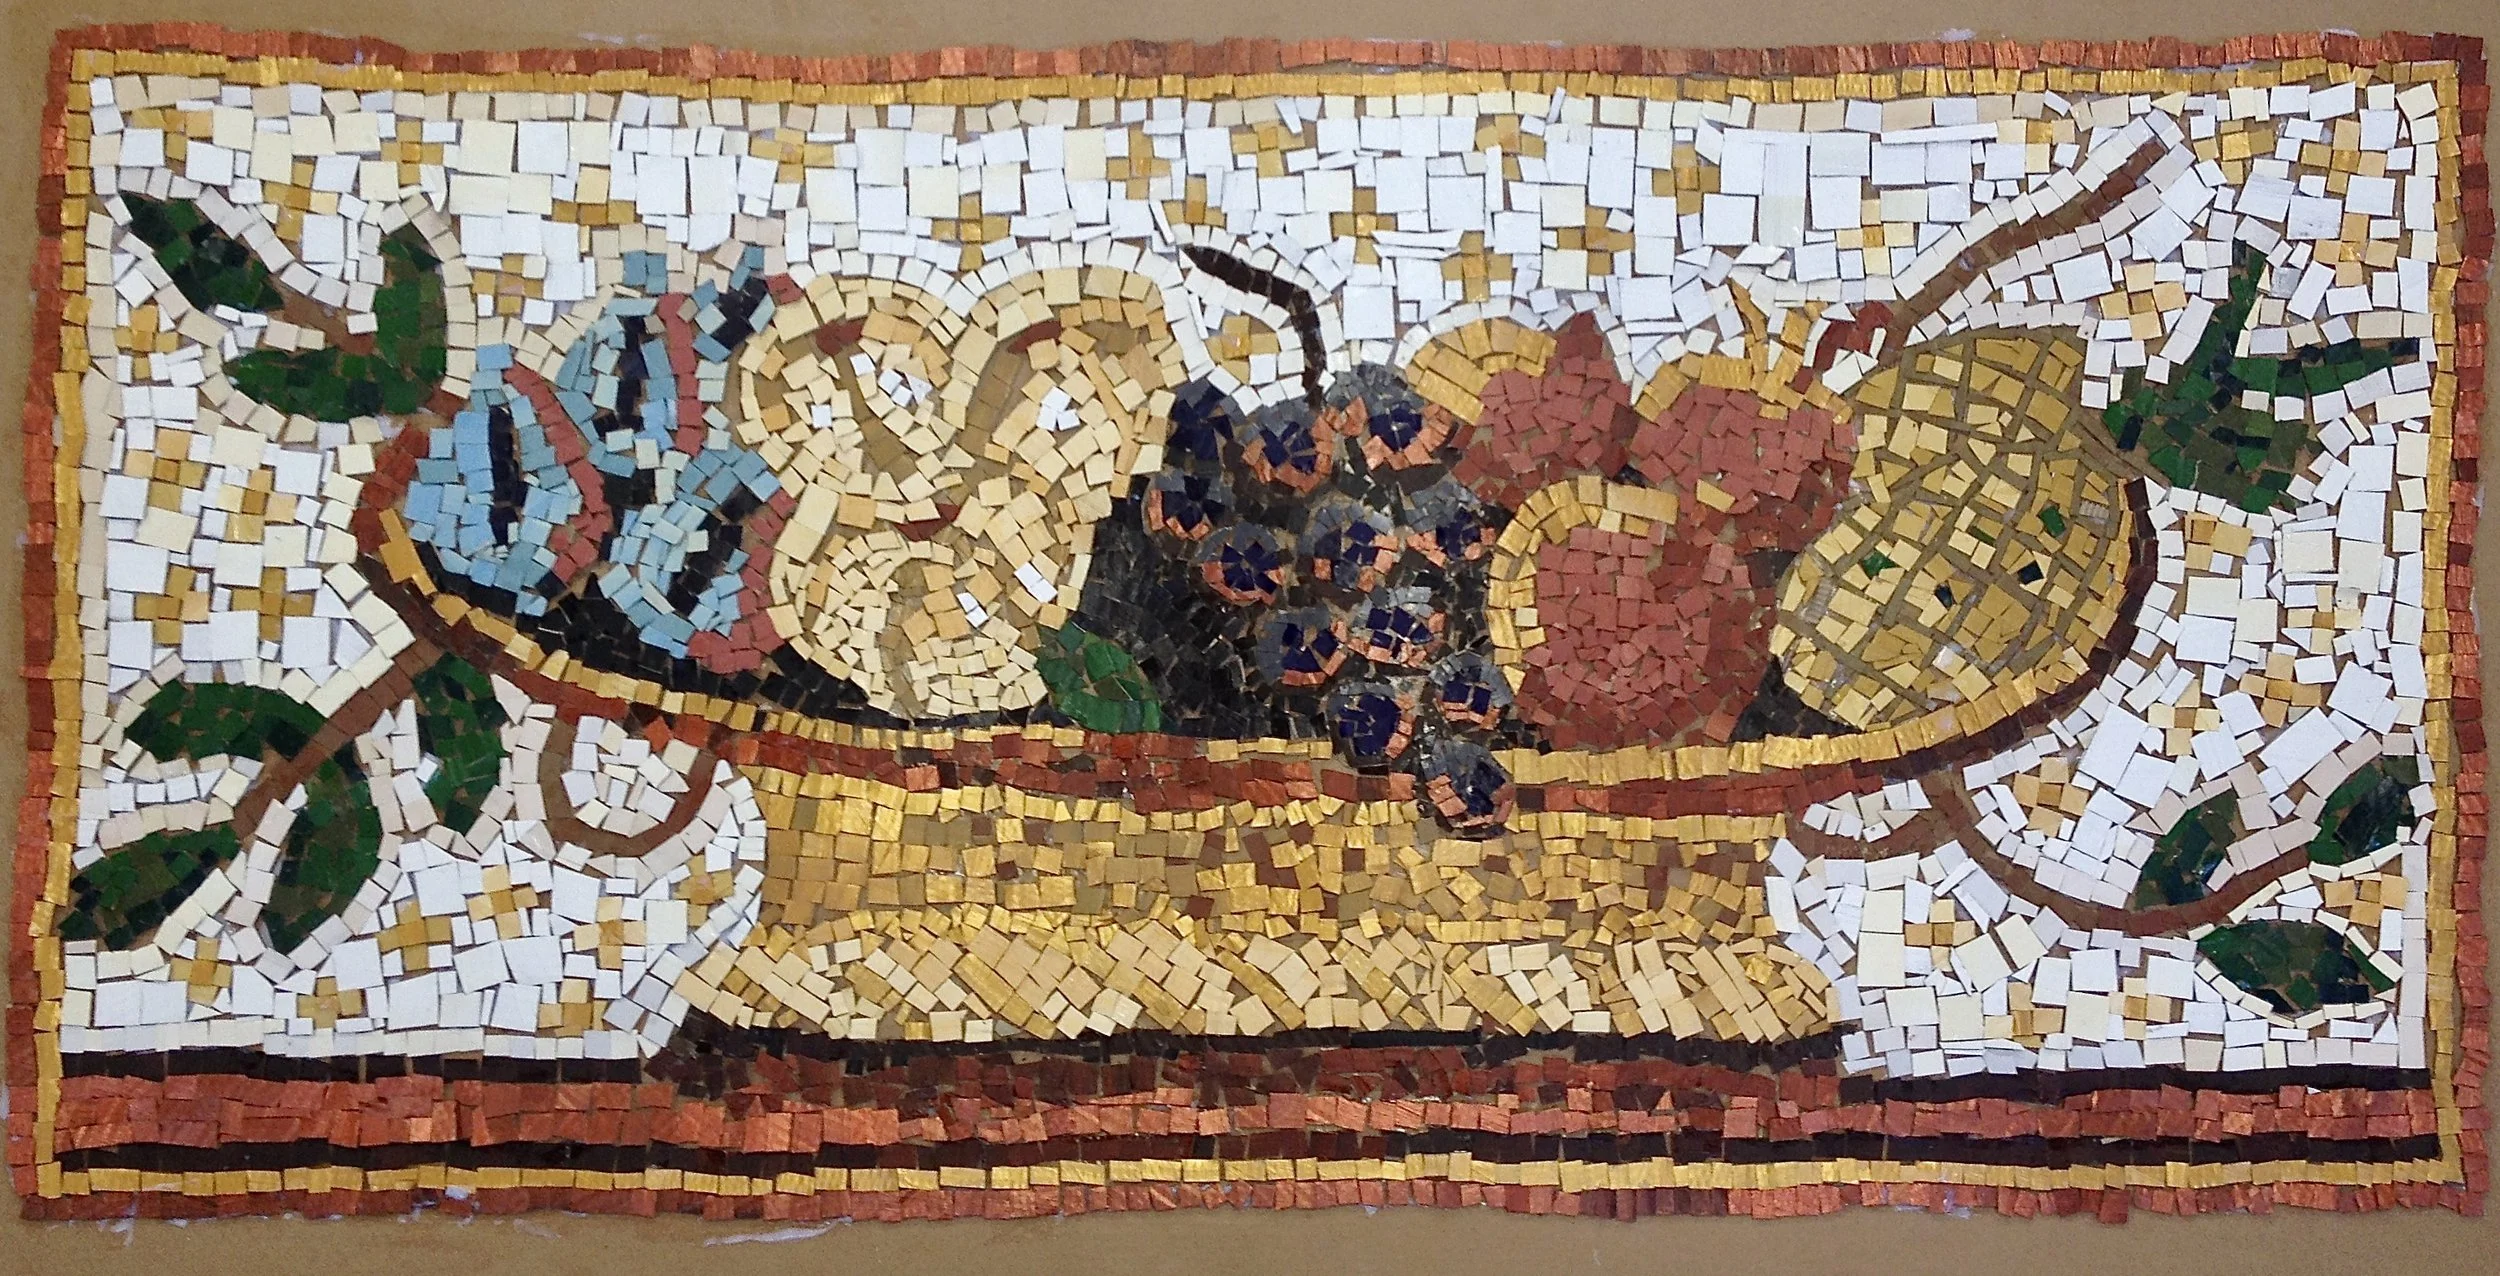
A cardboard mosaic based on a ‘Roman Feast’, created by Year 5/6 pupils from Charmouth Primary School. 2018
Way back when I was first working with kids, I decided I wanted to create a mosaic for a particular project. This was inspired by ‘Ancient Greeks’, but I knew we couldn’t afford to make ‘real’ mosaics. The materials are not only expensive, but it’s also difficult for younger children to access. You need the strength to use the ‘nippers’ to cut the tiles, you have to wear goggles for obvious reasons, and it’s incredibly time consuming. So, I tried to come up with a method that was quicker, cheaper, and more accessible for children.
C A R D B O A R D M O S A I C
I’d seen people attempt simple mosaic pieces with children before, by cutting up coloured paper and then simple gluing this onto a coloured background. Most of these had been made using cheap sugar-paper, but in my opinion, there were two main reasons why these didn’t work. The first was that the paper was thin, and so didn’t produce a raised, tile-like effect. Secondly, there was no easy way of creating varying tones or colours. Unless you had thousands of different papers to cut up, the blues would all be one shade of blue, the reds the same etc. Real mosaics have different shades and tints, making them much more subtle and beautiful.

One of my earliest pieces, this is a ‘scan’ of a film photo, pre-digital! 1997 (ish)
I decided to try using cardboard sheets, painting them with acrylic paint, and then chopping them up into ‘tiles’. The beauty of this was that you could vary the colours and shades while you were painting these larger sheets. (or get the children to paint these if you had time) The children could also cut their own tiles as and when they were needed, just as long as the cardboard you’d painted wasn’t too thick. (single ply instead of double)
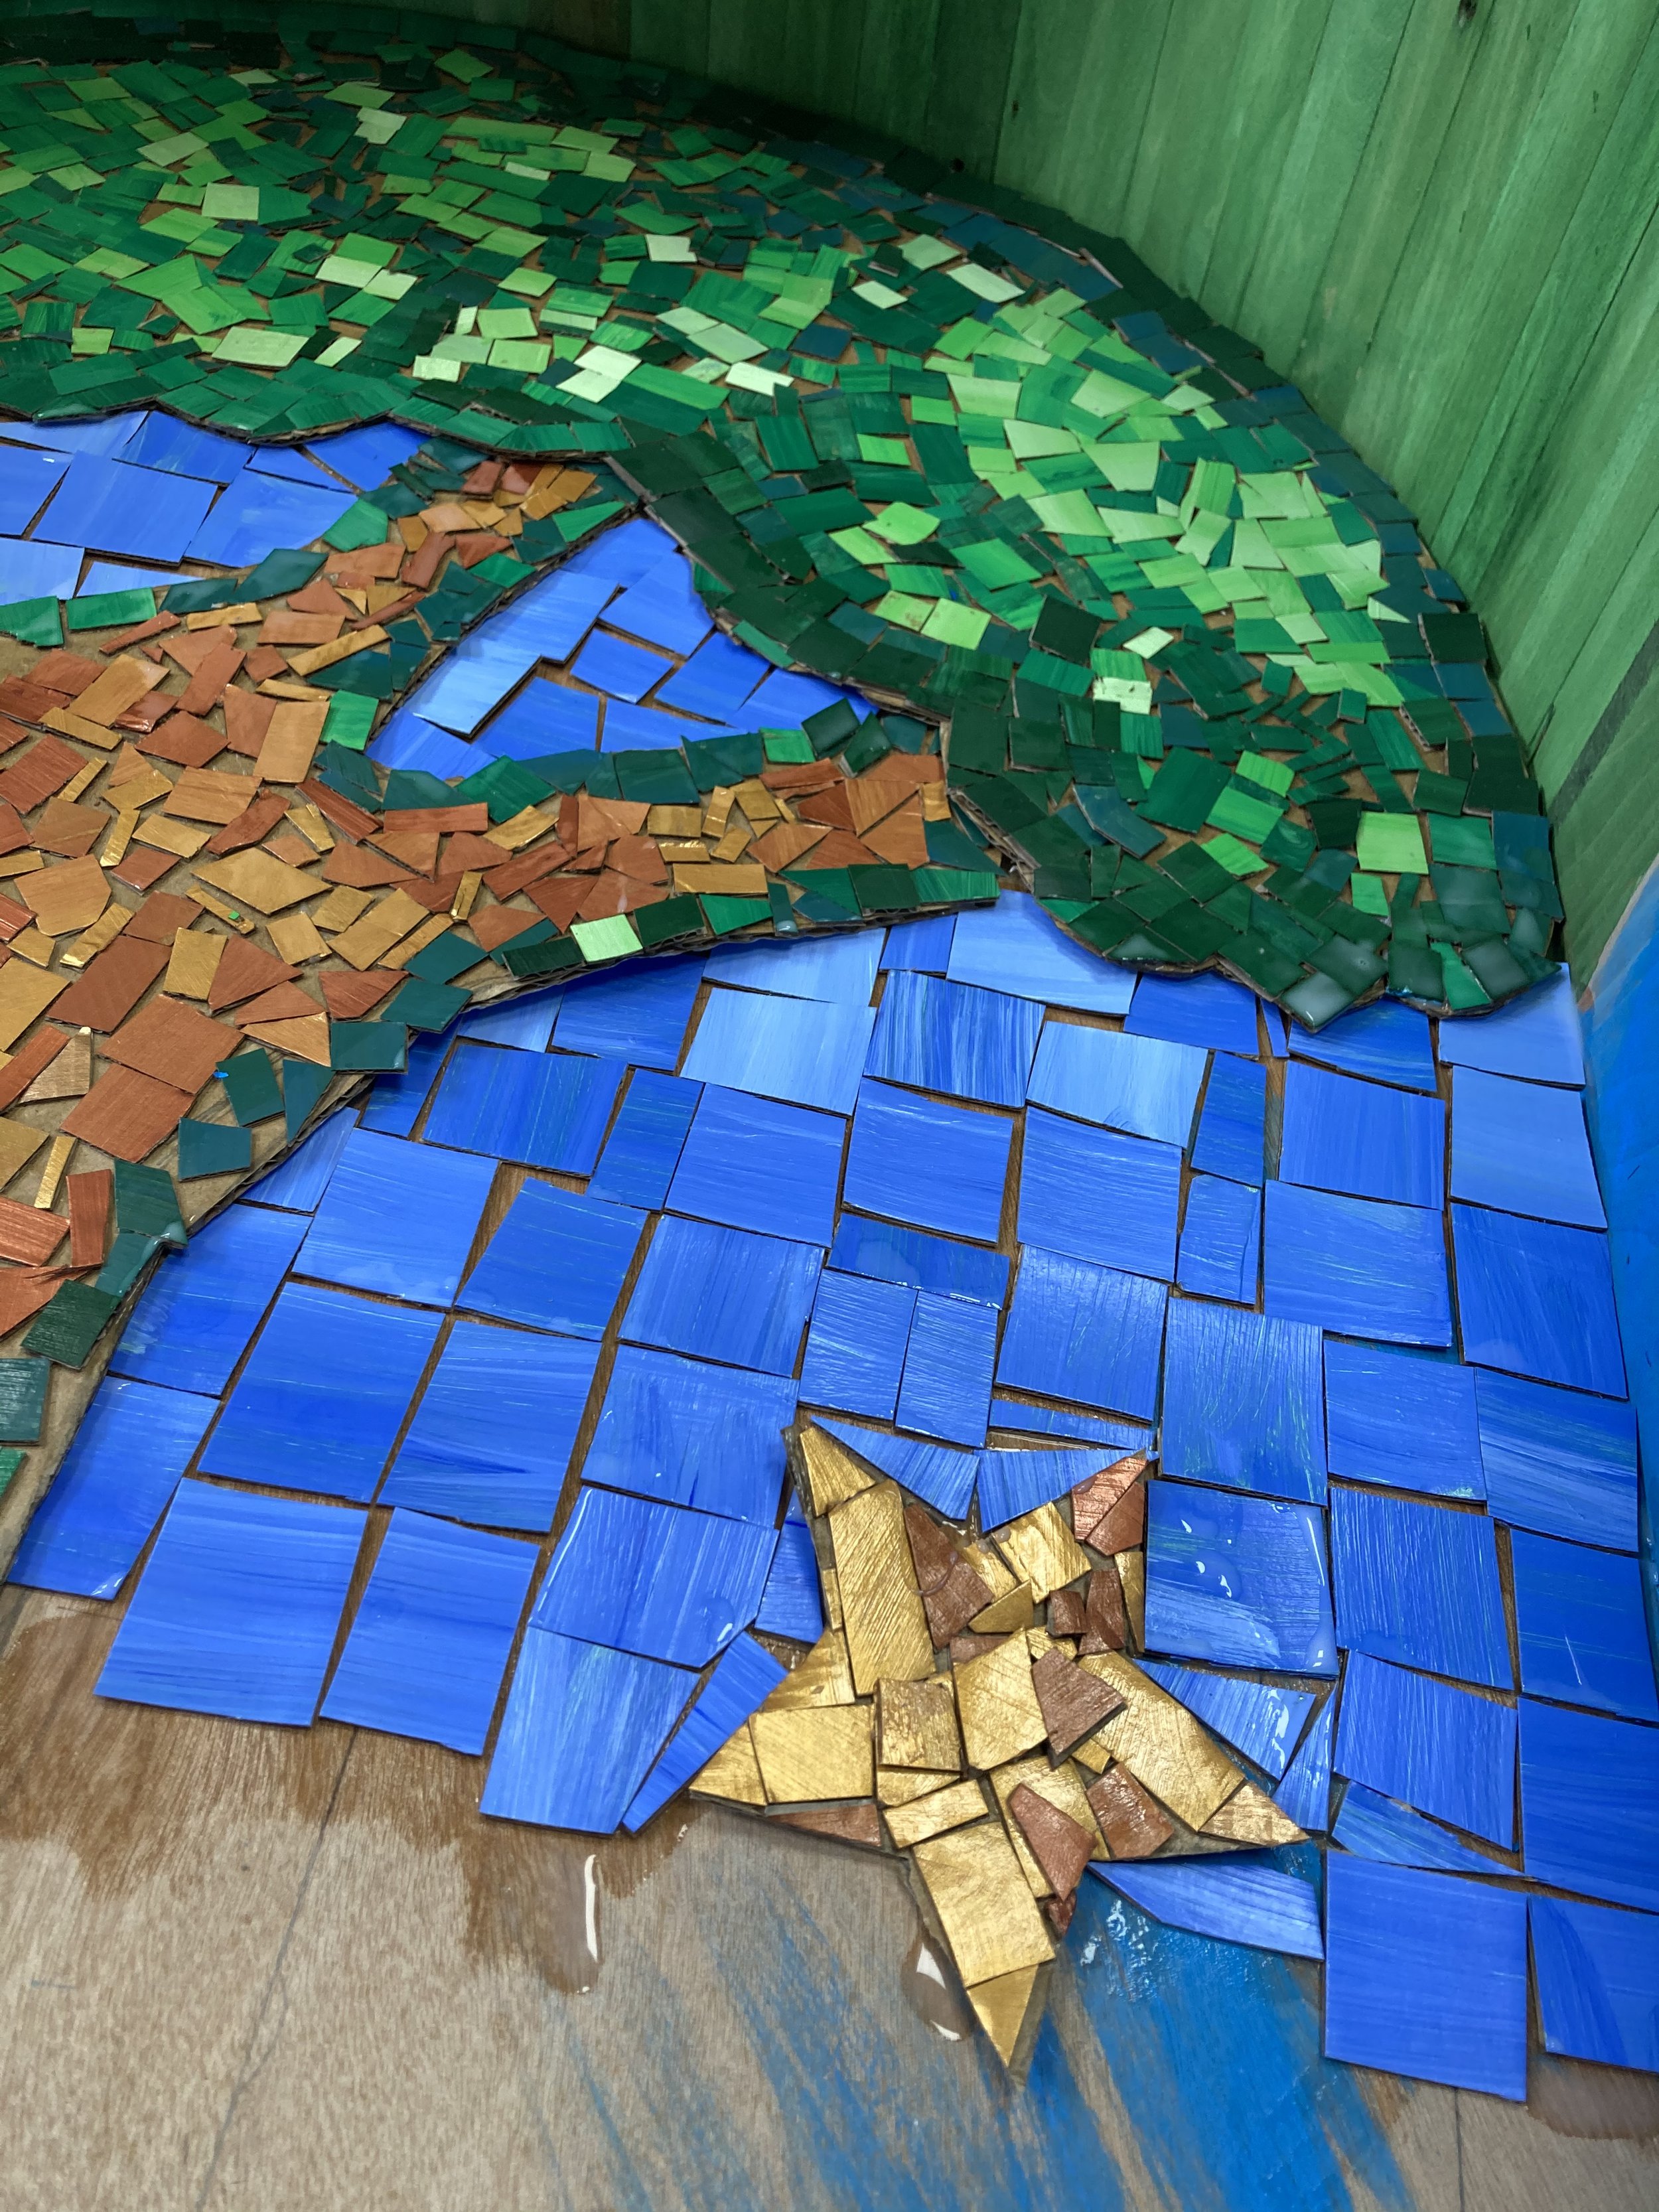
Close-up section of a mosaic tree created by pupils at The Marchant Holliday School, Somerset. 2020
Enabling the children to cut their own tiles means that you can vary the complexity depending on their age or ability. Older kids can produce more complex elements, with smaller tiles. Sometimes I’ve created work like this with different age groups working on one piece, in that instance I’ve separated the work out into ‘easier’ and ‘harder’ parts.
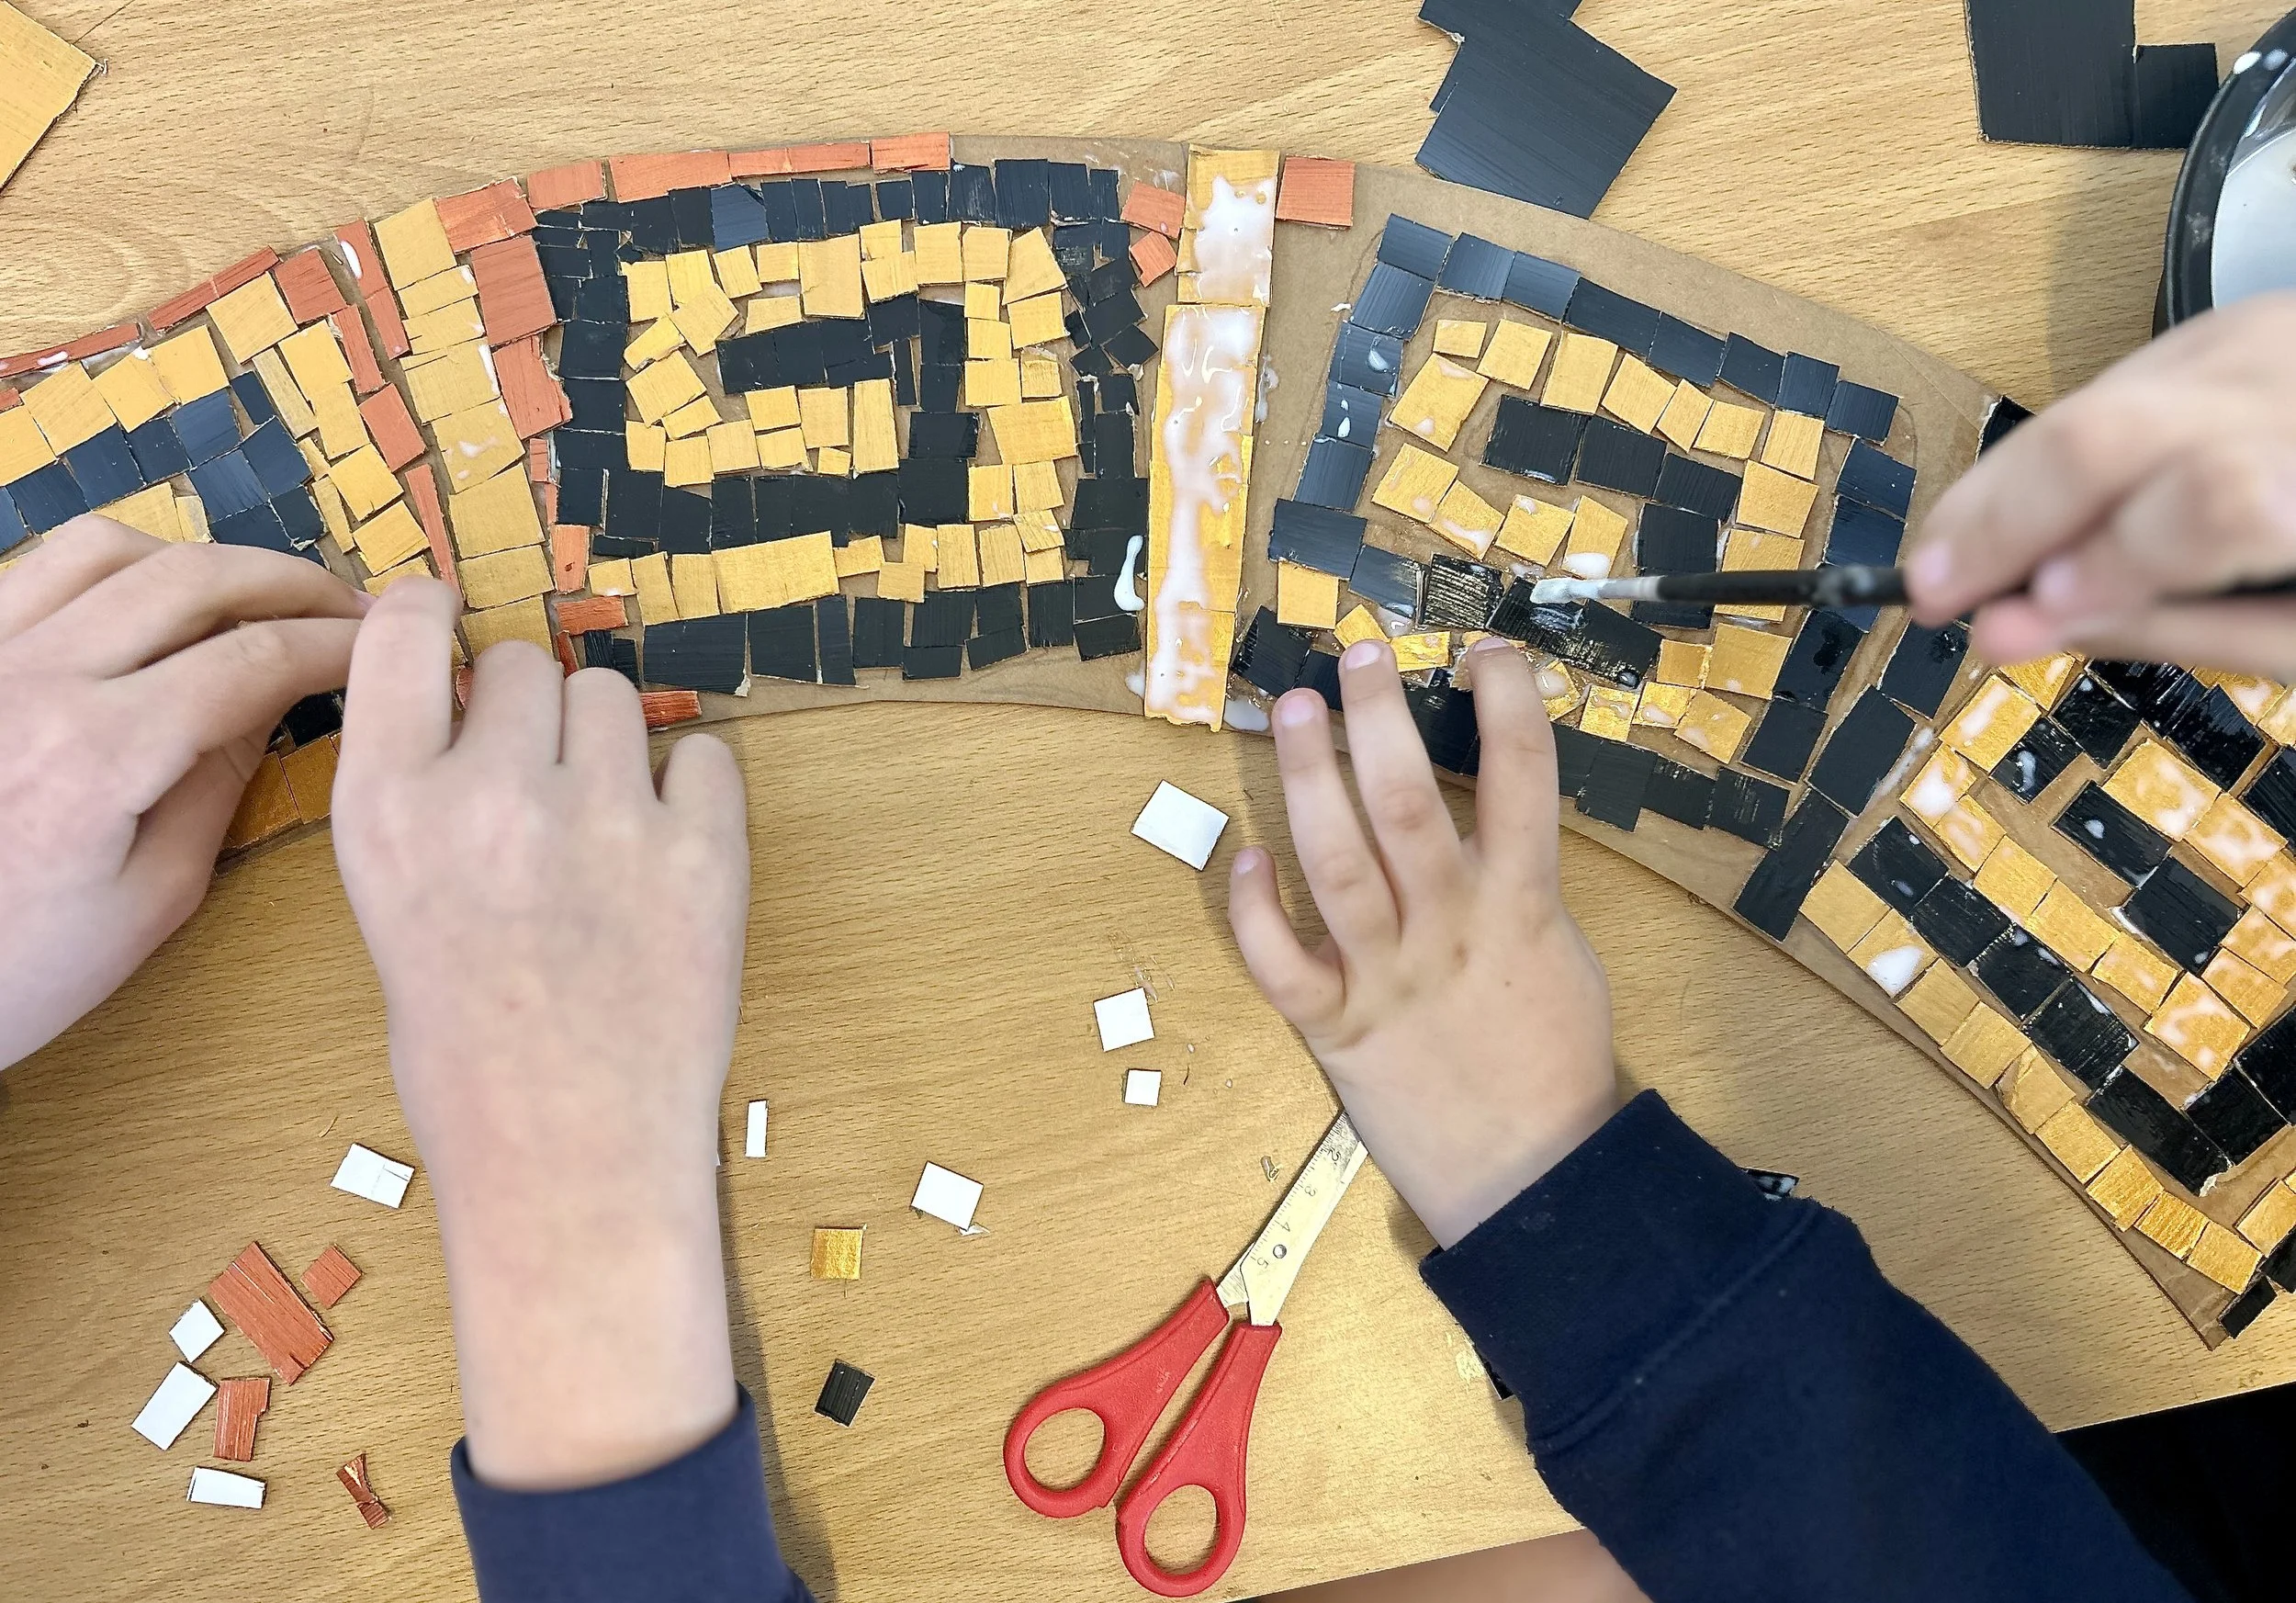
A close-up of a section of a ‘Medusa shield’, created by Year 5 & 6 children from St. Mary’s Primary, Swanage. 2025
Year 5 & 6 children from St. Mary’s Primary creating the snakes for Medusa’s hair.

Here, you can see how the design you attempt can contain more complex sections, and also simpler, repetitive motifs and patterns.
You can clearly see in the last few photos how the different shades help to make the mosaic look more authentic and sophisticated. You can also introduce ‘metallic’ tiles (painted with metallic paints) which are also often included in real Ancient examples. The image below shows clearly how effective that can be . . .

Mosaic tree, based on the paintings of Gustav Klimt, created by Year 5/6 children from Harrogate Primary. 2012
Using acrylic paint to paint the cardboard sheets means that you also get another, unintentional effect which makes the artwork look even more original. You get slight streaks in the paintwork, brush-lines on the surface. These sometimes show up on the design, looking very similar to the slight streaks you get on the glaze of ancient tiles. You can see this effect on the red lettering in the example below.
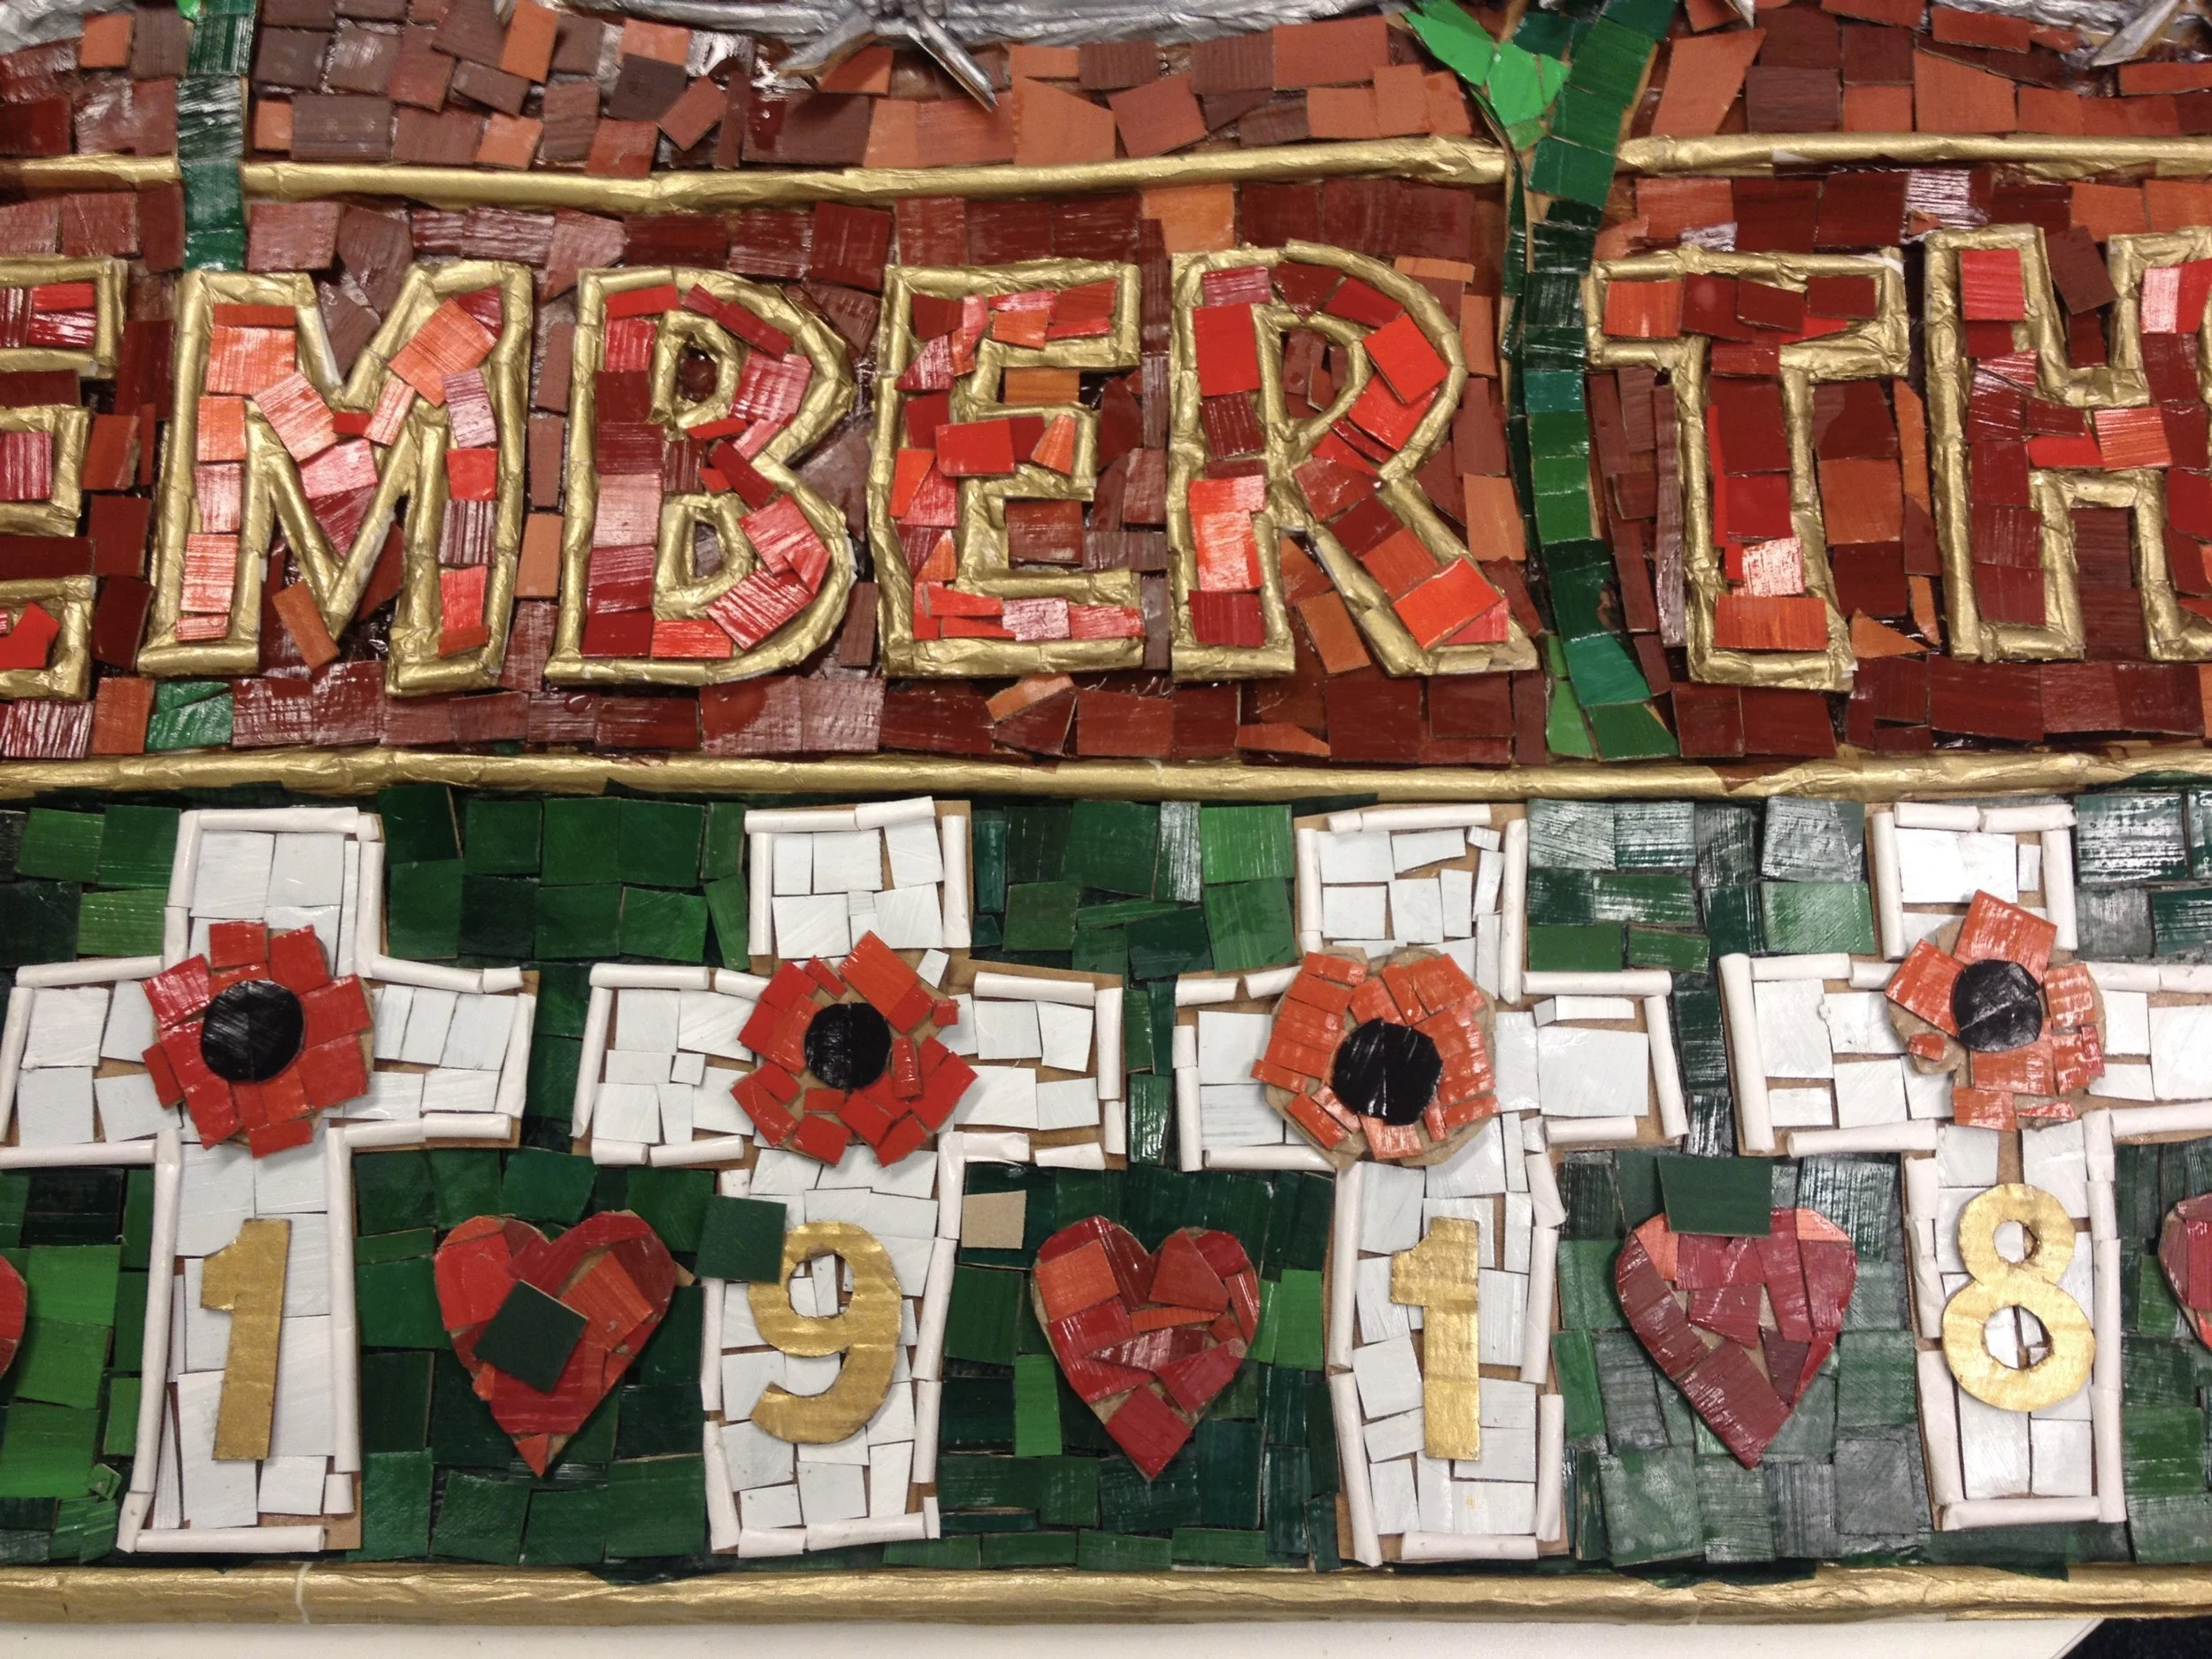
Close-up of a ‘Remembrance Day’ mosaic created by Year 5/6 pupils from Jubilee Park Academy. 2021
I’ve always felt that this process works well, but like any creative person, each time I’ve attempted the technique, I’ve refined it and learned lessons from what worked, and from what didn’t.
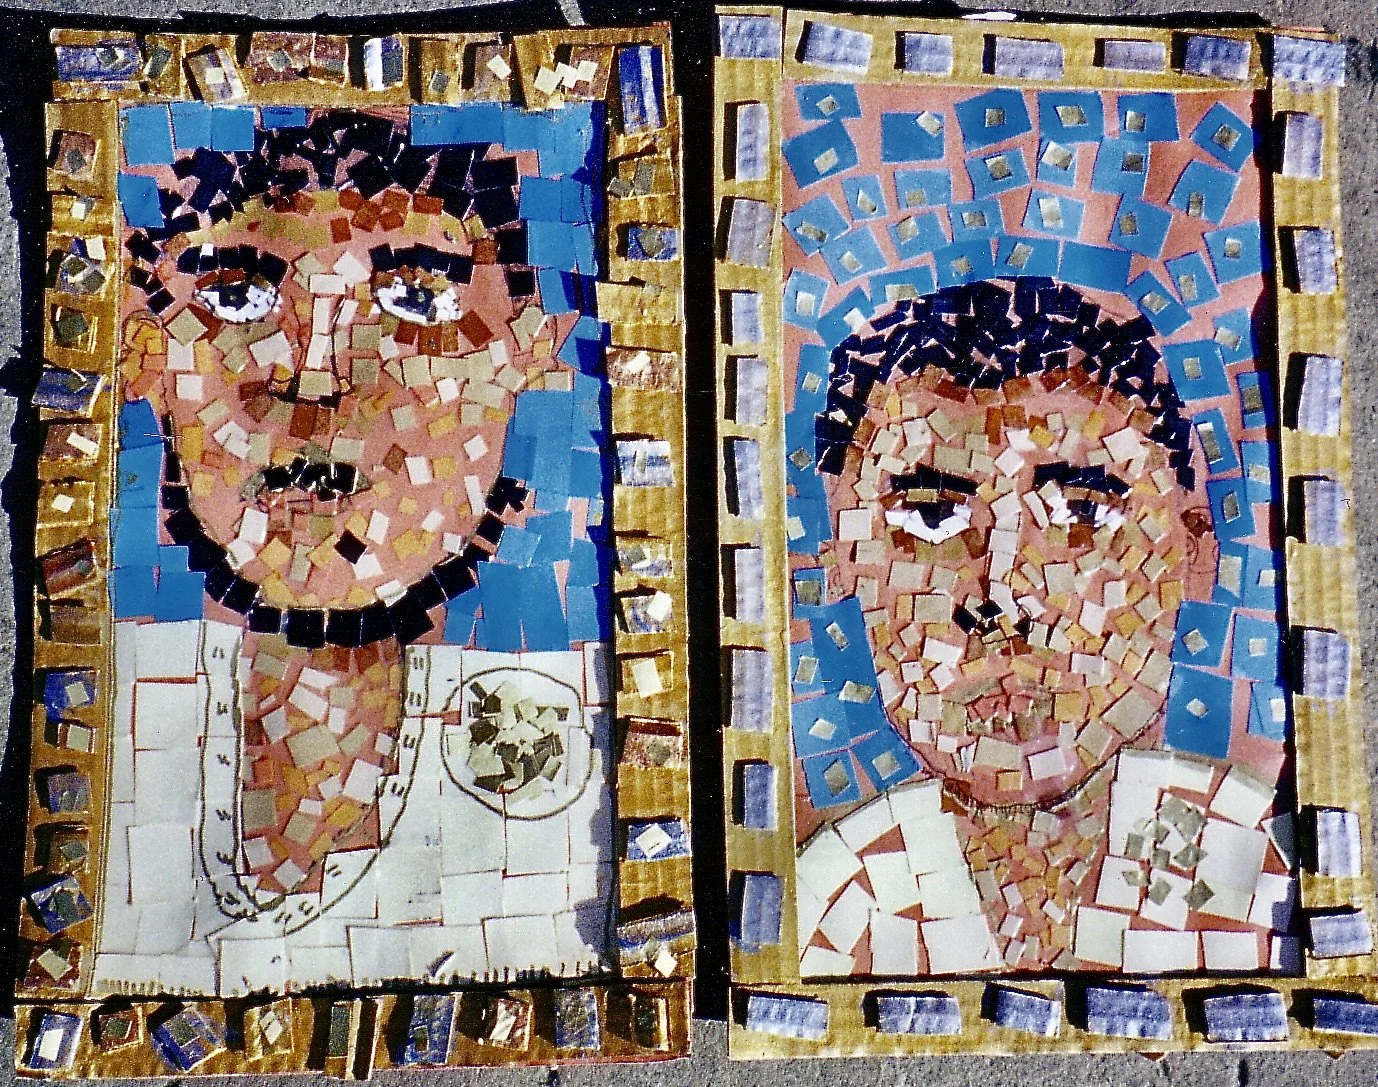
Ancient Greek Mosaic Portraits created by Year 5 children from Mesty Croft Primary. 1997 ?
The two examples above are some of the earliest examples that I have photos of, I’m pretty certain this was 1997, these are scans of ‘film’ photos, so pre-digital. You can see that I’ve got the children to use cardboard but also some coloured paper too, and gold paper. They are nice, but less sophisticated.
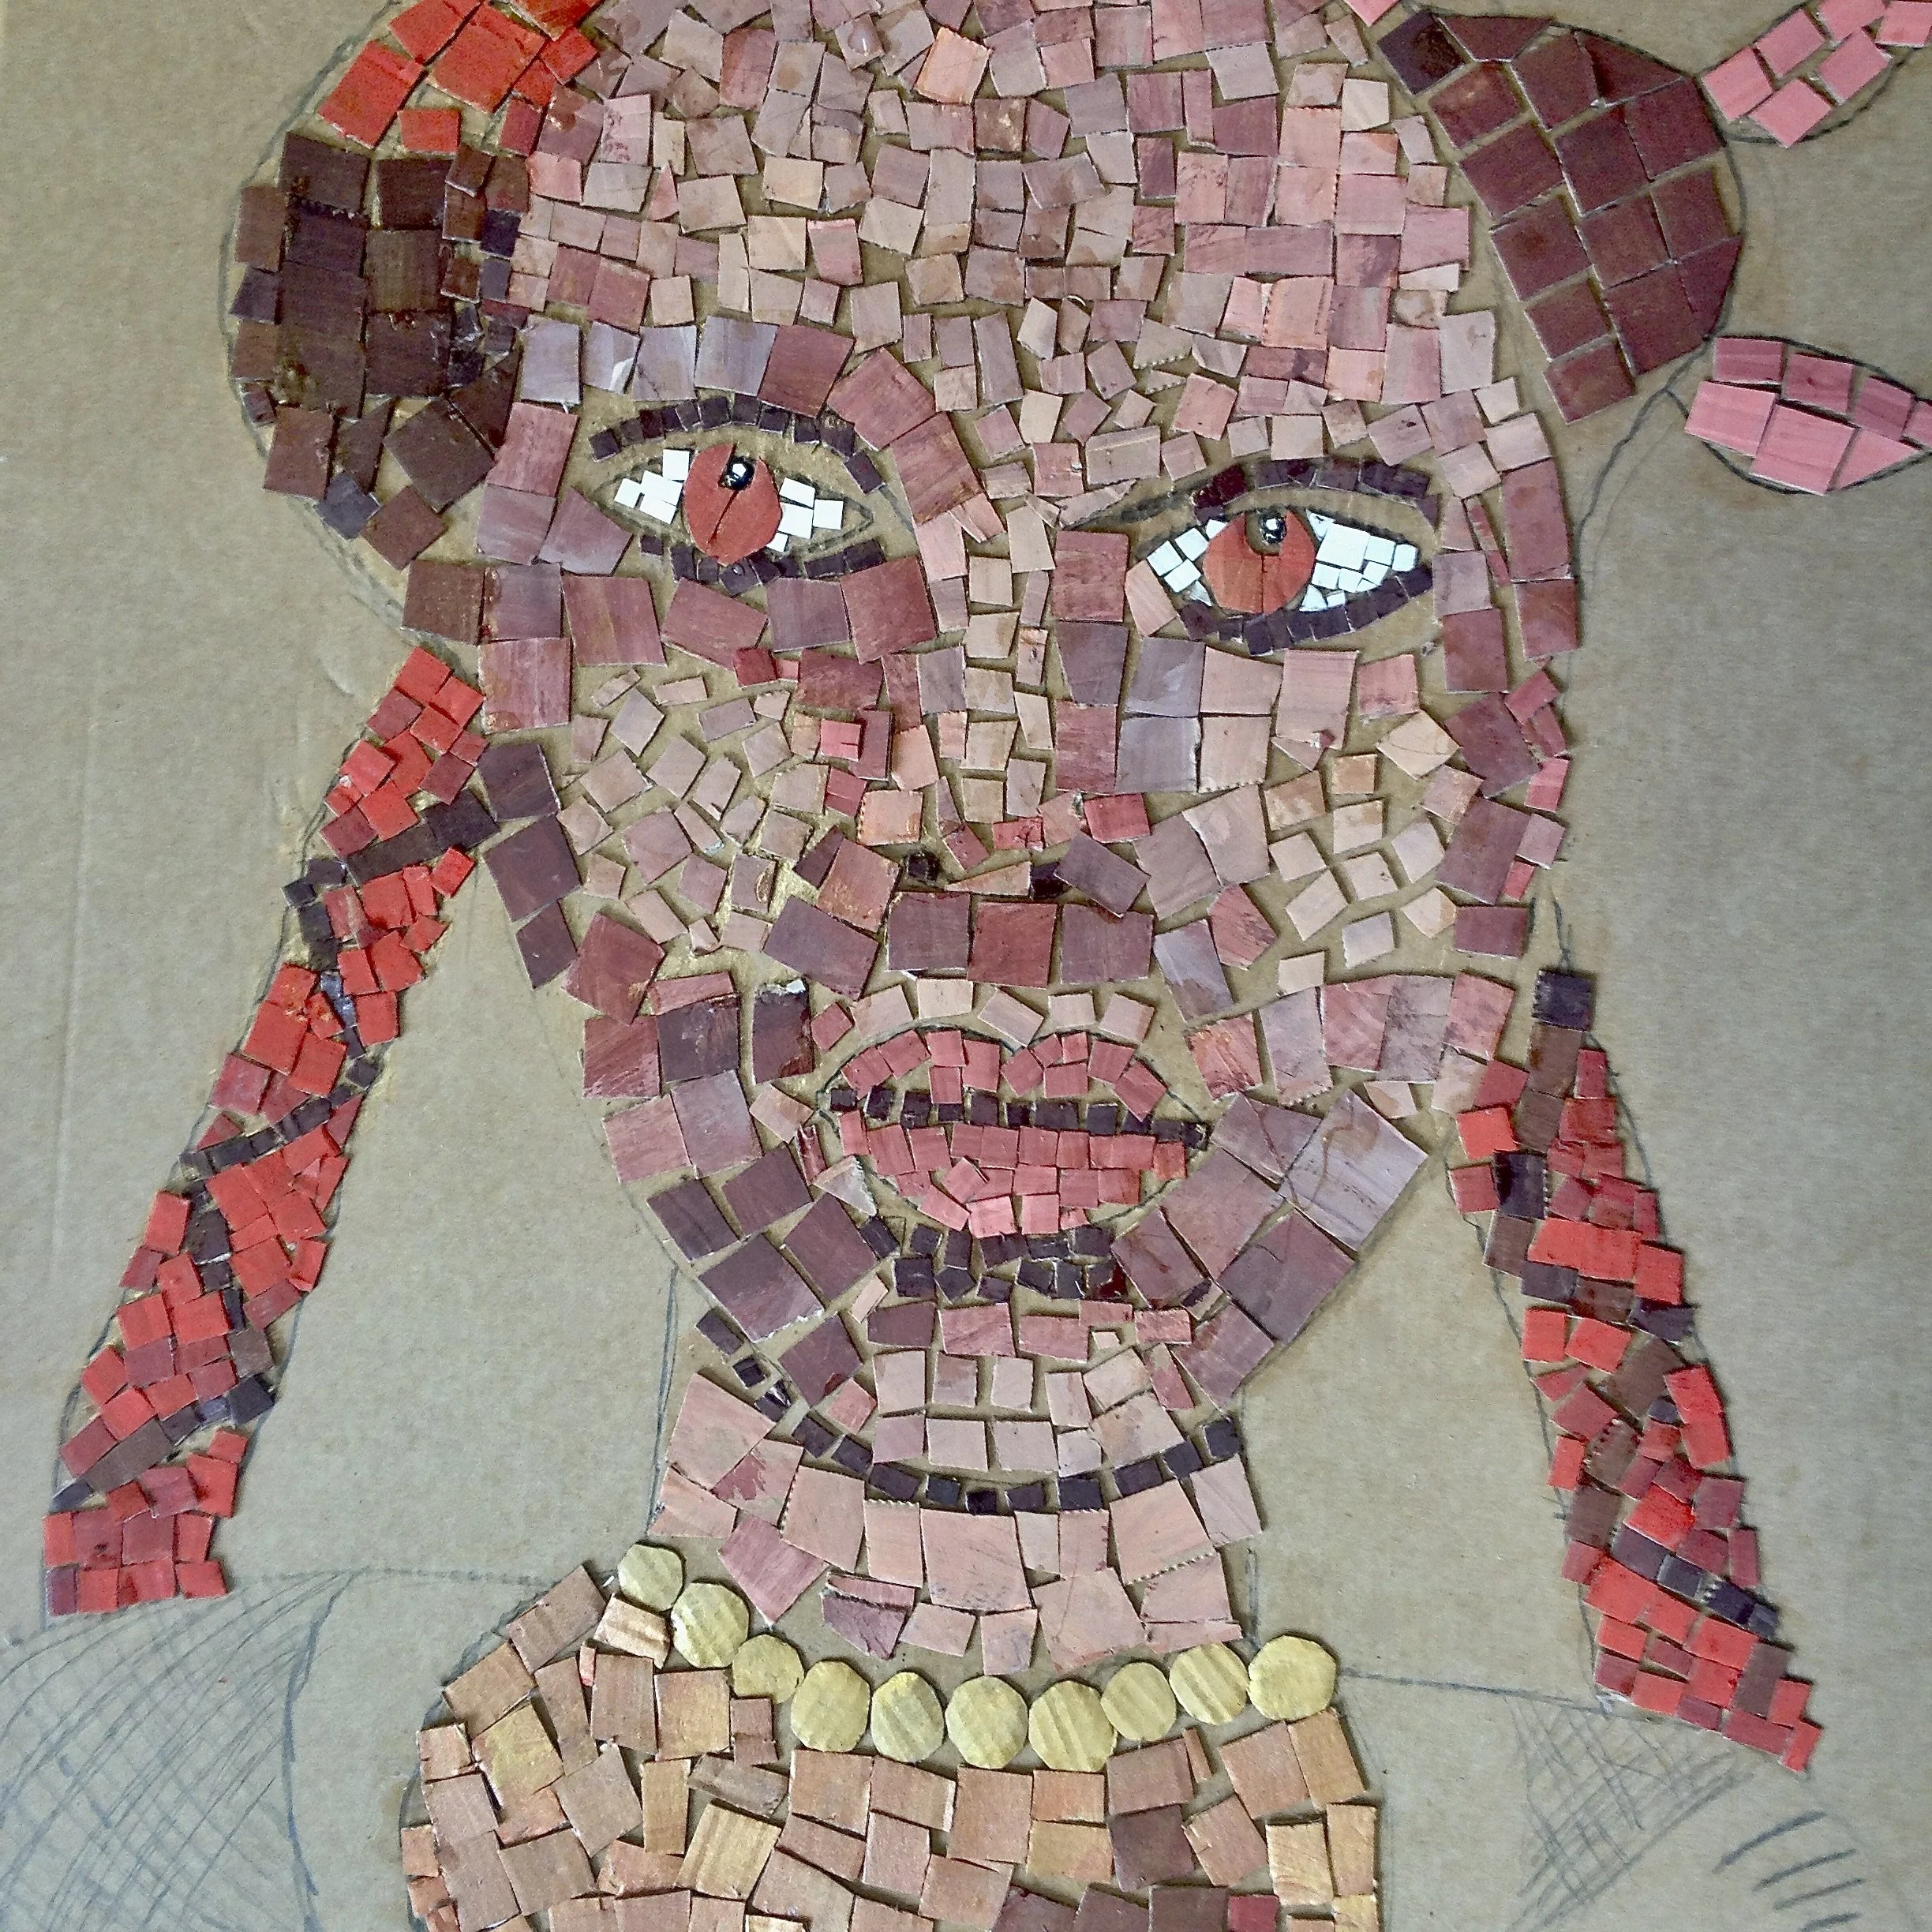
Mosaic portraits, created by Year 4 children from Rood End Primary. 2018
I think you can see a big difference here, this mosaic portrait is about 20 years later. The children here have drawn their portraits and then added the tiles in stages. In this example I got them to create the eyes first (smaller, and more detailed) Then, we just focussed on the skin tones, thinking about shadows and highlights. Then, finally they could add the costume, jewellery, hair etc therefore allowing them to use what they’d learned in the previous stages, while also encouraging them to be inventive, and allowing them a bit more freedom.
Occasionally, I’ve also introduced a couple of other materials. Just to offer a different texture to the whole piece . . .
‘Nature’ mosaic, created by the KS1 pupils from Hanbury Primary. 2018
. . . you can see how I’ve used introduced some corrugated card here on the bird. Again this has been painted and cut up, but the surface texture helps it to stand out more.

Aztec mosaic design ‘two-headed serpent’ created by Year 5 pupils from Rood End Primary. 2015

Close-up of Aztec design.
In the photo above you can see where we’ve used paper straws to make the word ‘Aztec’. These straws were already coloured, which helped, but I’ve also used this technique with the children pre-painting the straws themselves. It’s great for lettering or borders.
Okay, so that’s the basic technique and how it evolved. It continues to change each time I use it, I learn as the children do, and sometimes they stumble upon a new way of using the idea, and it then inspires me too.
I’m adding some more varied examples below. Some have been made by individual Year groups, some are ‘whole school’ projects, with many different ages involved.
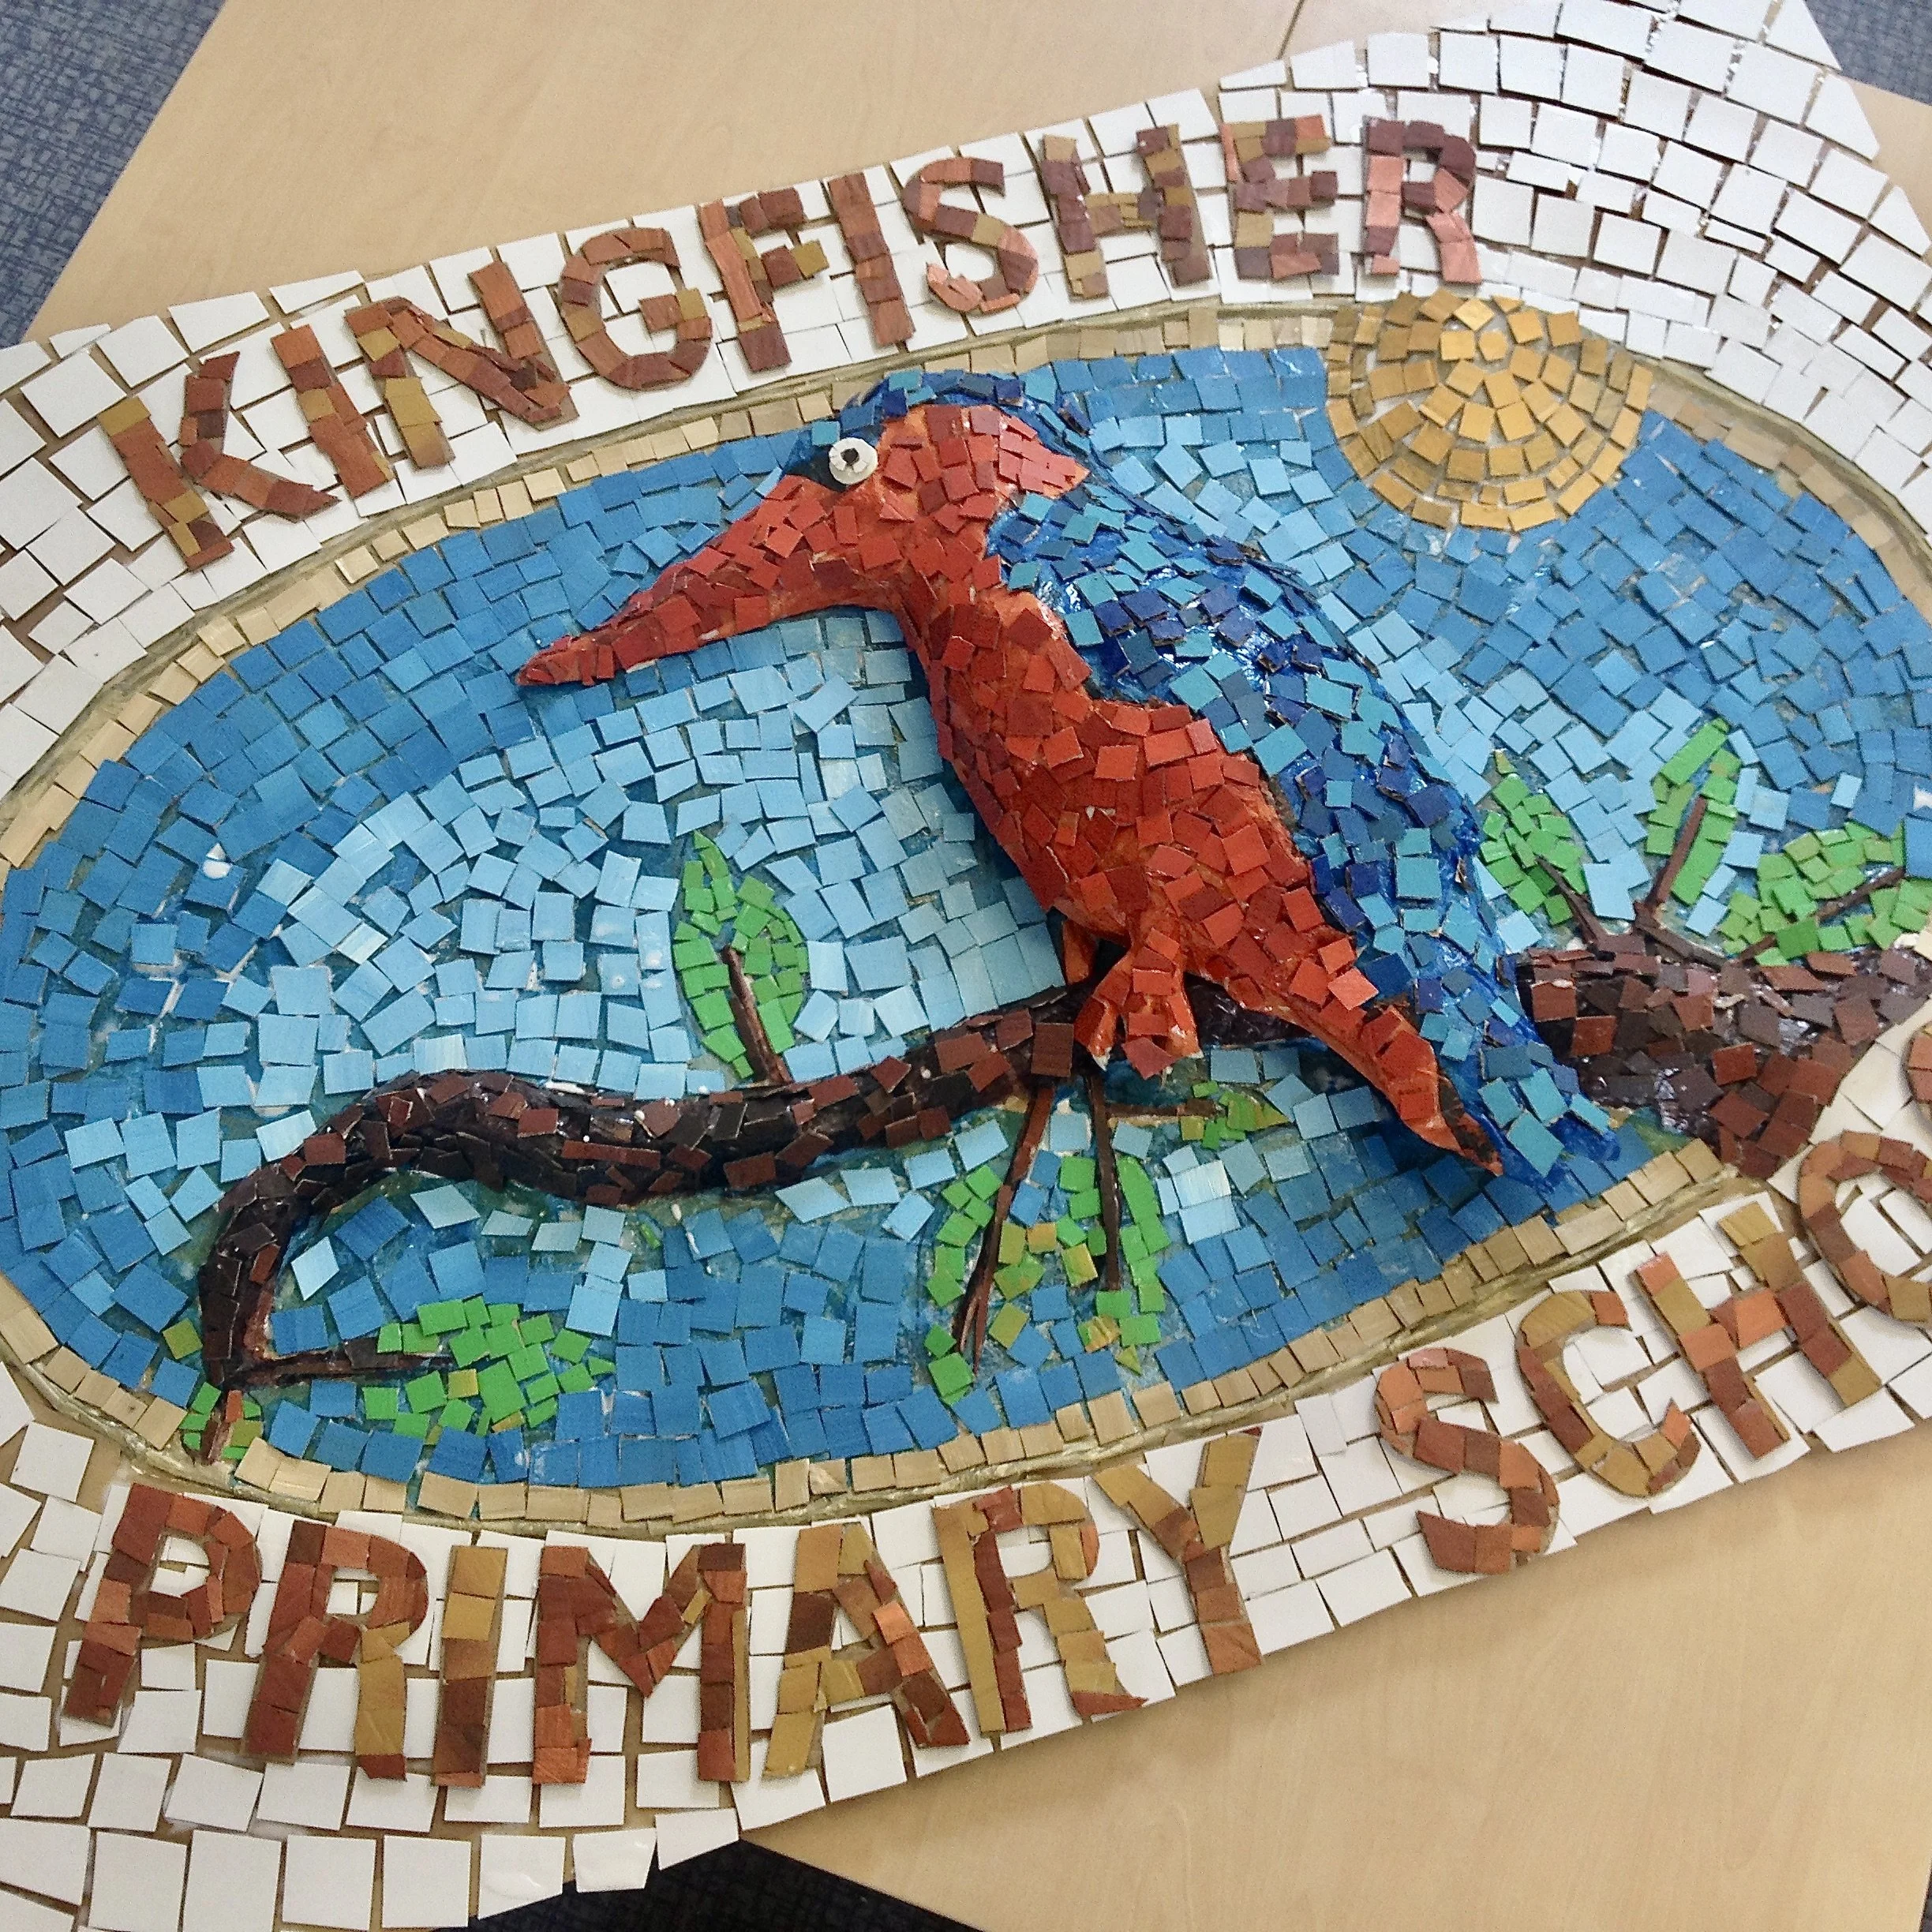
Kingfisher Primary School logo, created by KS1 children. 2018
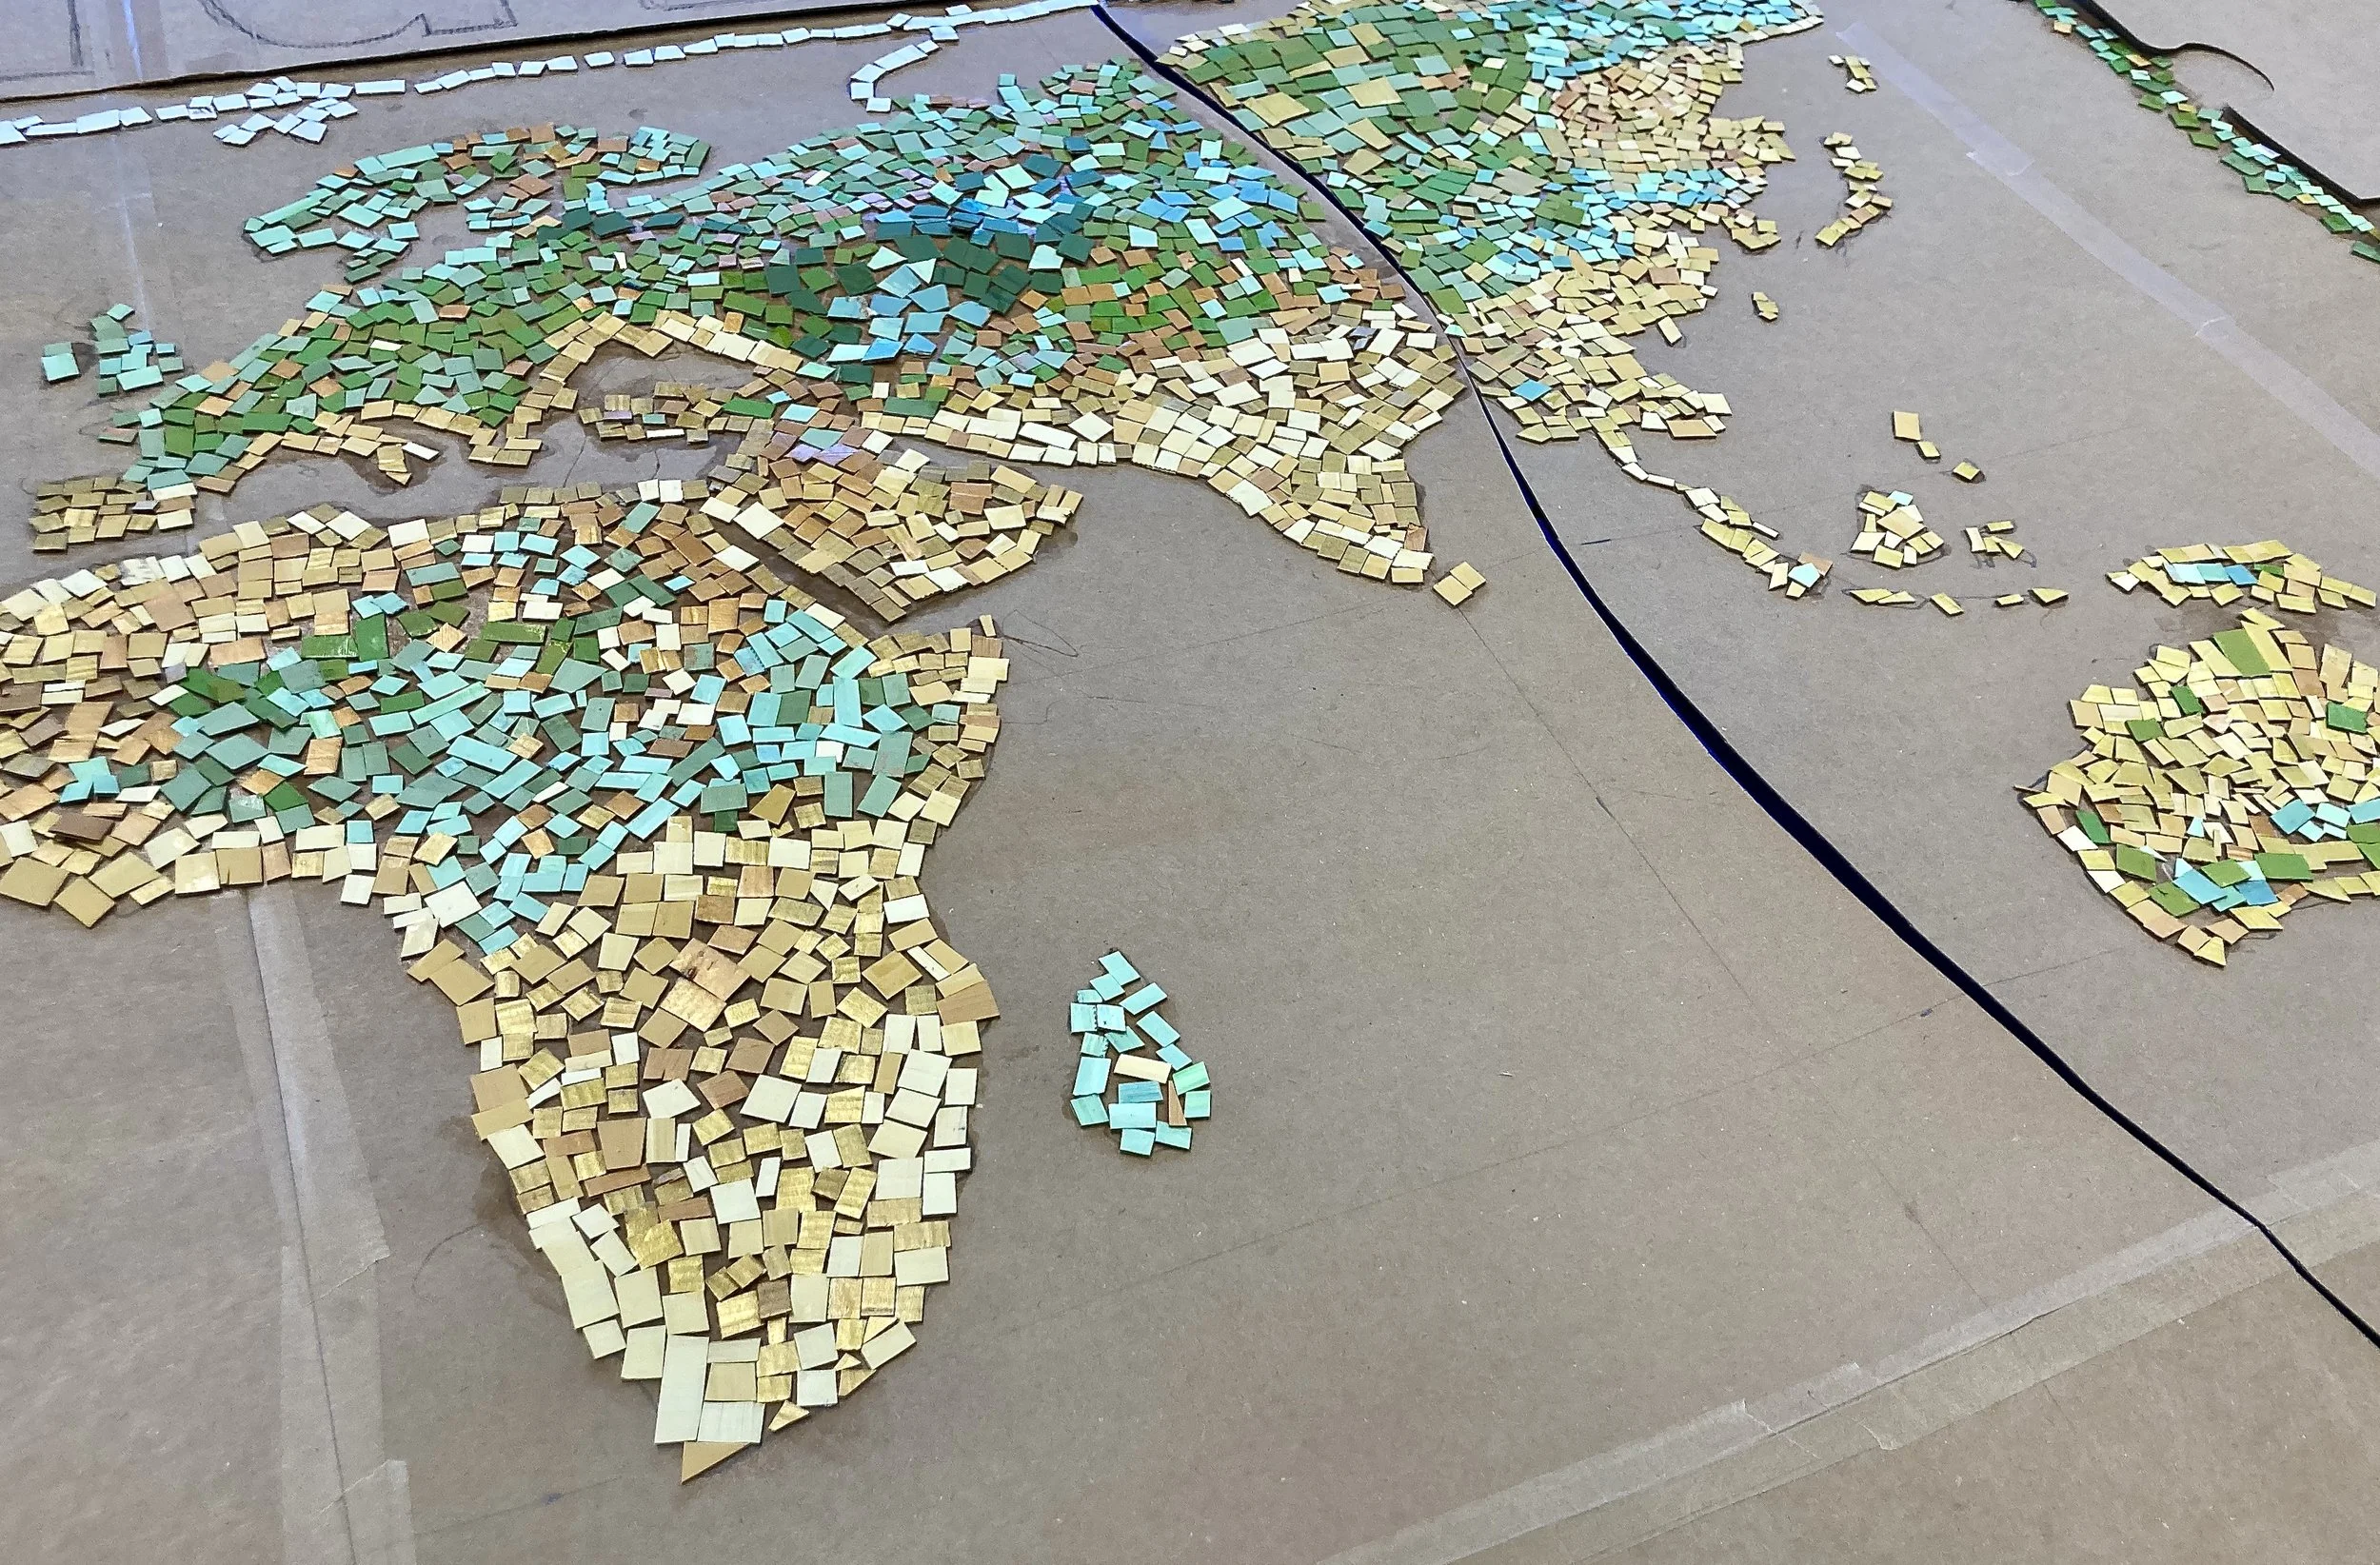
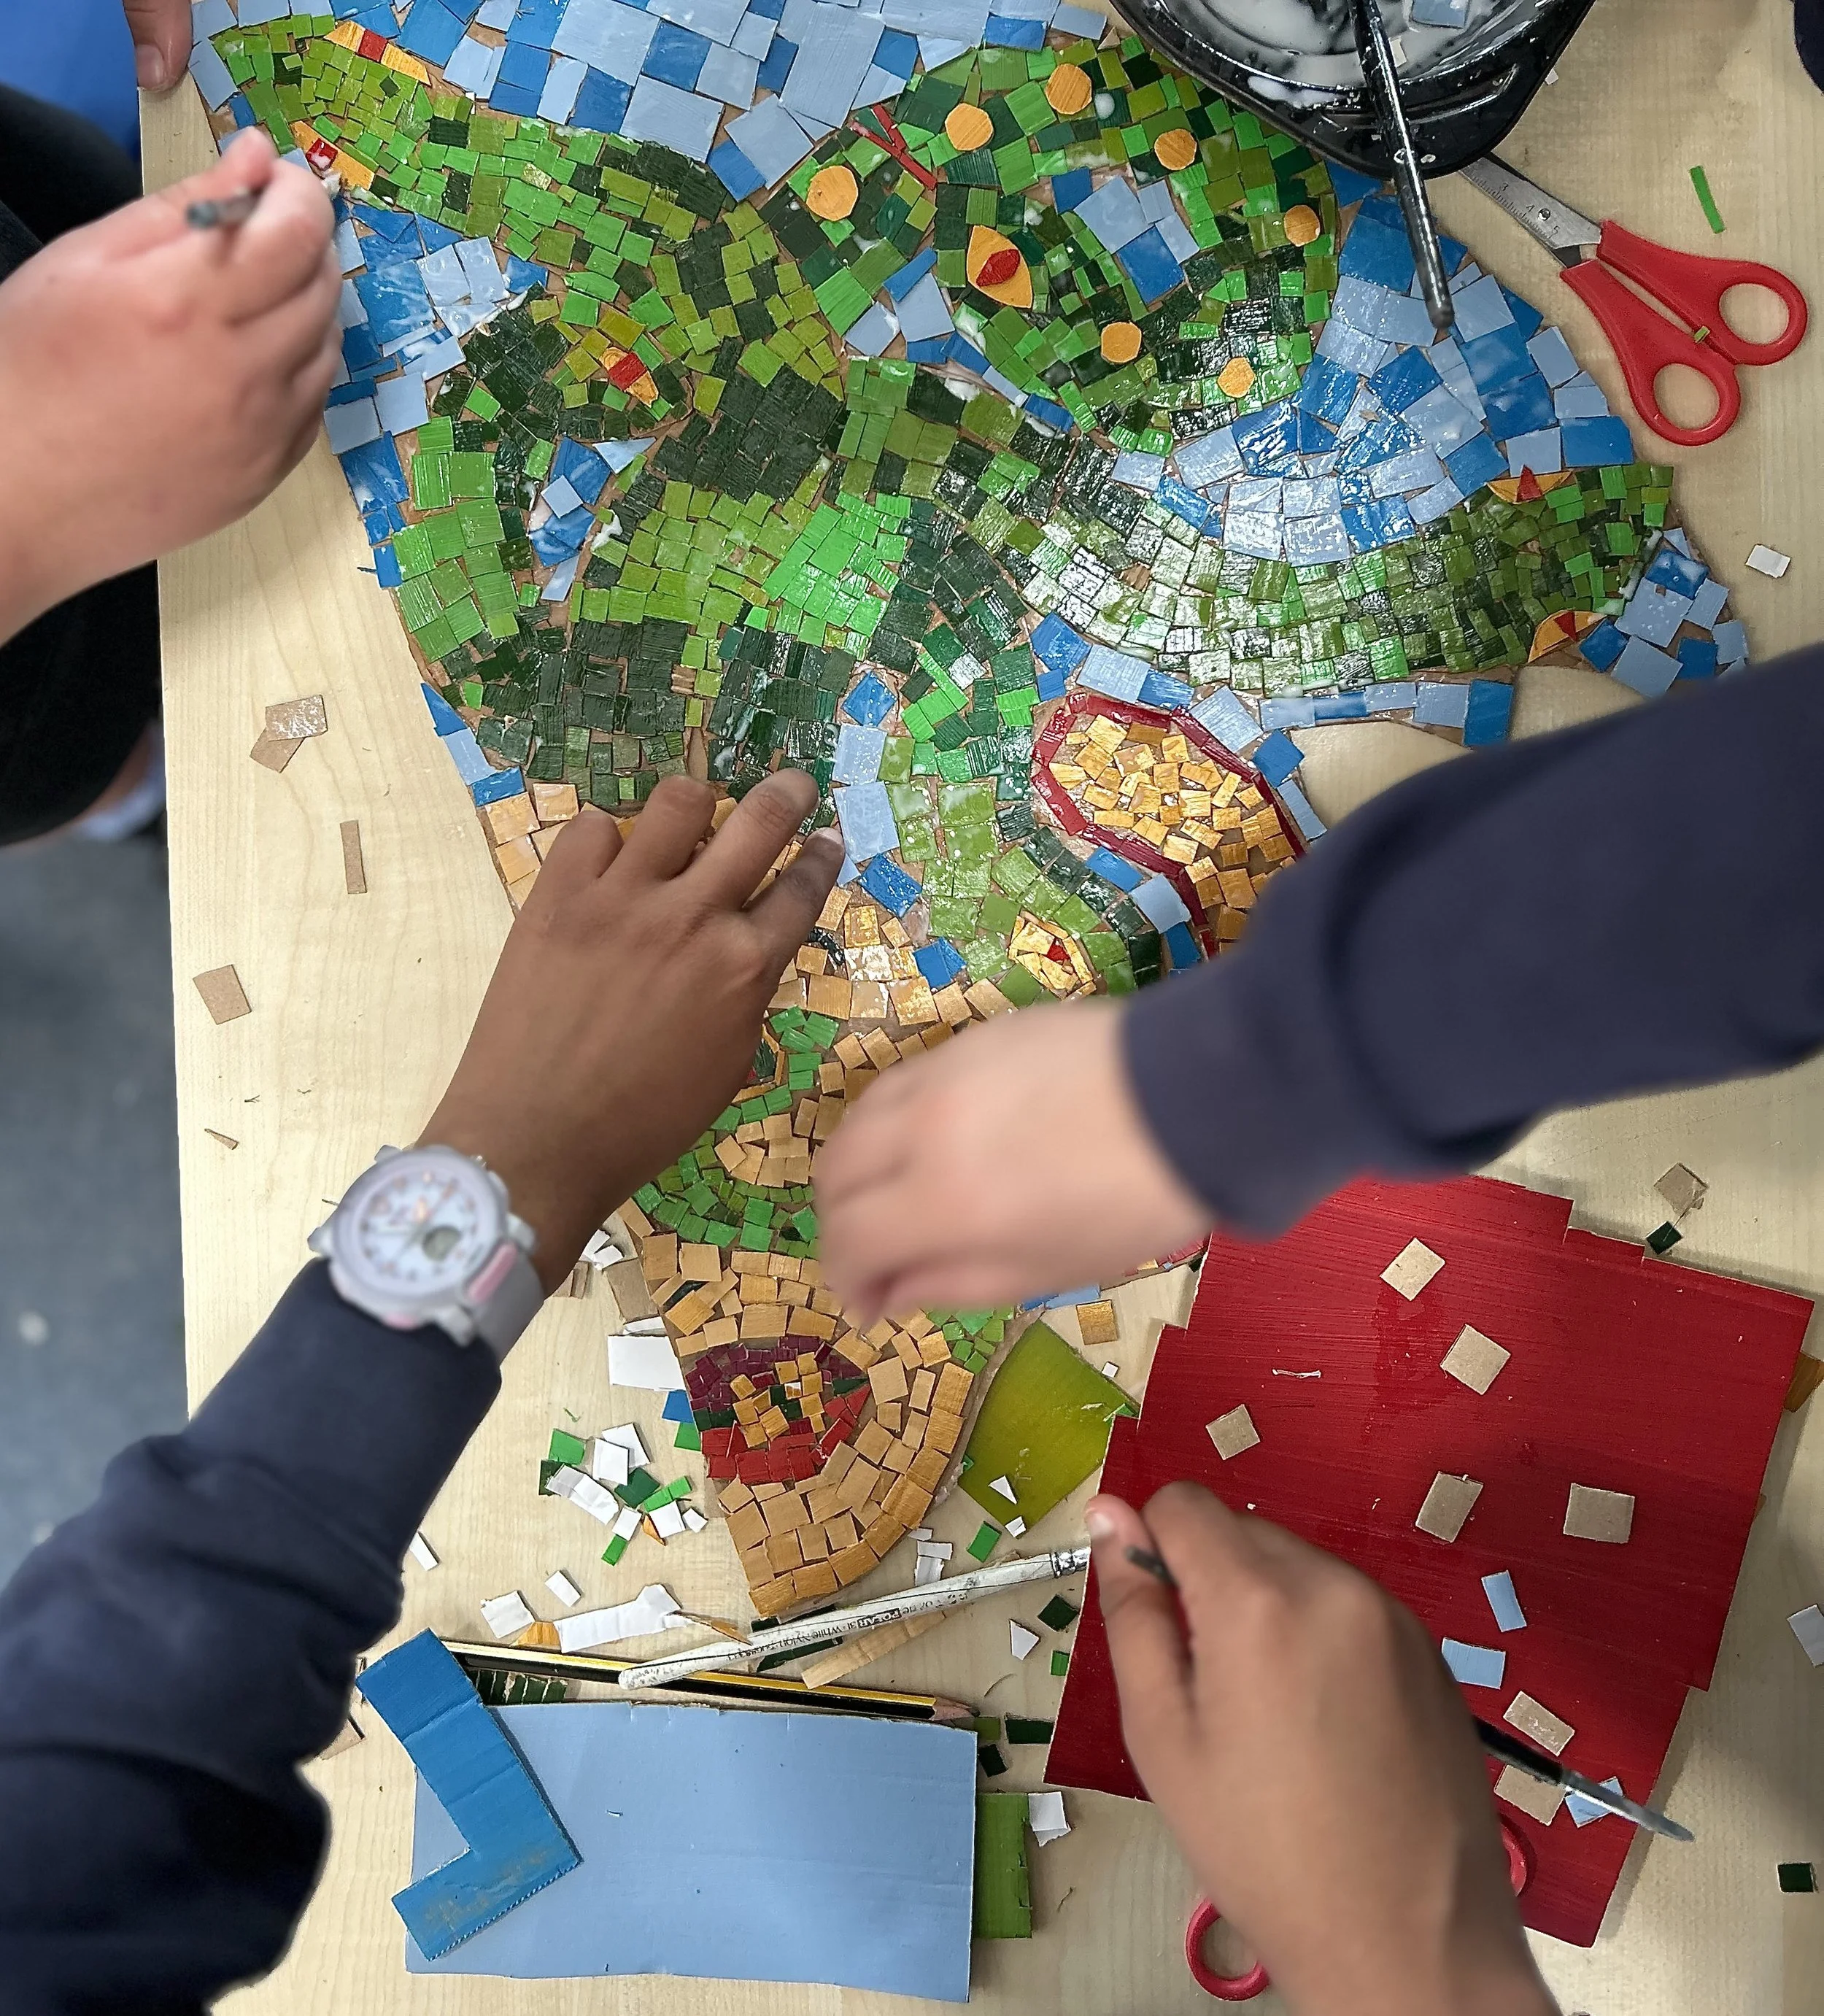
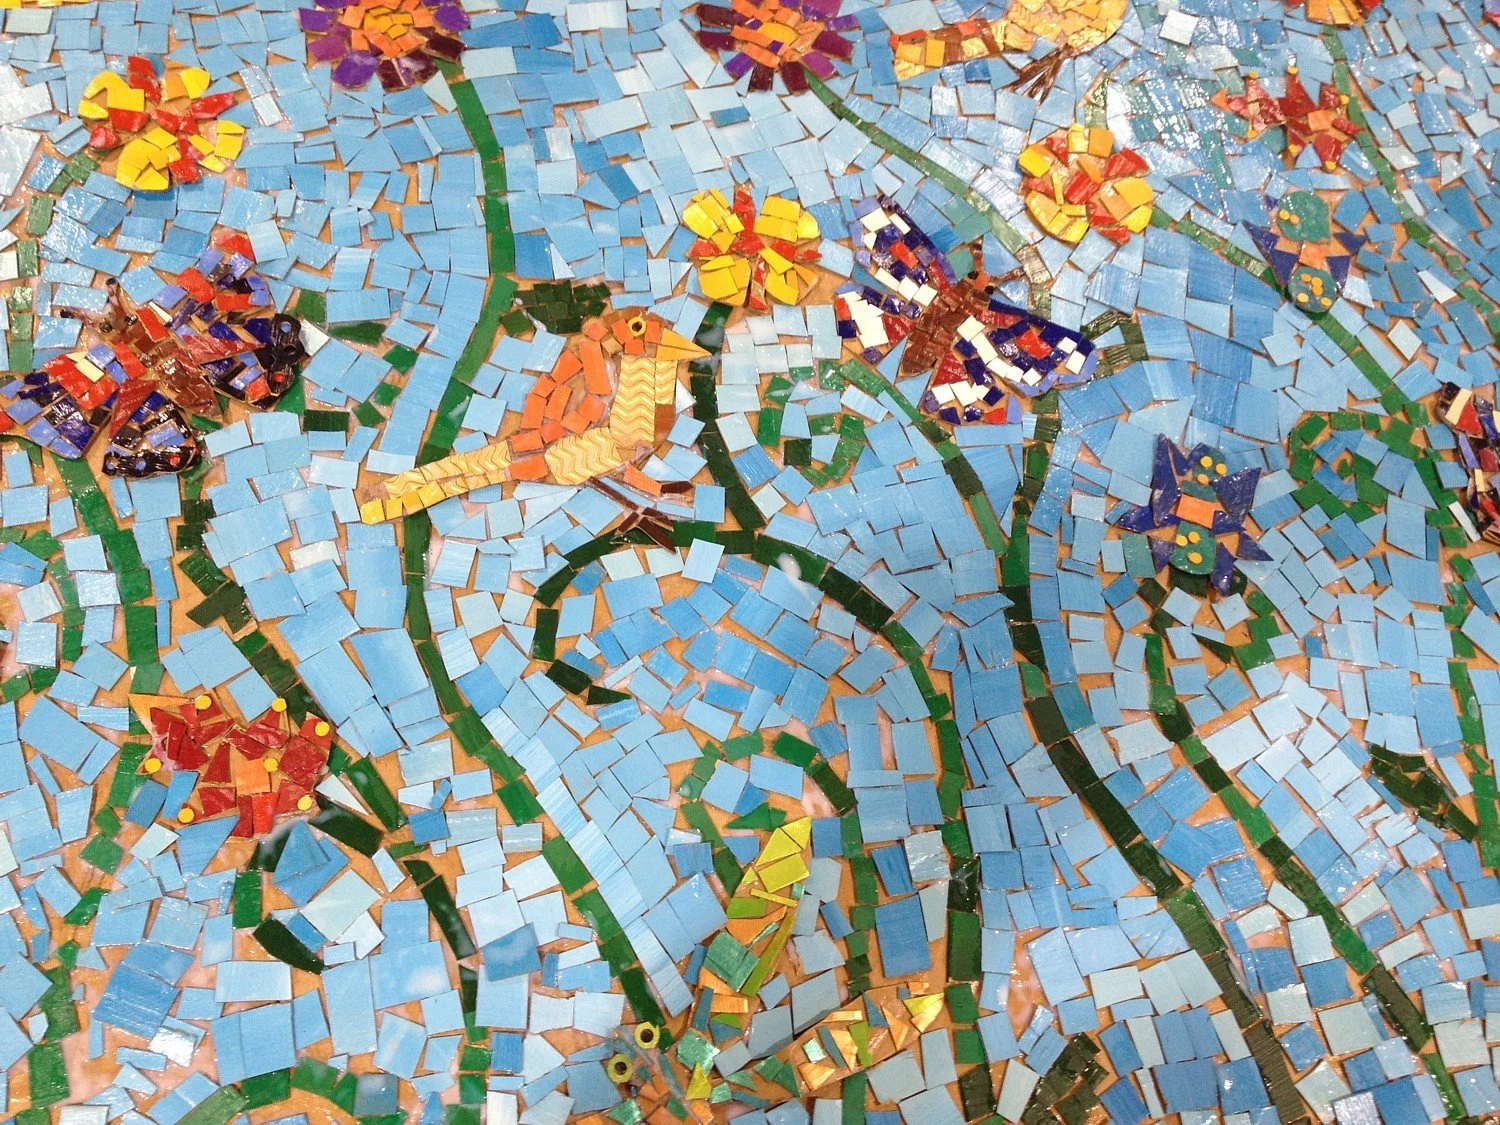
World Map Mosaic, created by KS2 children from St. Alphege Primary, Solihull. 2023
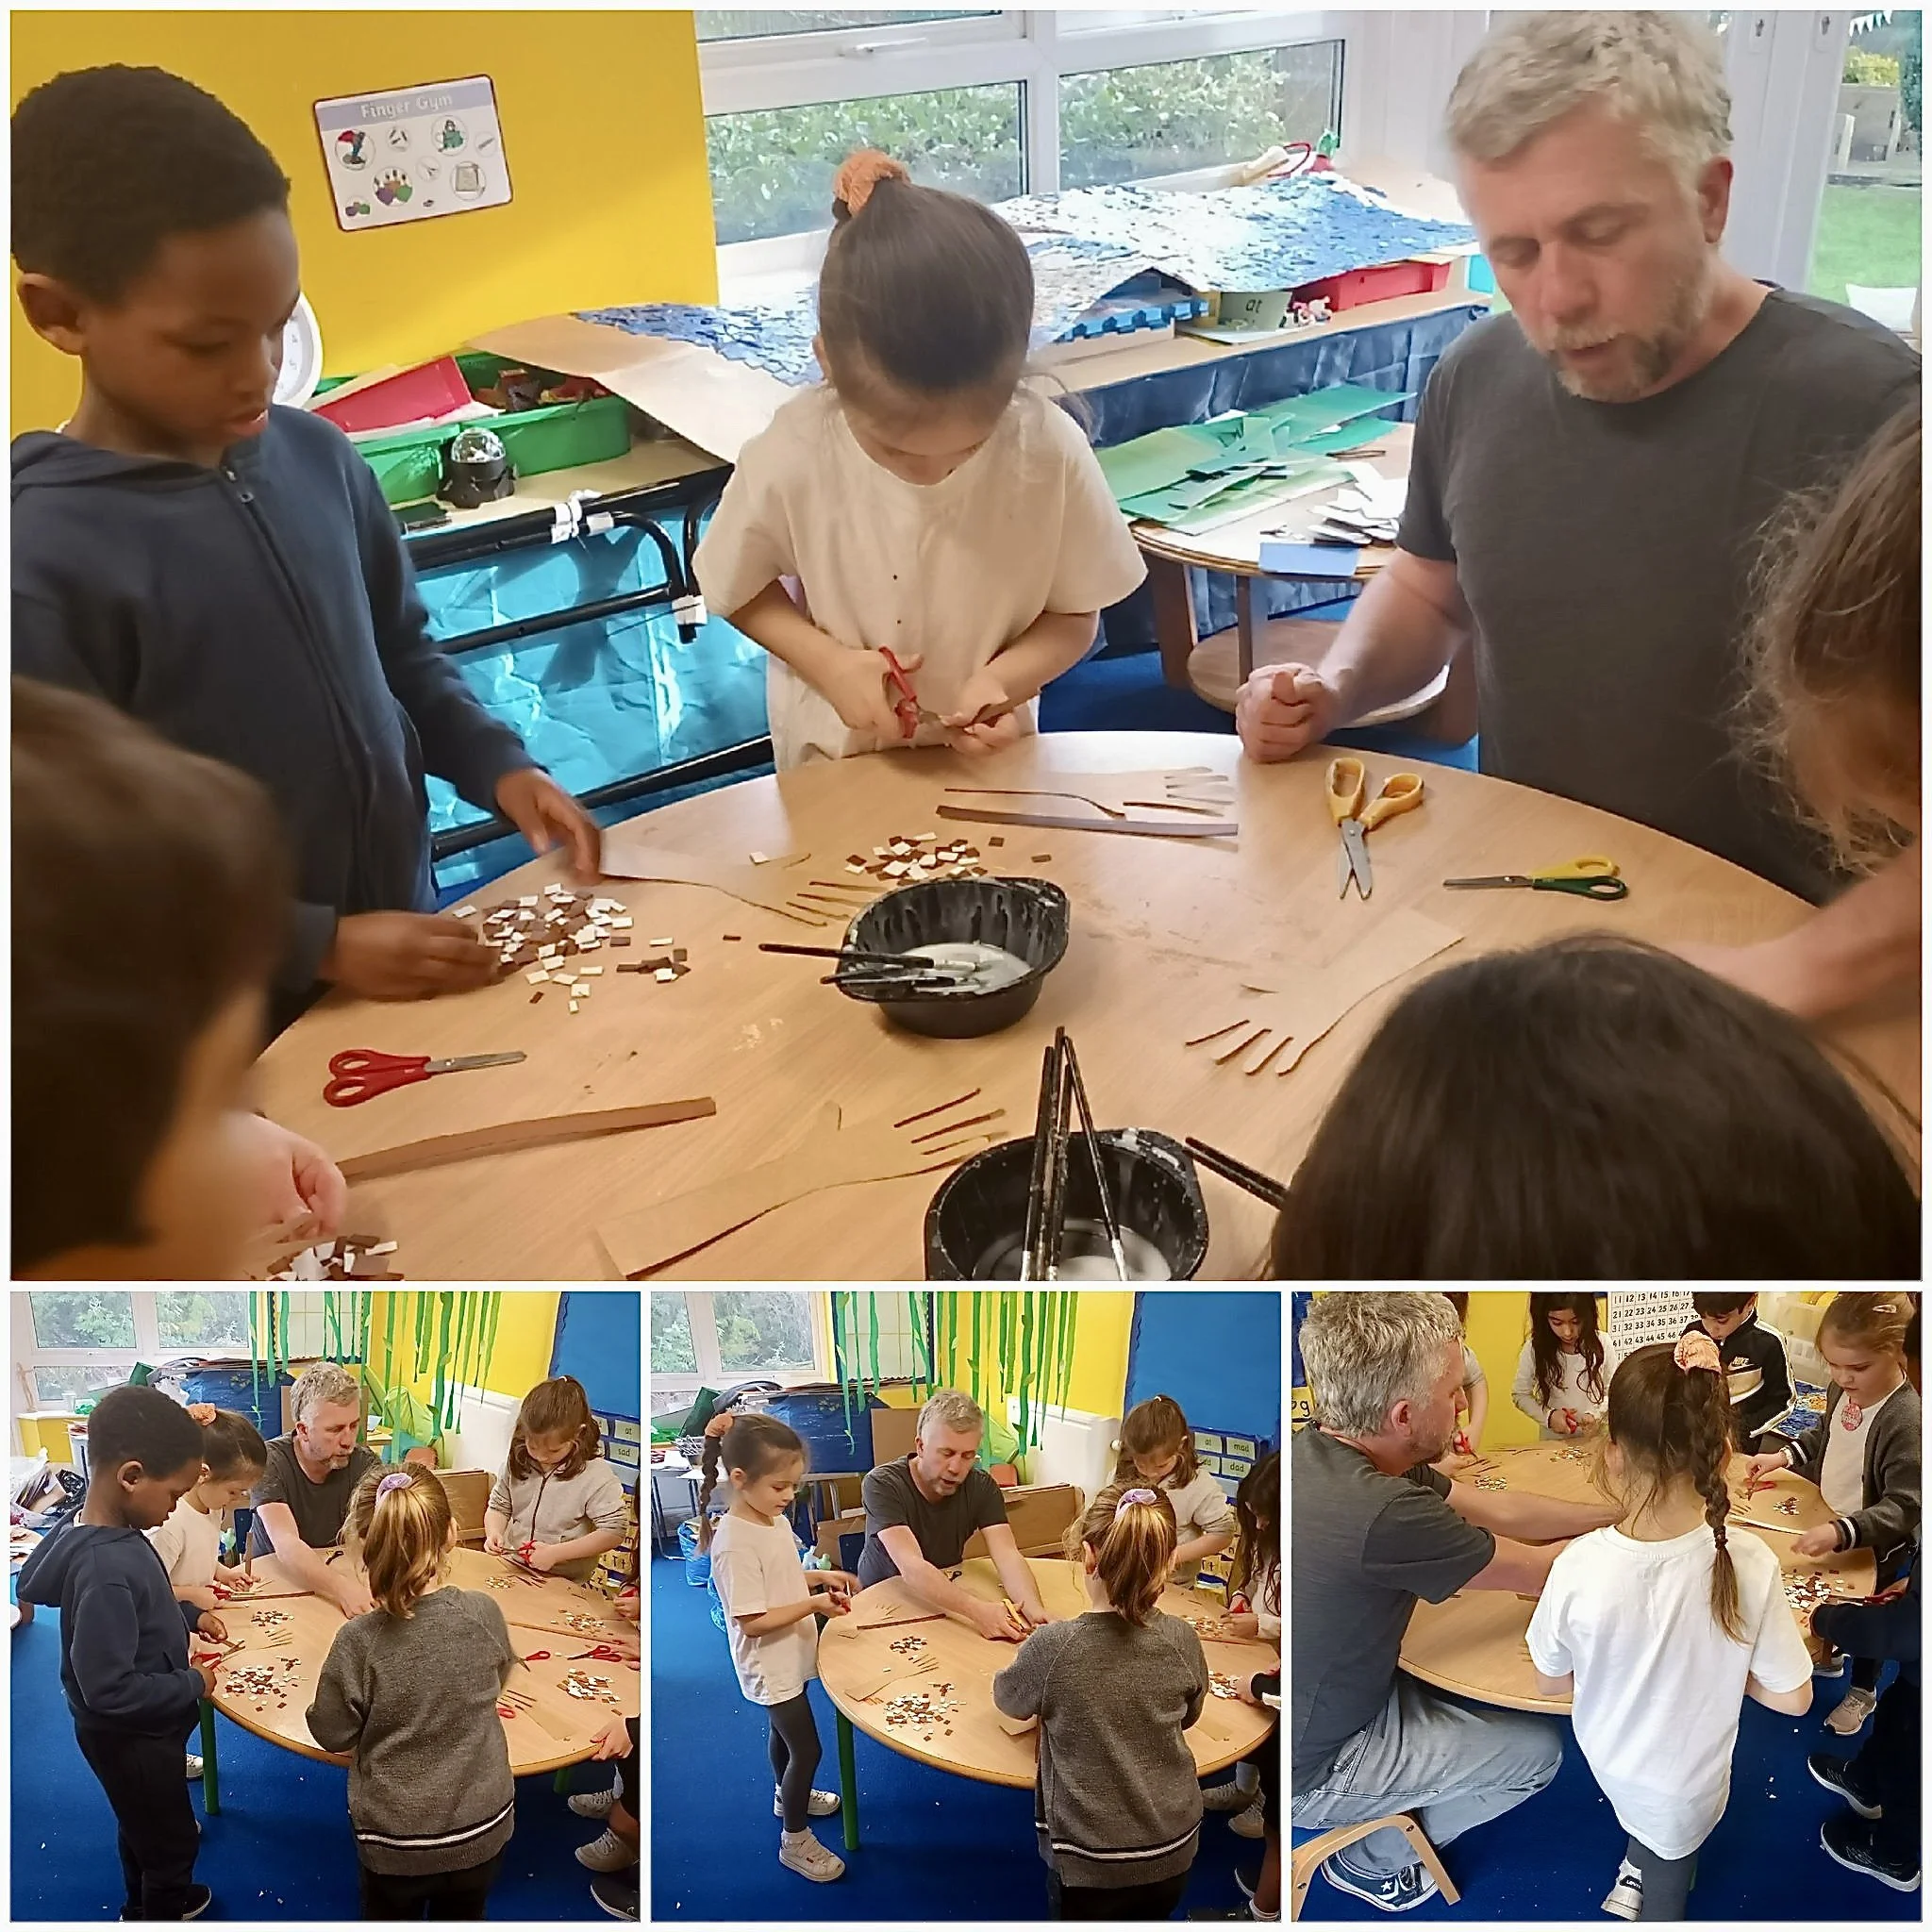
KS1 children from St. Alphege Primary School making mosaic hands. 2023
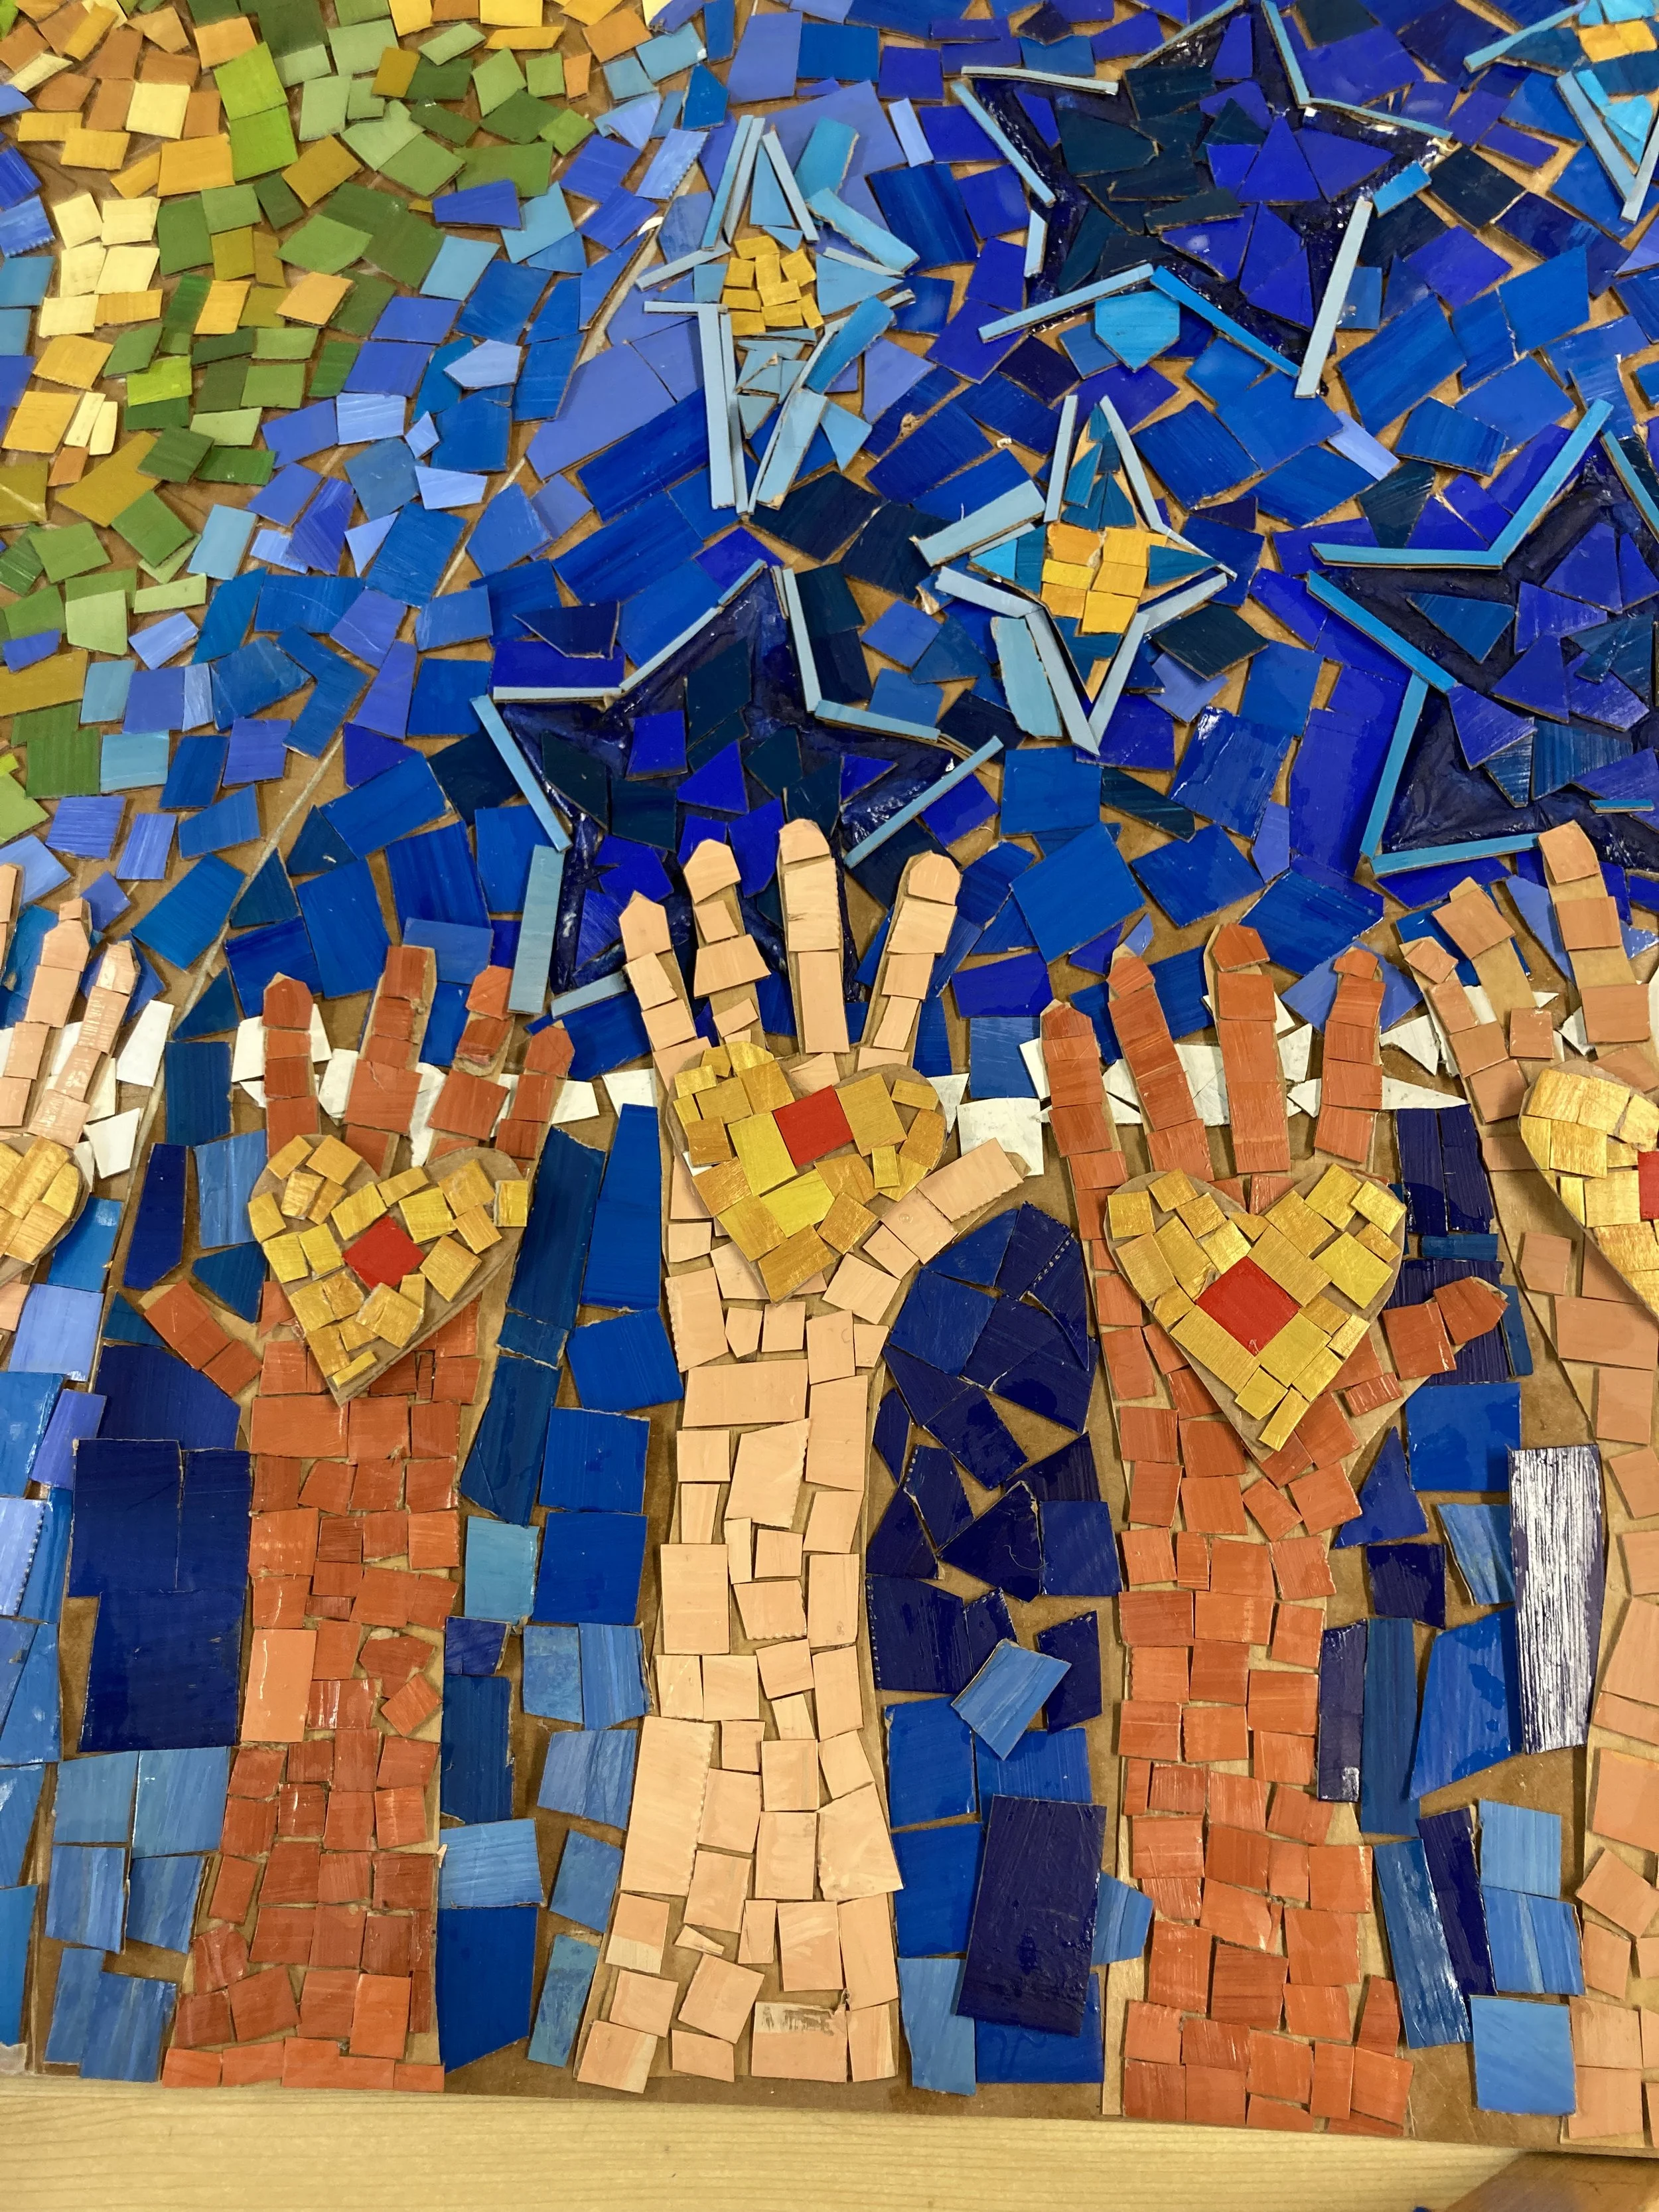
The ‘hands’ from the photo above integrated into a larger mosaic design.
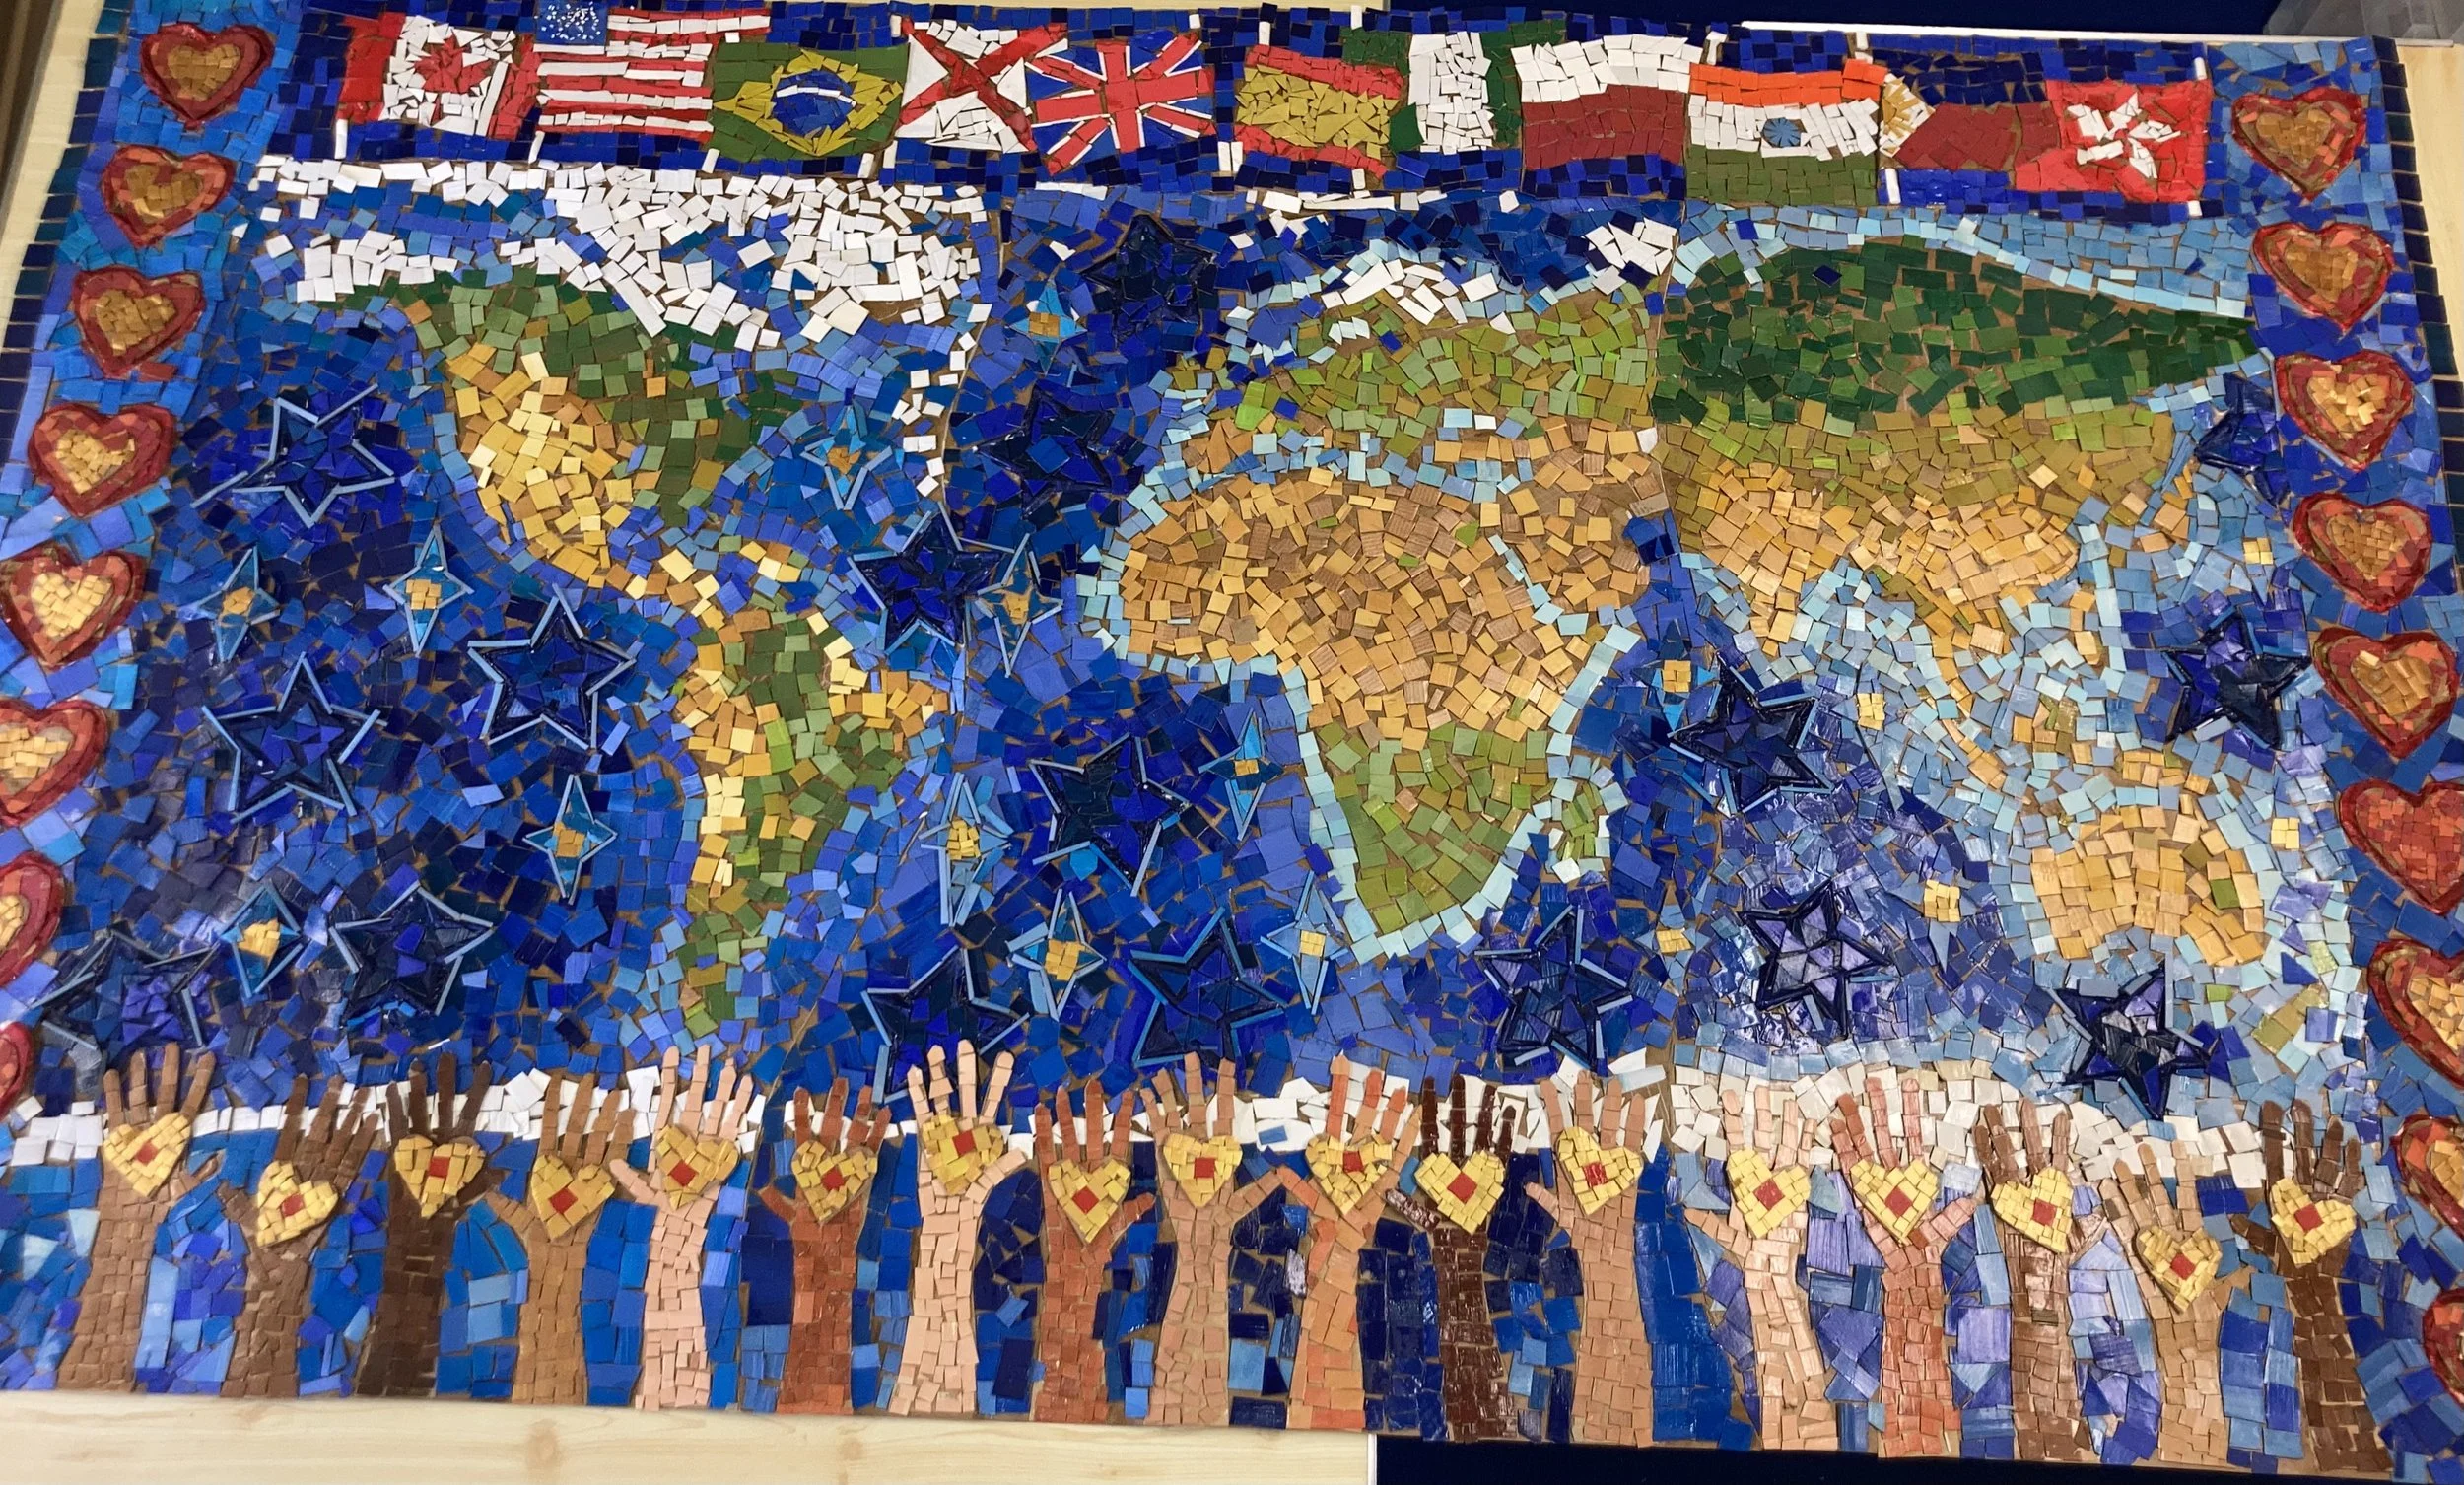
. . . the same ‘hands’ within the whole mosaic design. 4 days work.
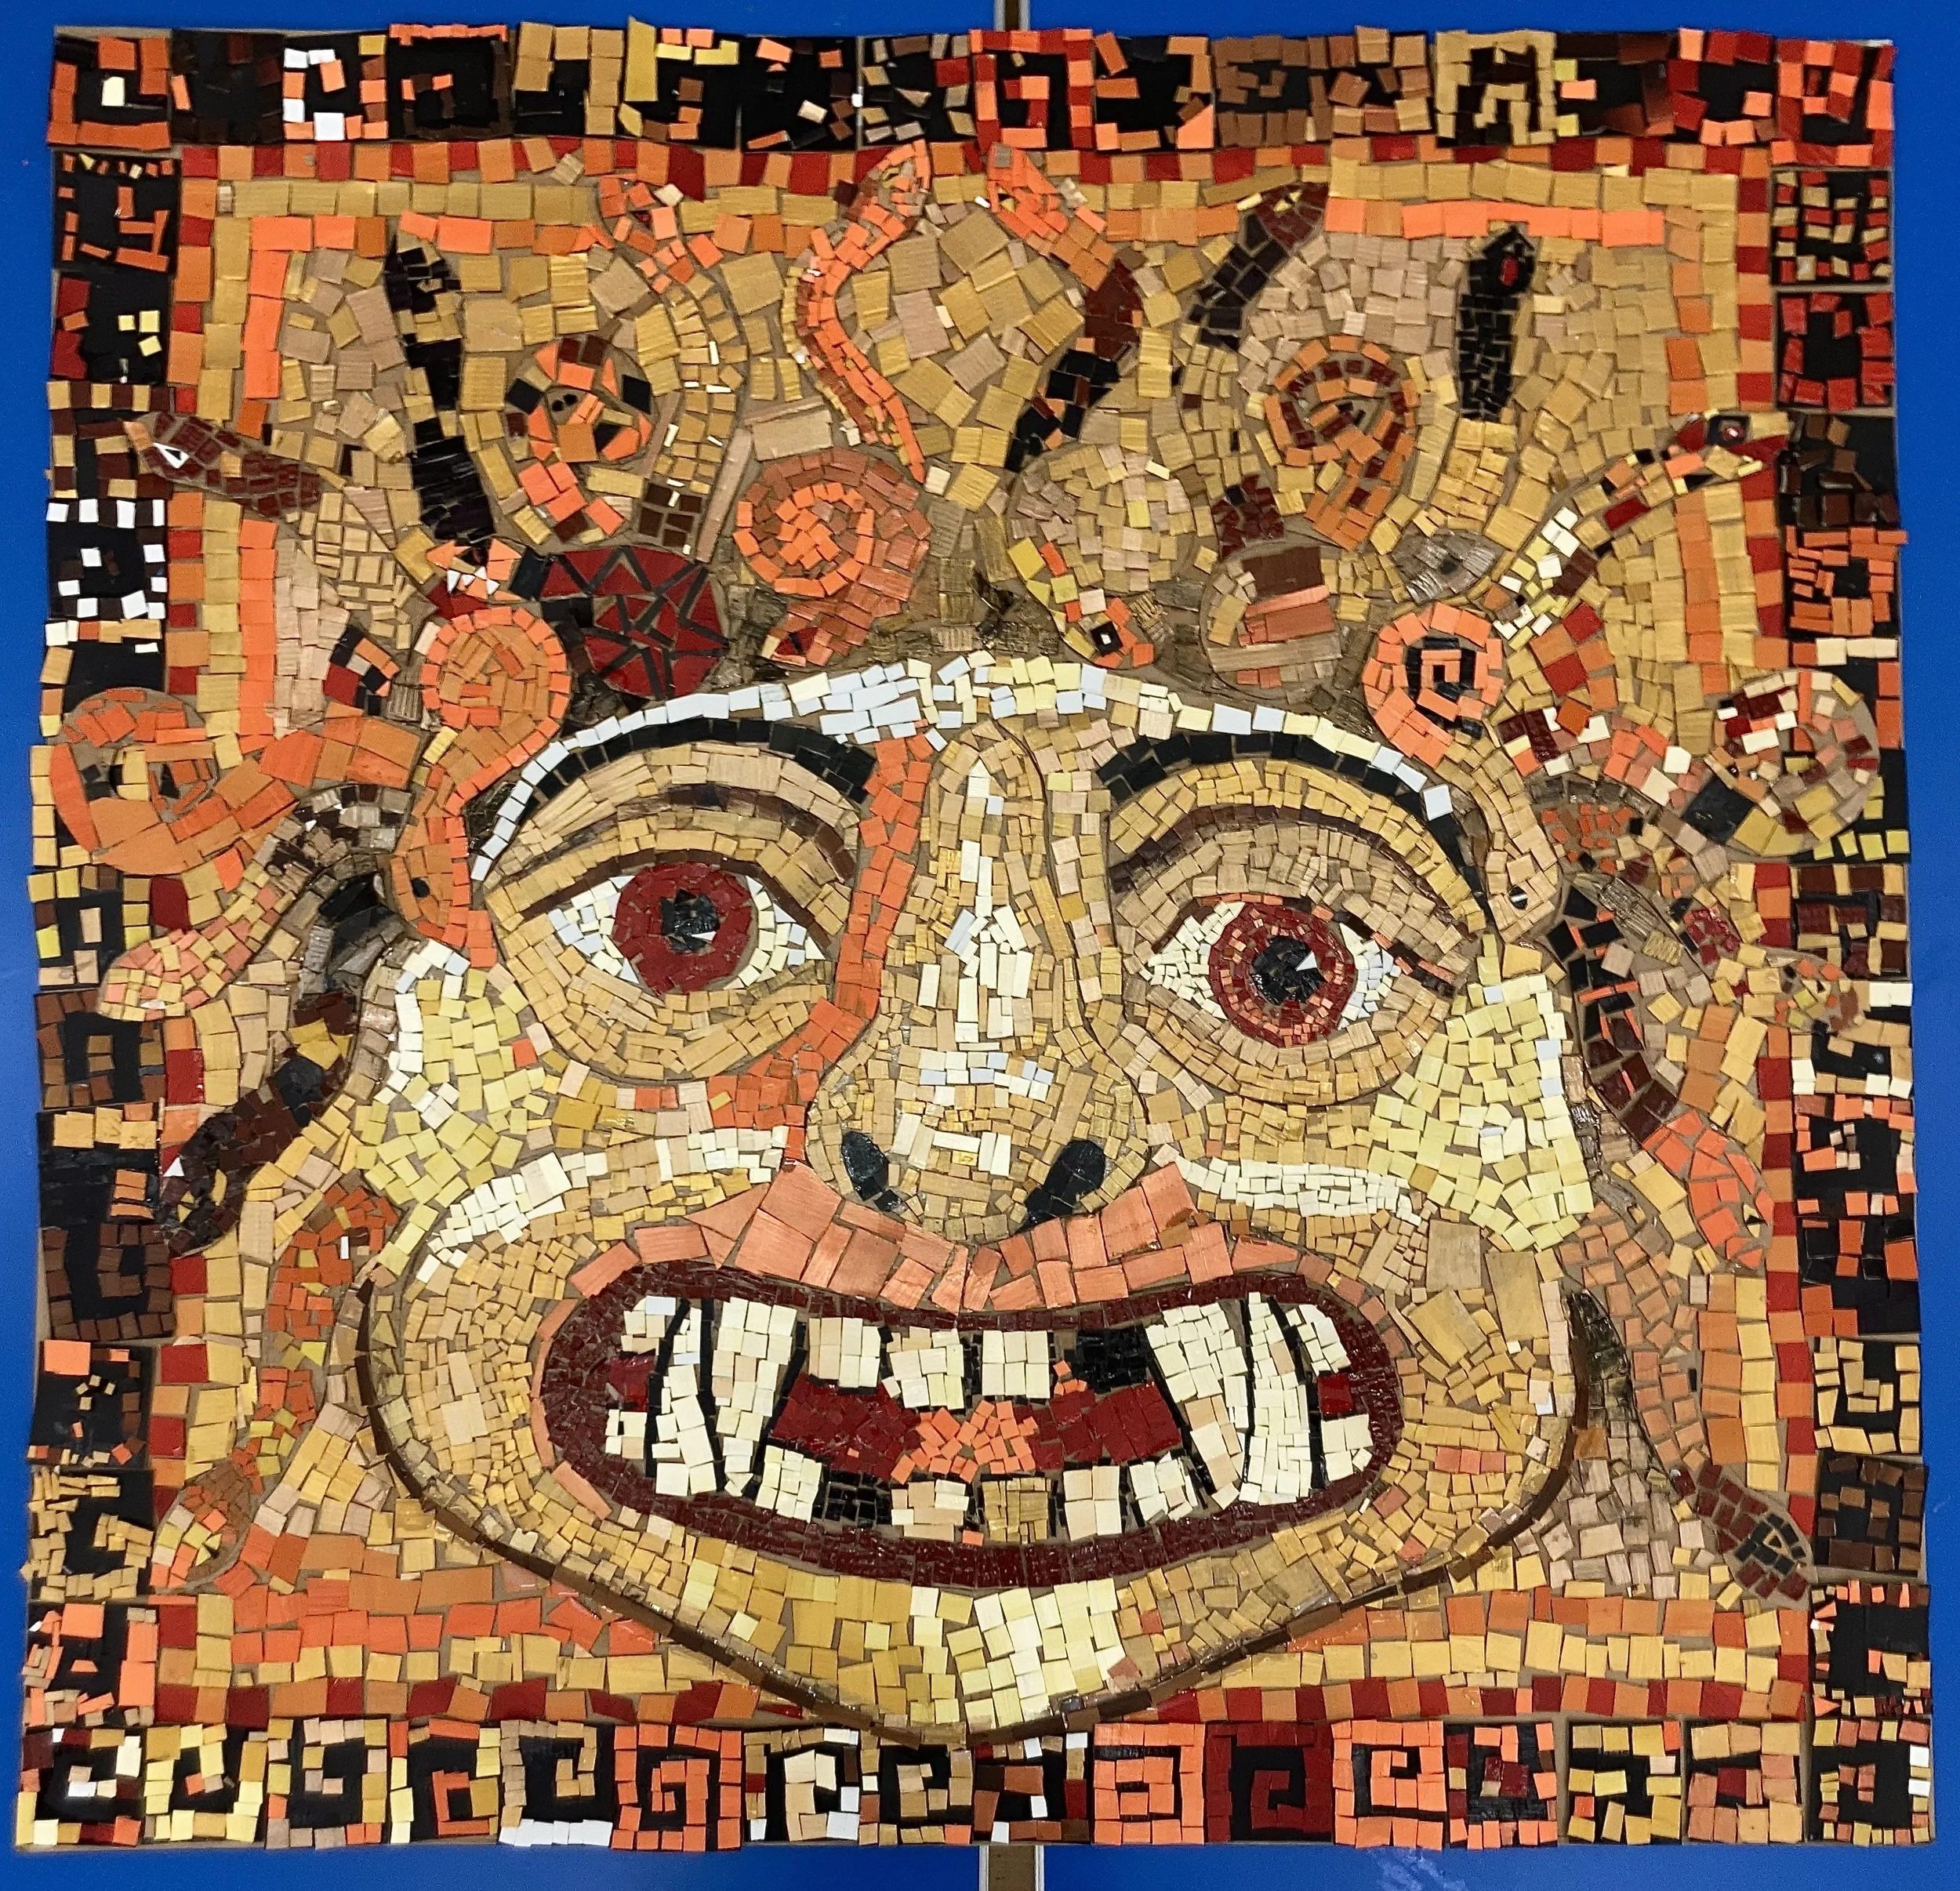
A fabulous Ancient Greek Medusa design created by the Year 5 pupils from Wiveliscombe Primary in Somerset. 2021
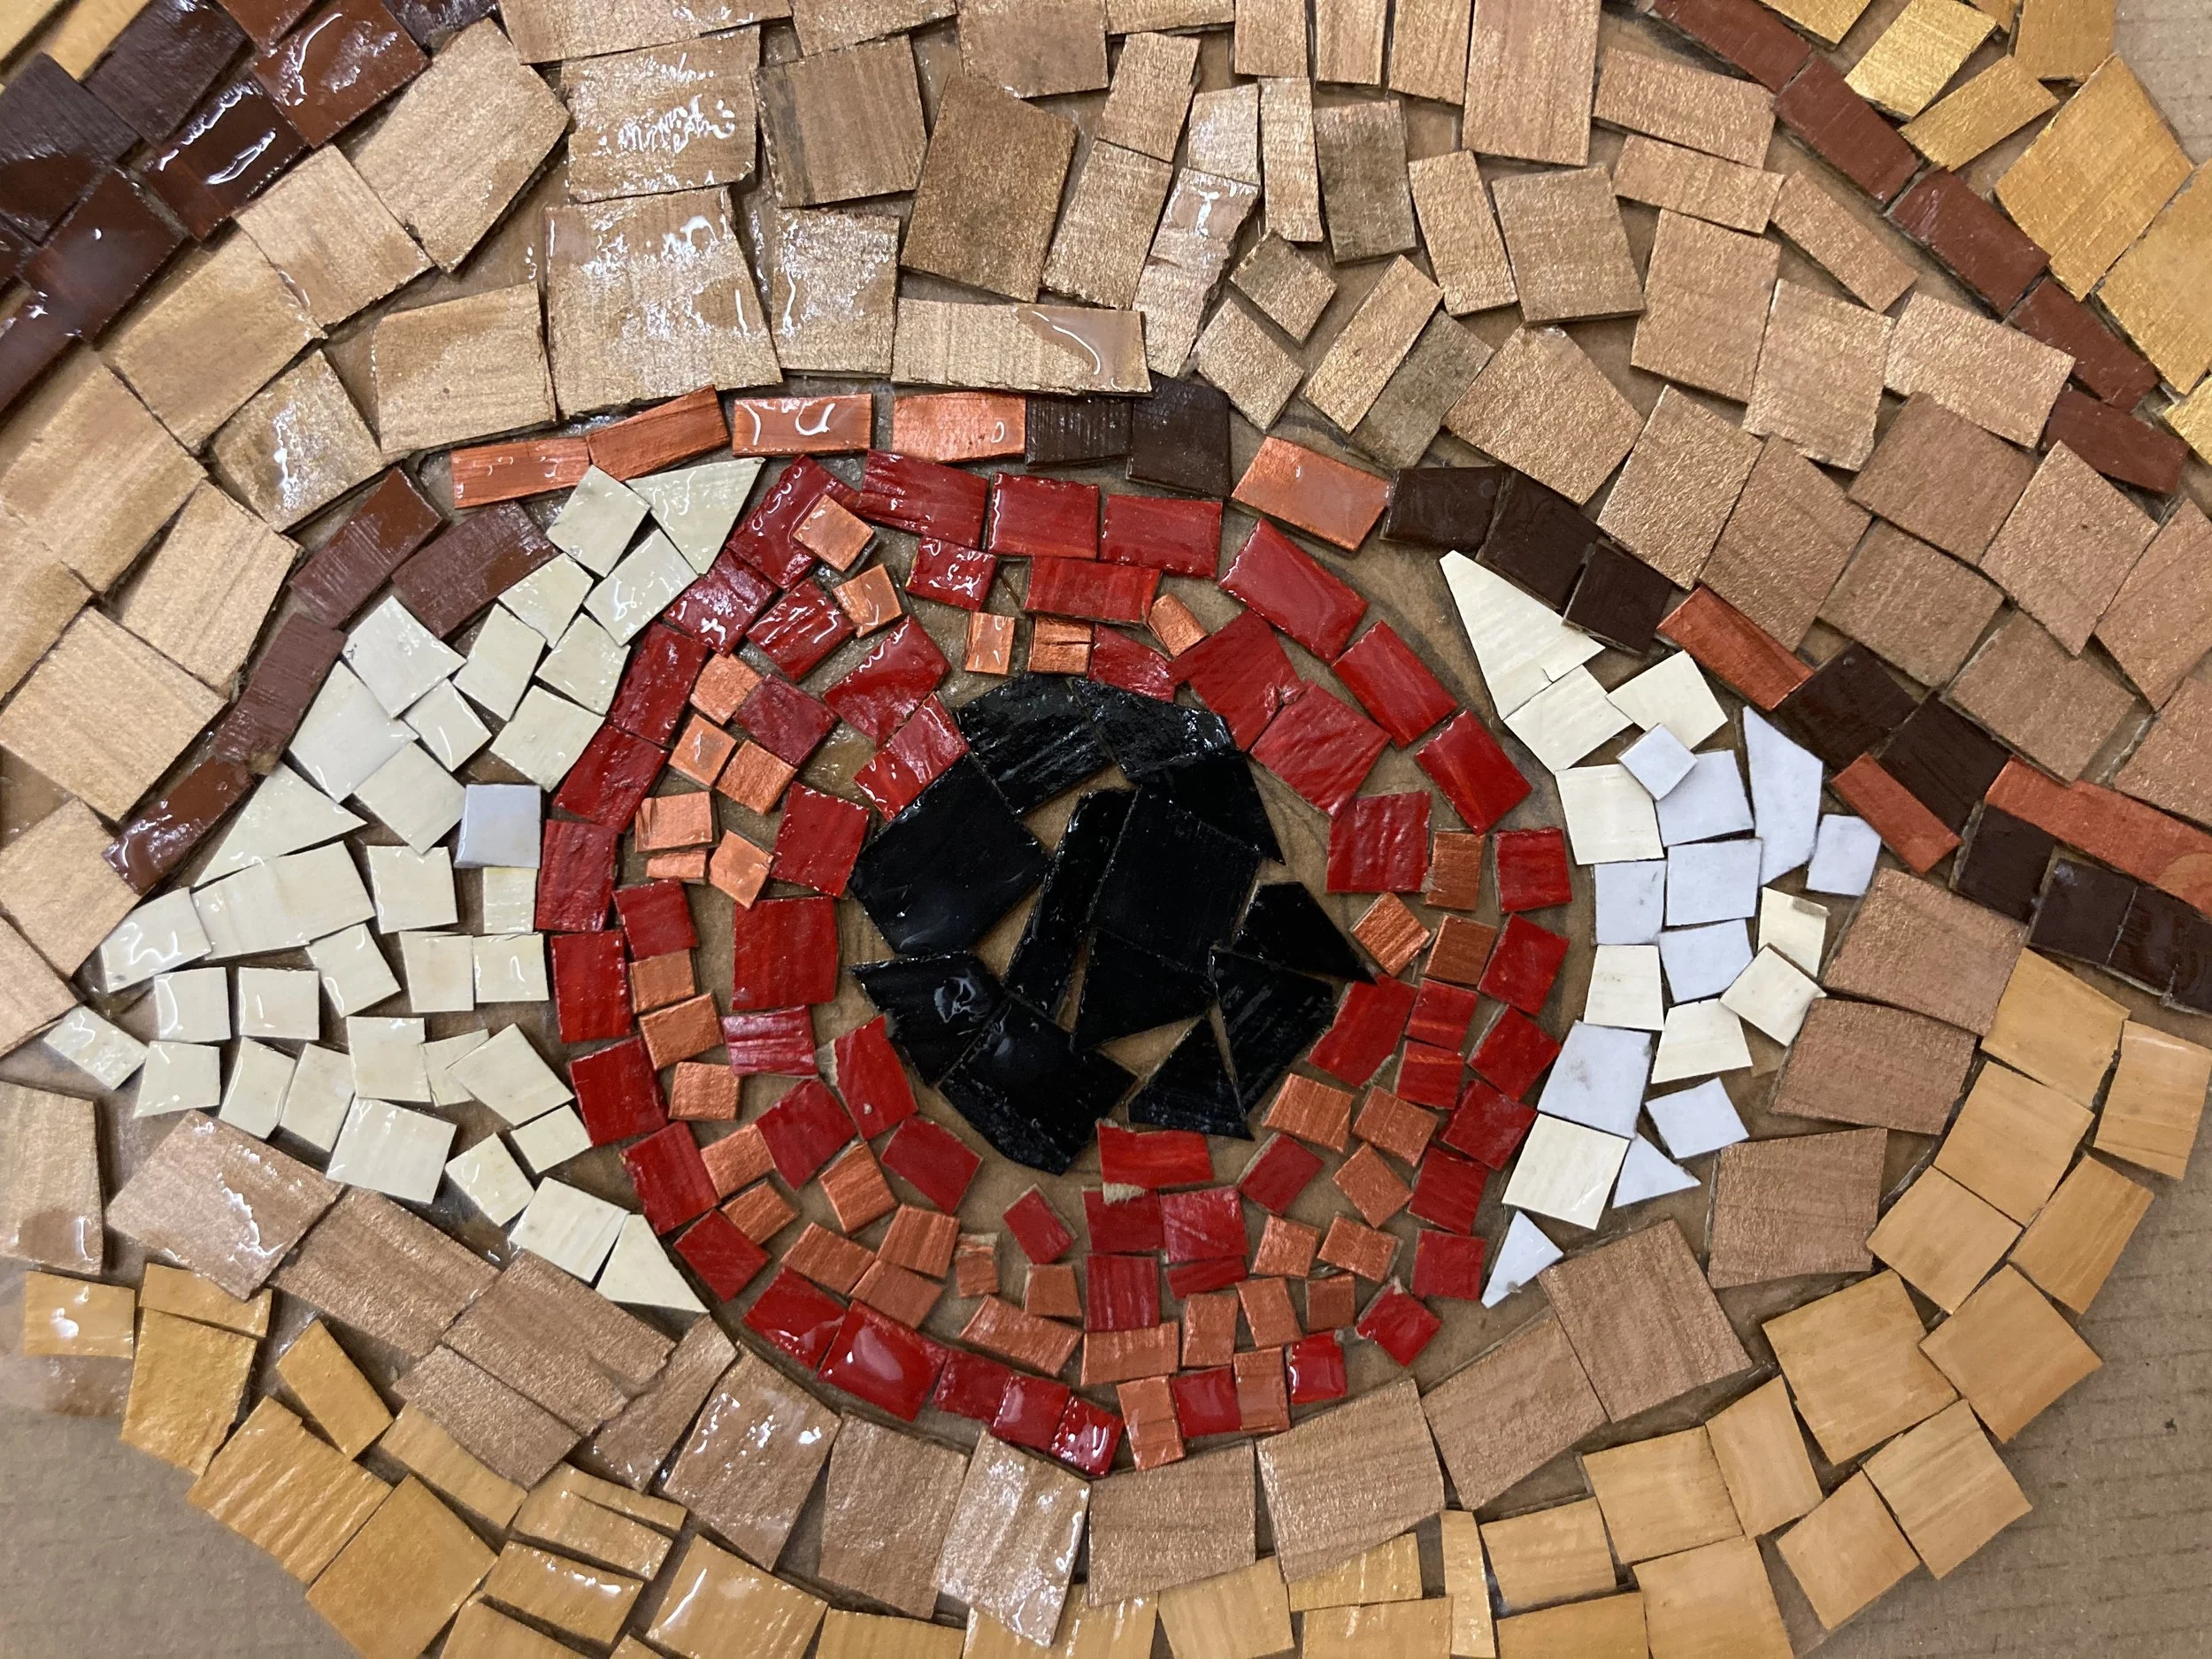
A close-up of Medusa’s eye from the above artwork.

‘Remembrance Artwork’ created by the KS2 children from Jubilee Park Primary. 2018
and . . . over the years I’ve shared this technique many times online, here’s a post from Twitter in 2021 . . .

. . . and in return, many teachers have shared their versions of this technique with me. Mrs Potter has used the same basic technique here, but speeded things up even further by colouring the cardboard with chalk pastels. Very effective.
