Paper Cup Fighter Plane

Paper Cup Fighter Plane
So, I’m still exploring paper cups currently and I’ve really enjoyed putting together this ‘Fighter Plane’ project. I’ve based mine roughly on a Spitfire, but it’s one of those projects that you could easily adapt, or add to. I’m already thinking about making an early biplane in a similar way, watch this space.
Anyway, this project is another where you can virtually use up all of the materials you start with. I used one whole cup for the basic shape (explained in the video) and then, in order to make it more detailed and three-dimensional, I used a second cup to make the extras shown below. Younger kids would be happy with just the first few stages of this I think, and with a little help that would be achievable. Older kids, maybe those who liked more intricate making, would really enjoy trying to add the detail.
Here’s the video of the making process, it’s a long one for me, but I think this deserved it . . . I’m adding some clearer photos and instructions below if you need them.

So, halving the cup first, then taking one half and cutting it in two for the two larger parts of the fuselage (right). Then cutting the other half of the cup into three, two of these become the wings, the other makes the top of the plane with the cockpit. (left)

For the two pieces that become the wings I sliced off the points, make sure the wings are roughly the same thickness (trim if necessary) and put these to one side. (keep the leftover pieces)

The first of the thicker pieces is for the front section of the plane, I’ve pushed out the base end of the cup into a point to look like the front of the plane.

The cockpit and top of the plane are made from the other smaller slice of cup. To make this more flexible, I’ve cut small slits at the end (see pic) I’ve also made it slightly smaller by trimming off the end with the rim on. (I used this later, along with the other off-cuts.)

The last piece is the other thicker slice. This makes the back of the plane and the tail. I’ve folded this in half and then cut out a shape that makes the tail stick up slightly, you can see the shape I’ve removed in the background here.

Then, you can start to assemble these five pieces. The cockpit sits on top of the fuselage, it can stick out a little at the back, that doesn’t matter. I usually use a little bit of glue (wood glue, stronger PVA is good) and hold the pieces together for a little while with masking tape (this can be removed later)

The back of the plane fits on like this . . . again you could glue this (where my thumb is) and put some tape on to hold it in position on both sides.

I’ve glued both wings on and then taped them, this is only temporary, to get them into position, the next stage will add some strength . . .

To make the wing structure stronger I’ve glued in a lollipop stick. If you don’t have one you could use lots of other scrap stuff, a stronger strip of card, a thin piece of wood, a piece dowel, a thin garden cane, anything that has a little strength to it, but which is safe to cut.

Younger kids would be happy with this I think, but I wanted to add more sections to the plane and more details, firstly using the leftovers from the first cup.

One of the leftover pieces was perfect for making the tail fins, I just cut this in half so I had one for either side . . . see below

Tail fins glued and taped into position.
I then decided to grab a second paper cup and make some more similar ‘slices’ to build up the underneath of the fuselage, and the underside of each wing. You can see these in the video clip. Basically, they repeat the same process as the initial stages.
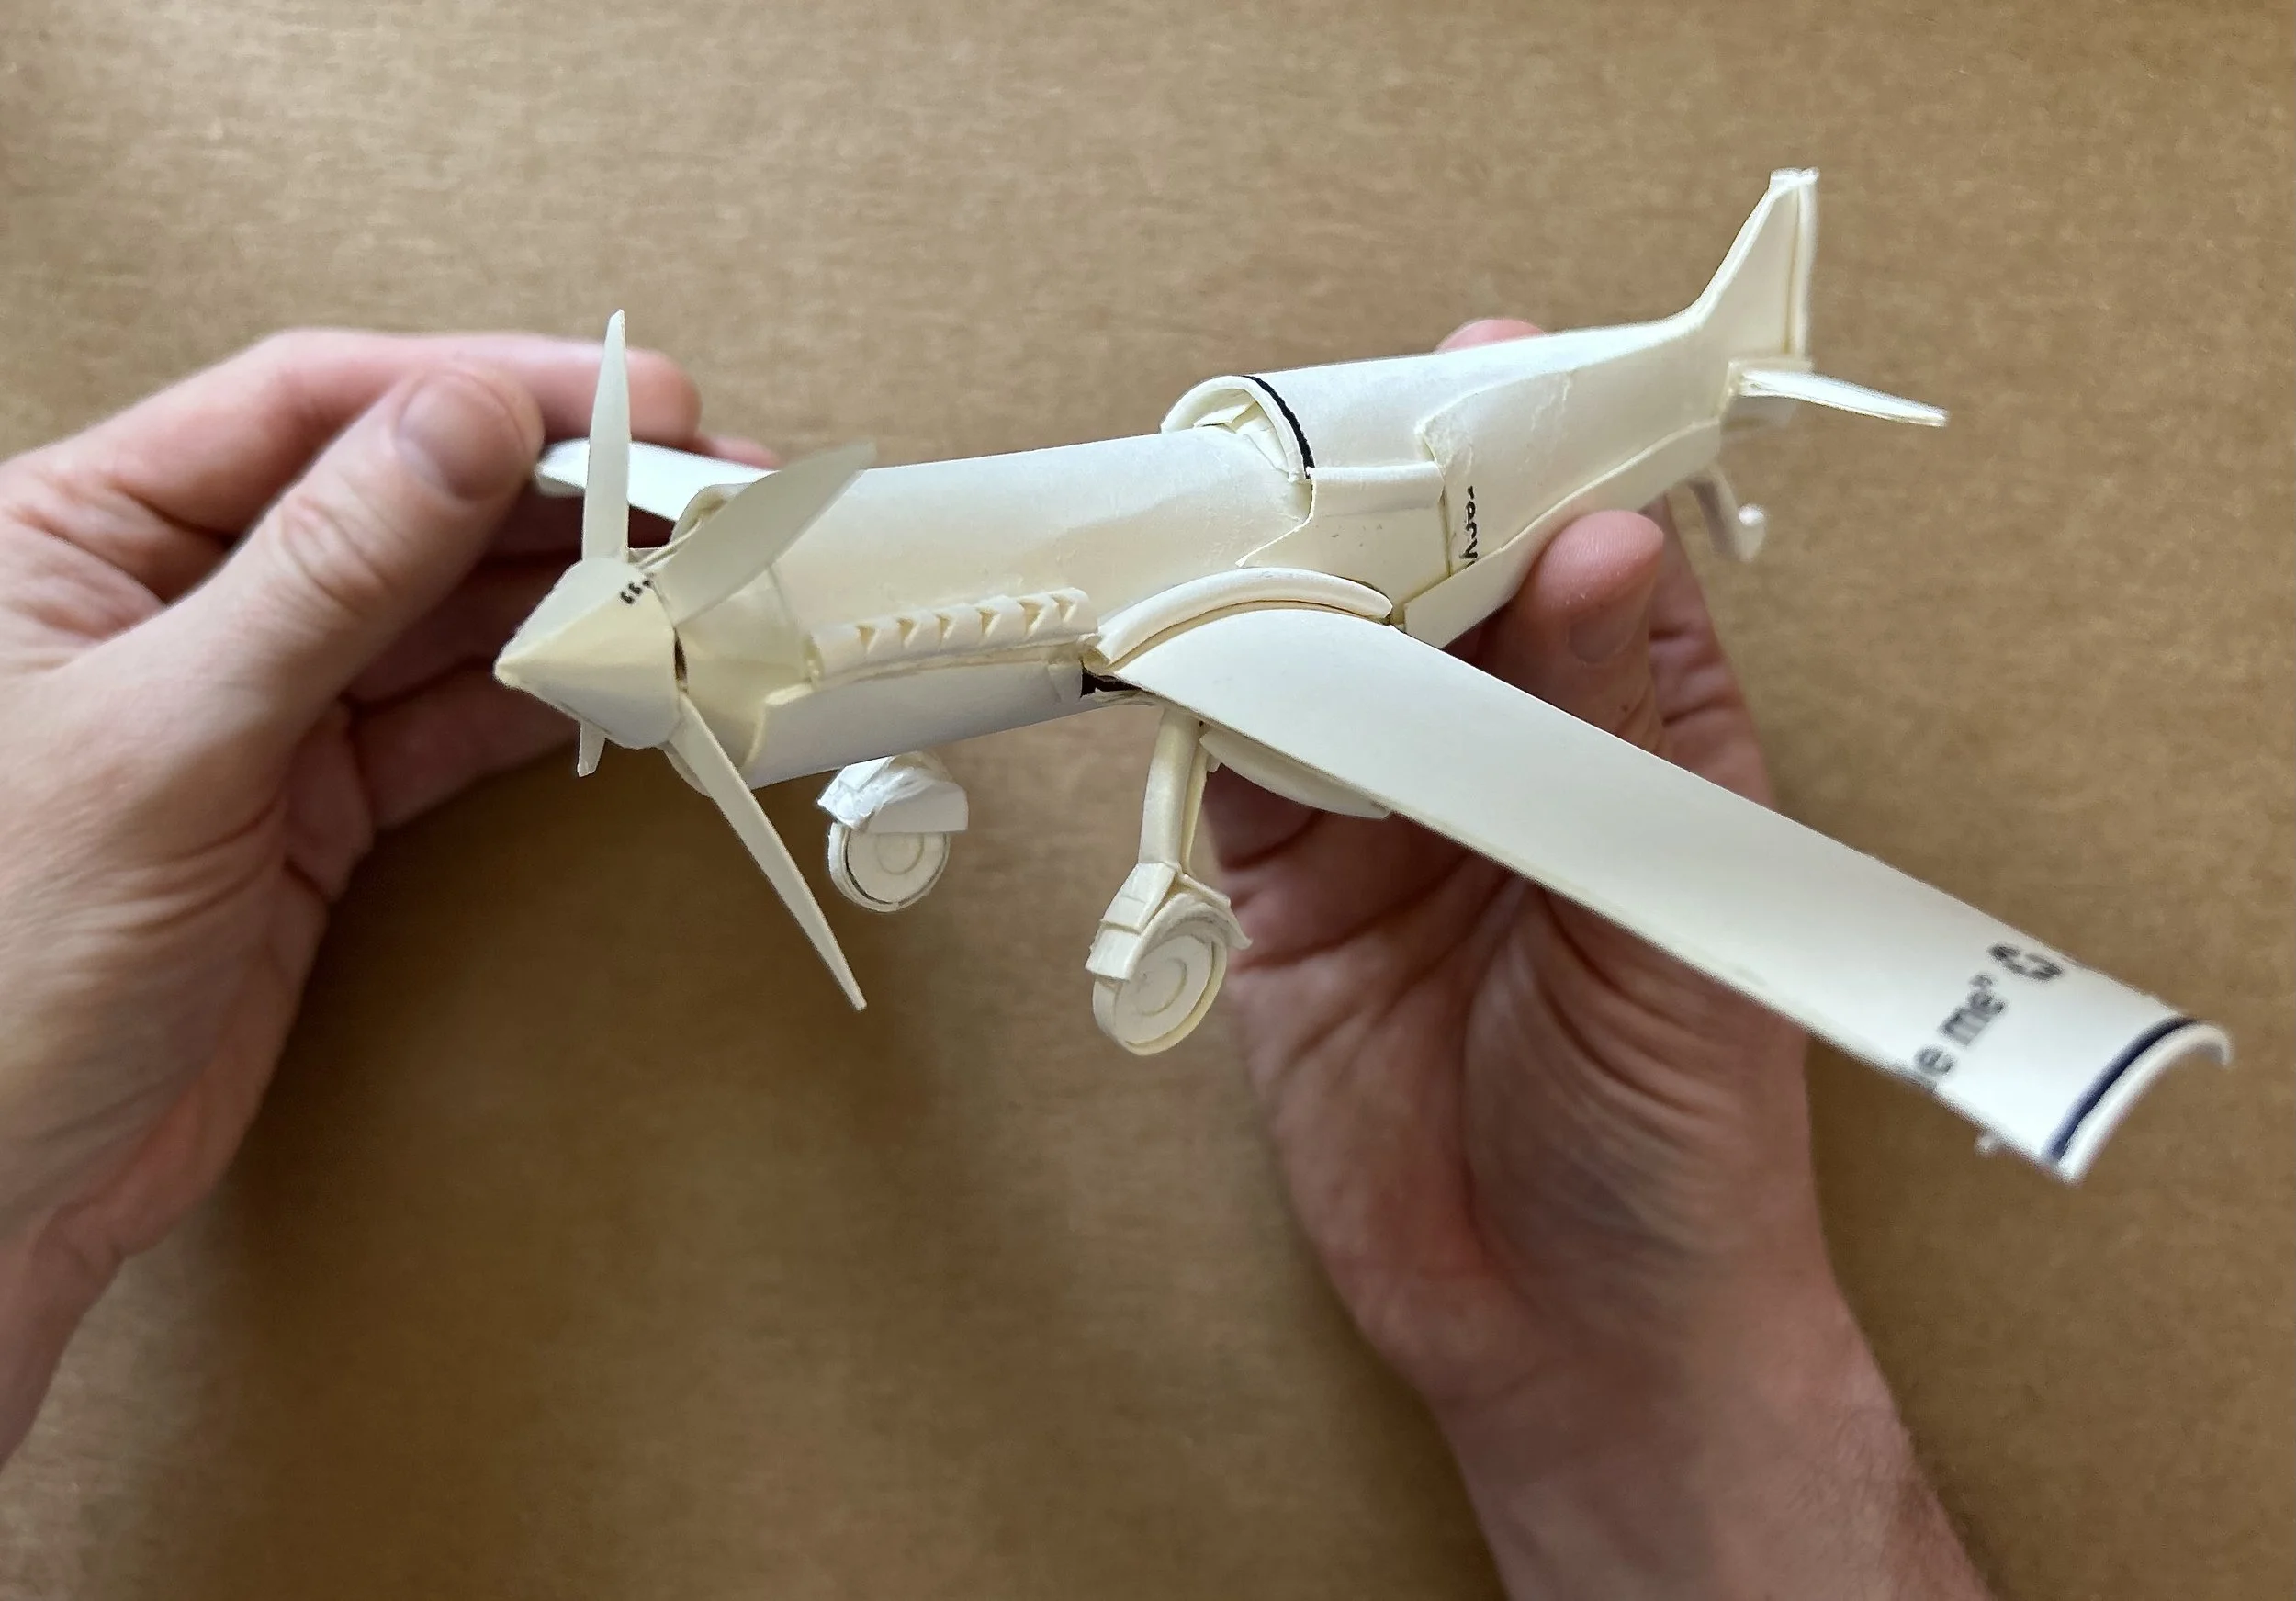
You can see here, a couple of cylindrical pieces have been added to the underside of body of the plane, one at the front, one at the back. These can be glued on, slightly overlapping to give them some strength. Now, what about those other details? . . .

Well, you obviously don’t have to make all of this stuff! . . . and I’m not going to go into detailed instructions of everything pictured here, I just looked at the photos I had as reference, and tried to make wheels and other extra details, just by cutting shapes out carefully, using a hole-punch, and trying to us the ‘rim’ of the paper cup for the parts I wanted to give added strength to.

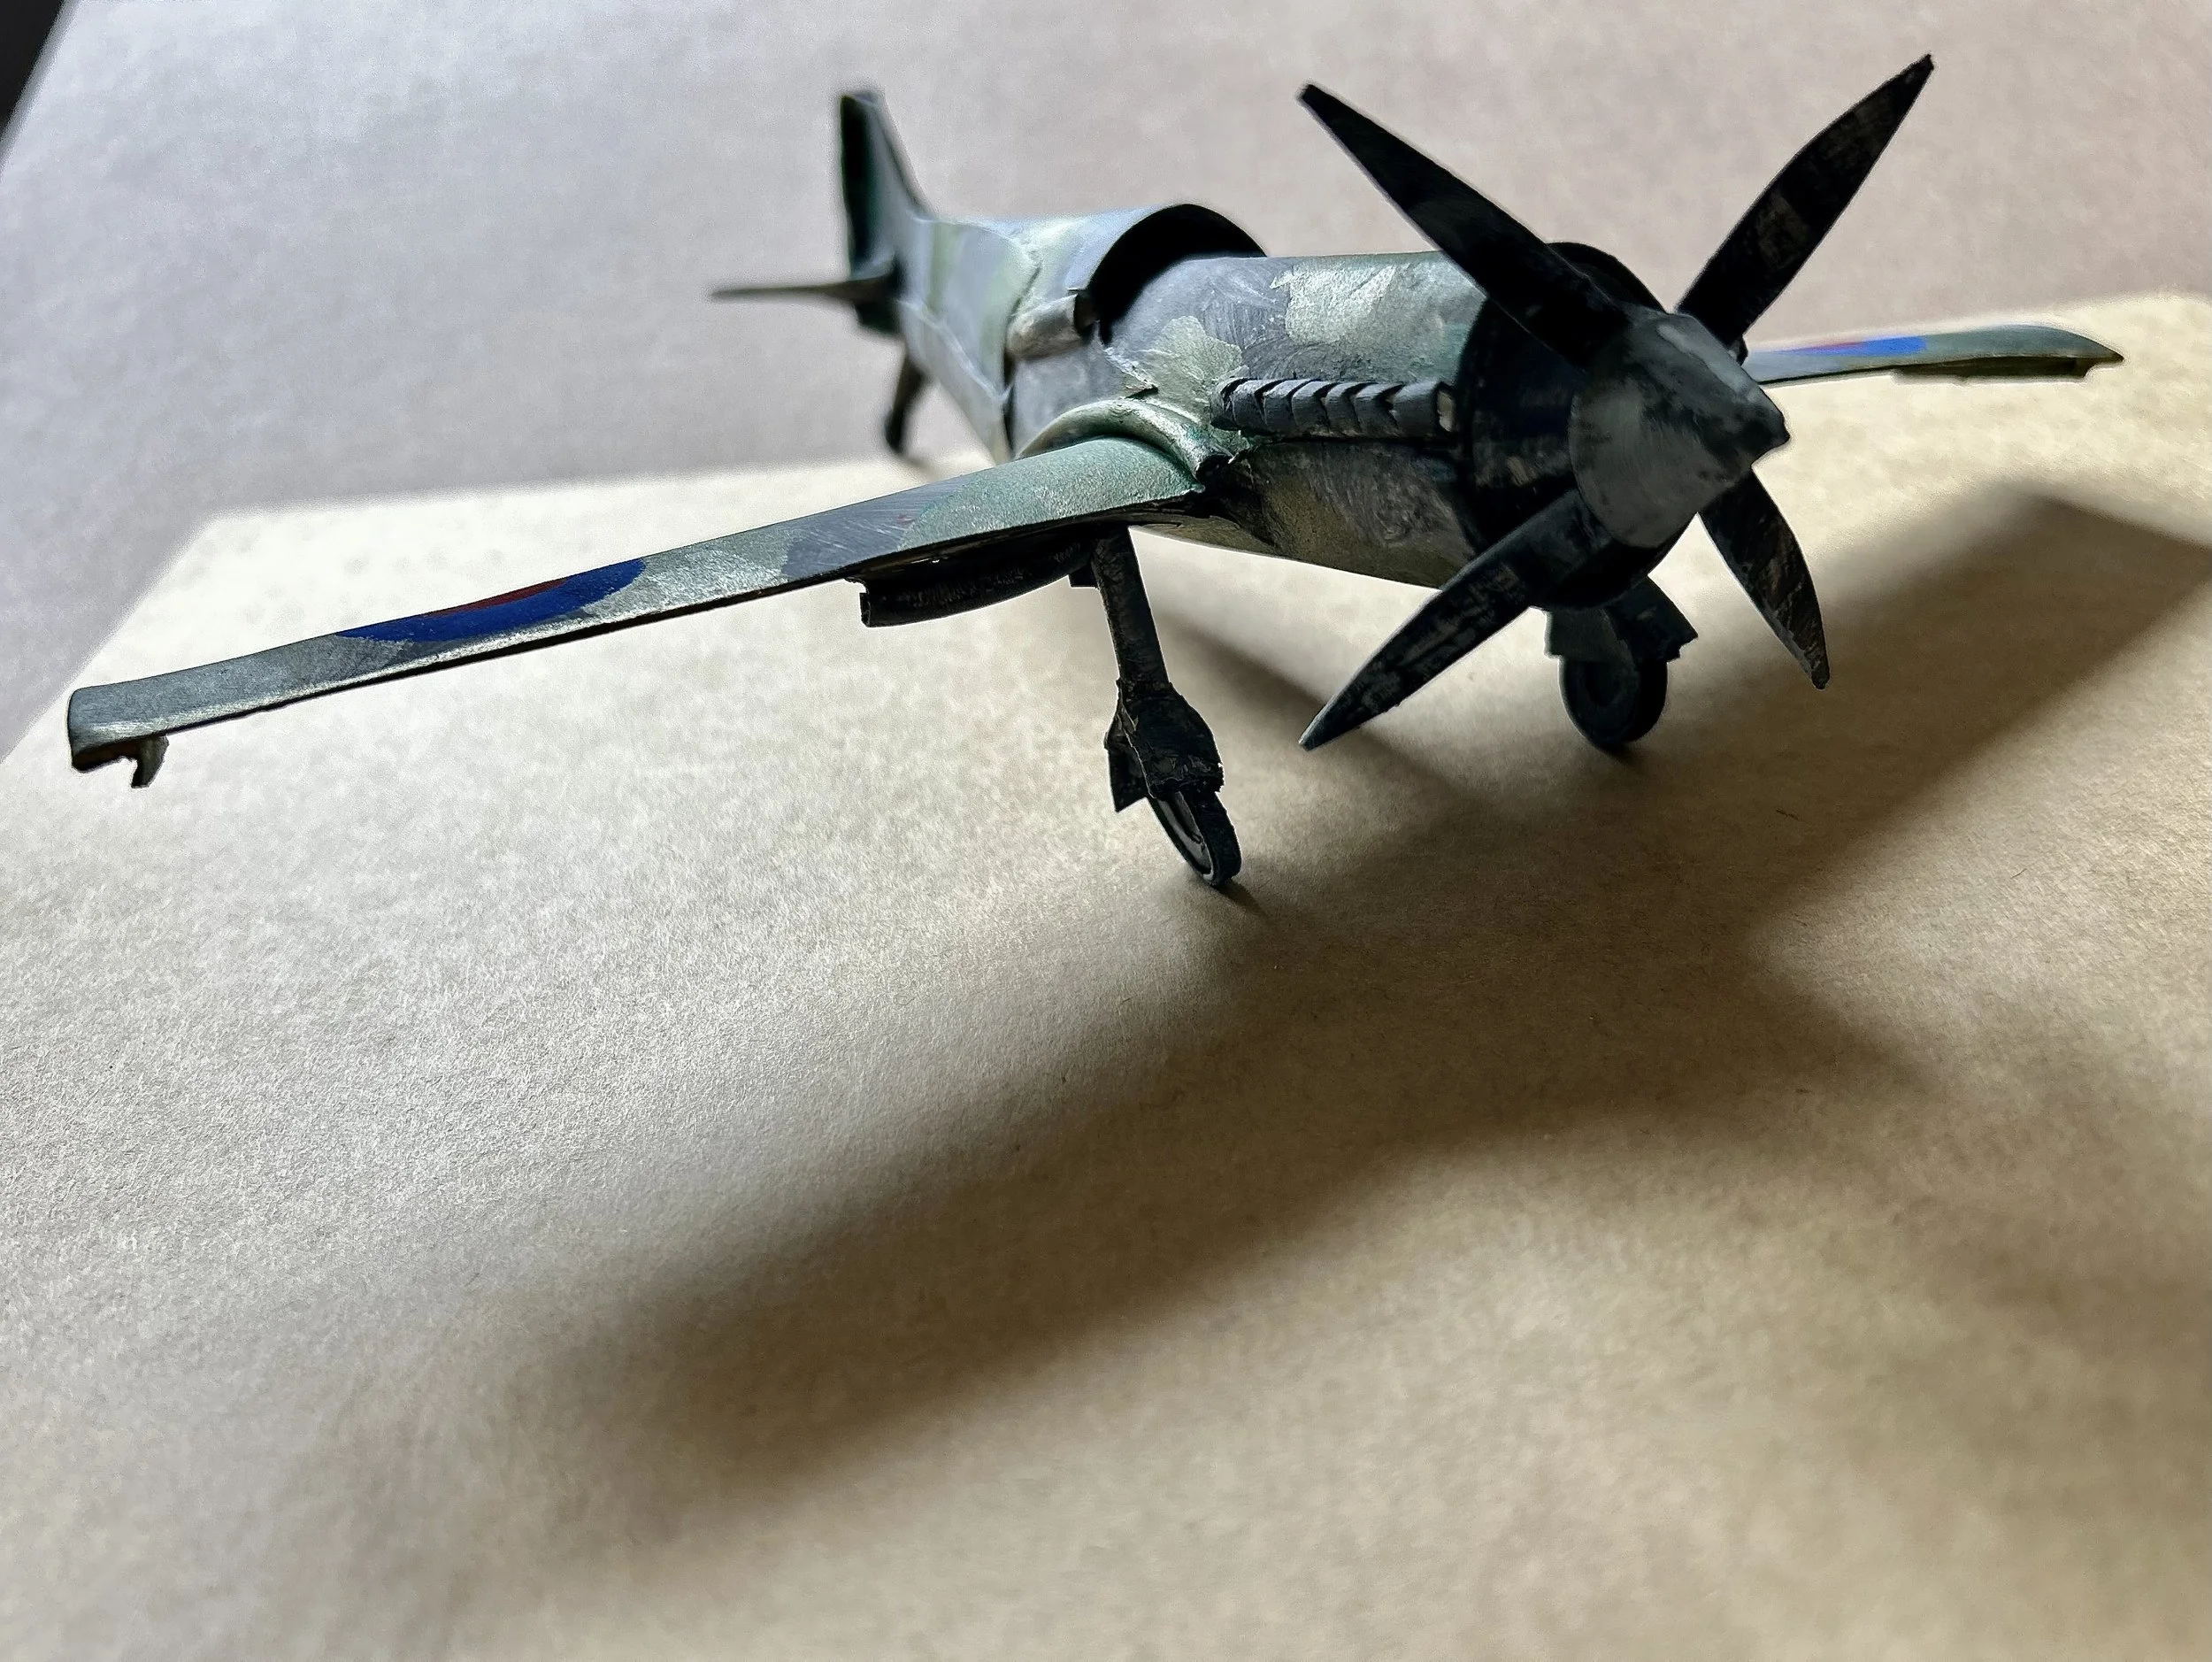
I also cut out four propellers (use one as a template to get them equal) and I made the nose cone by just cutting out a slightly larger circle, cutting one slit into the centre, and pulling it into a cone shape. These were then glued into position. A couple of tips as this is fiddly . . . you can see in the photo that I’ve snipped off the point of the cone on the plane so that I’ve got a flatter surface to stick the propellers onto. I also glued them on, then waited for that to dry before gluing on the nose-cone. Then you won’t knock off the propellers!
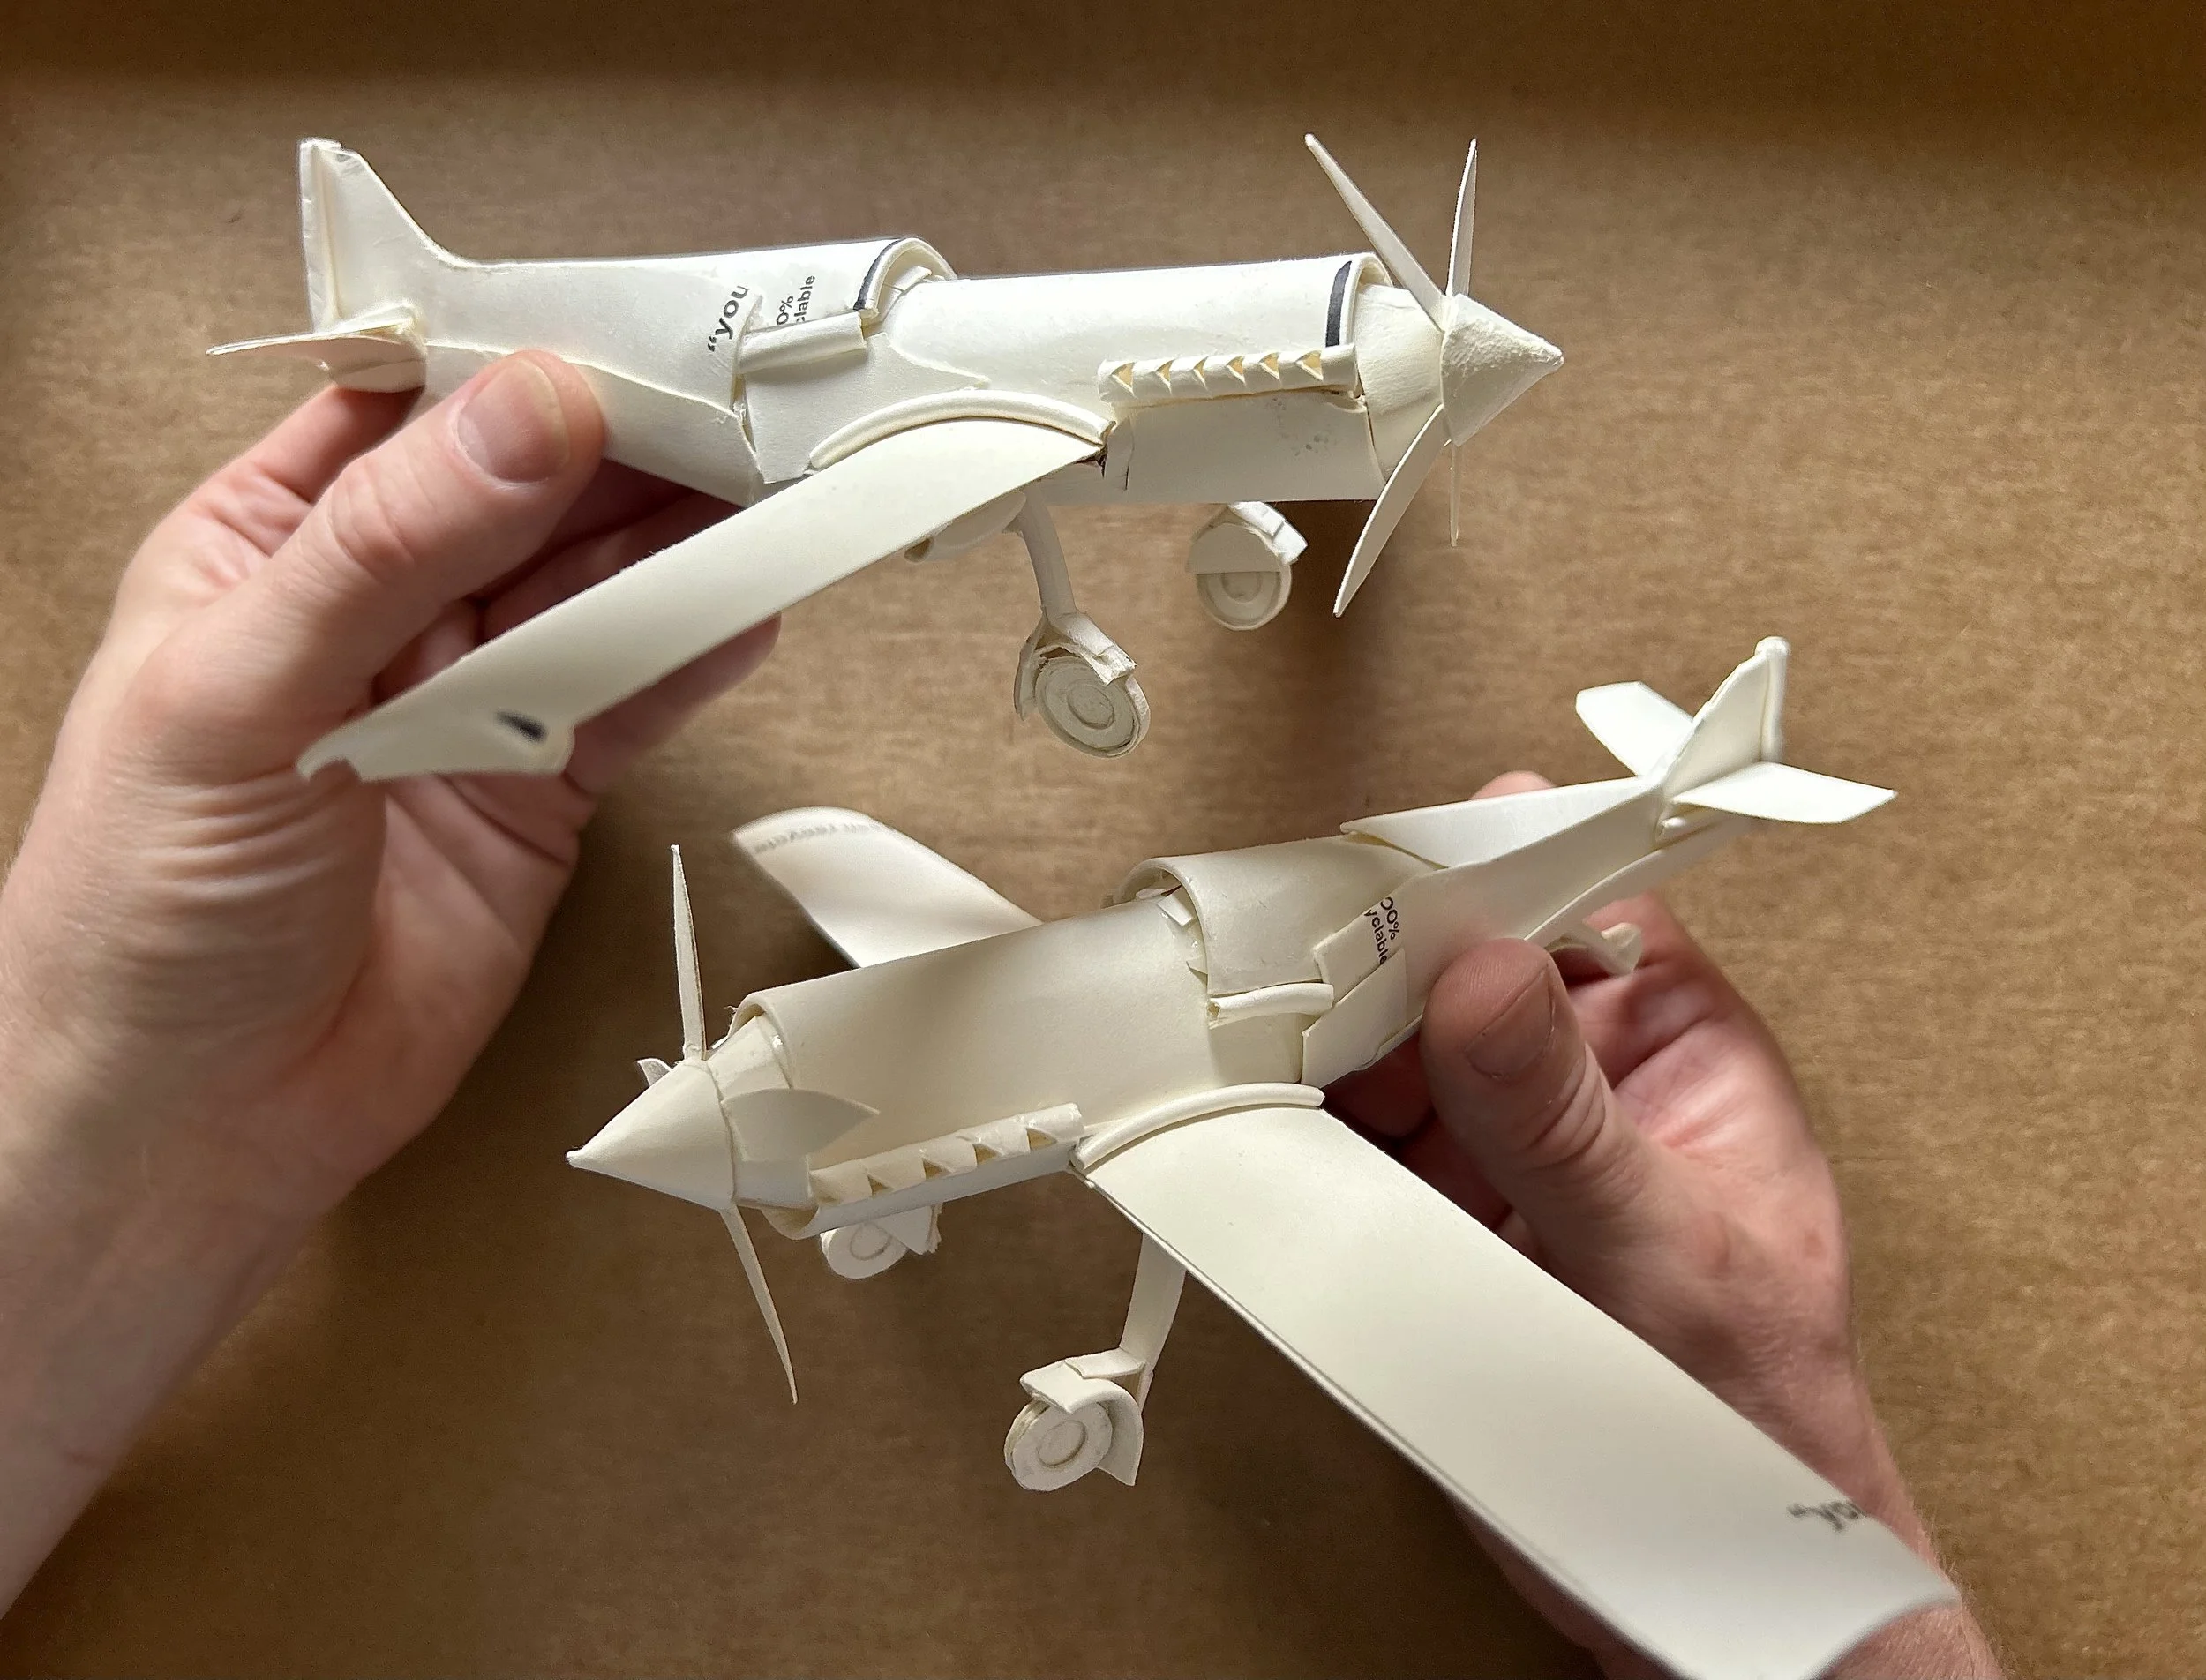
You can see on these photos that I’ve added the details to my models. I’ve not only glued on the ones I’ve made but even used up other bits of the leftover cups. Small pieces to patch up any gaps, or to add extra trim, like the small pieces either side of the cockpit. For the wheels, I either cut a small hole and slid them into the structure (gluing them in) or, I opened the end of the wheel housing up, cutting a slit (the other end from the wheel itself) and opening this up to make two flaps, then glued these onto the base of the wings. (I left this upside down to dry so the weight wasn’t rested on the wheels)
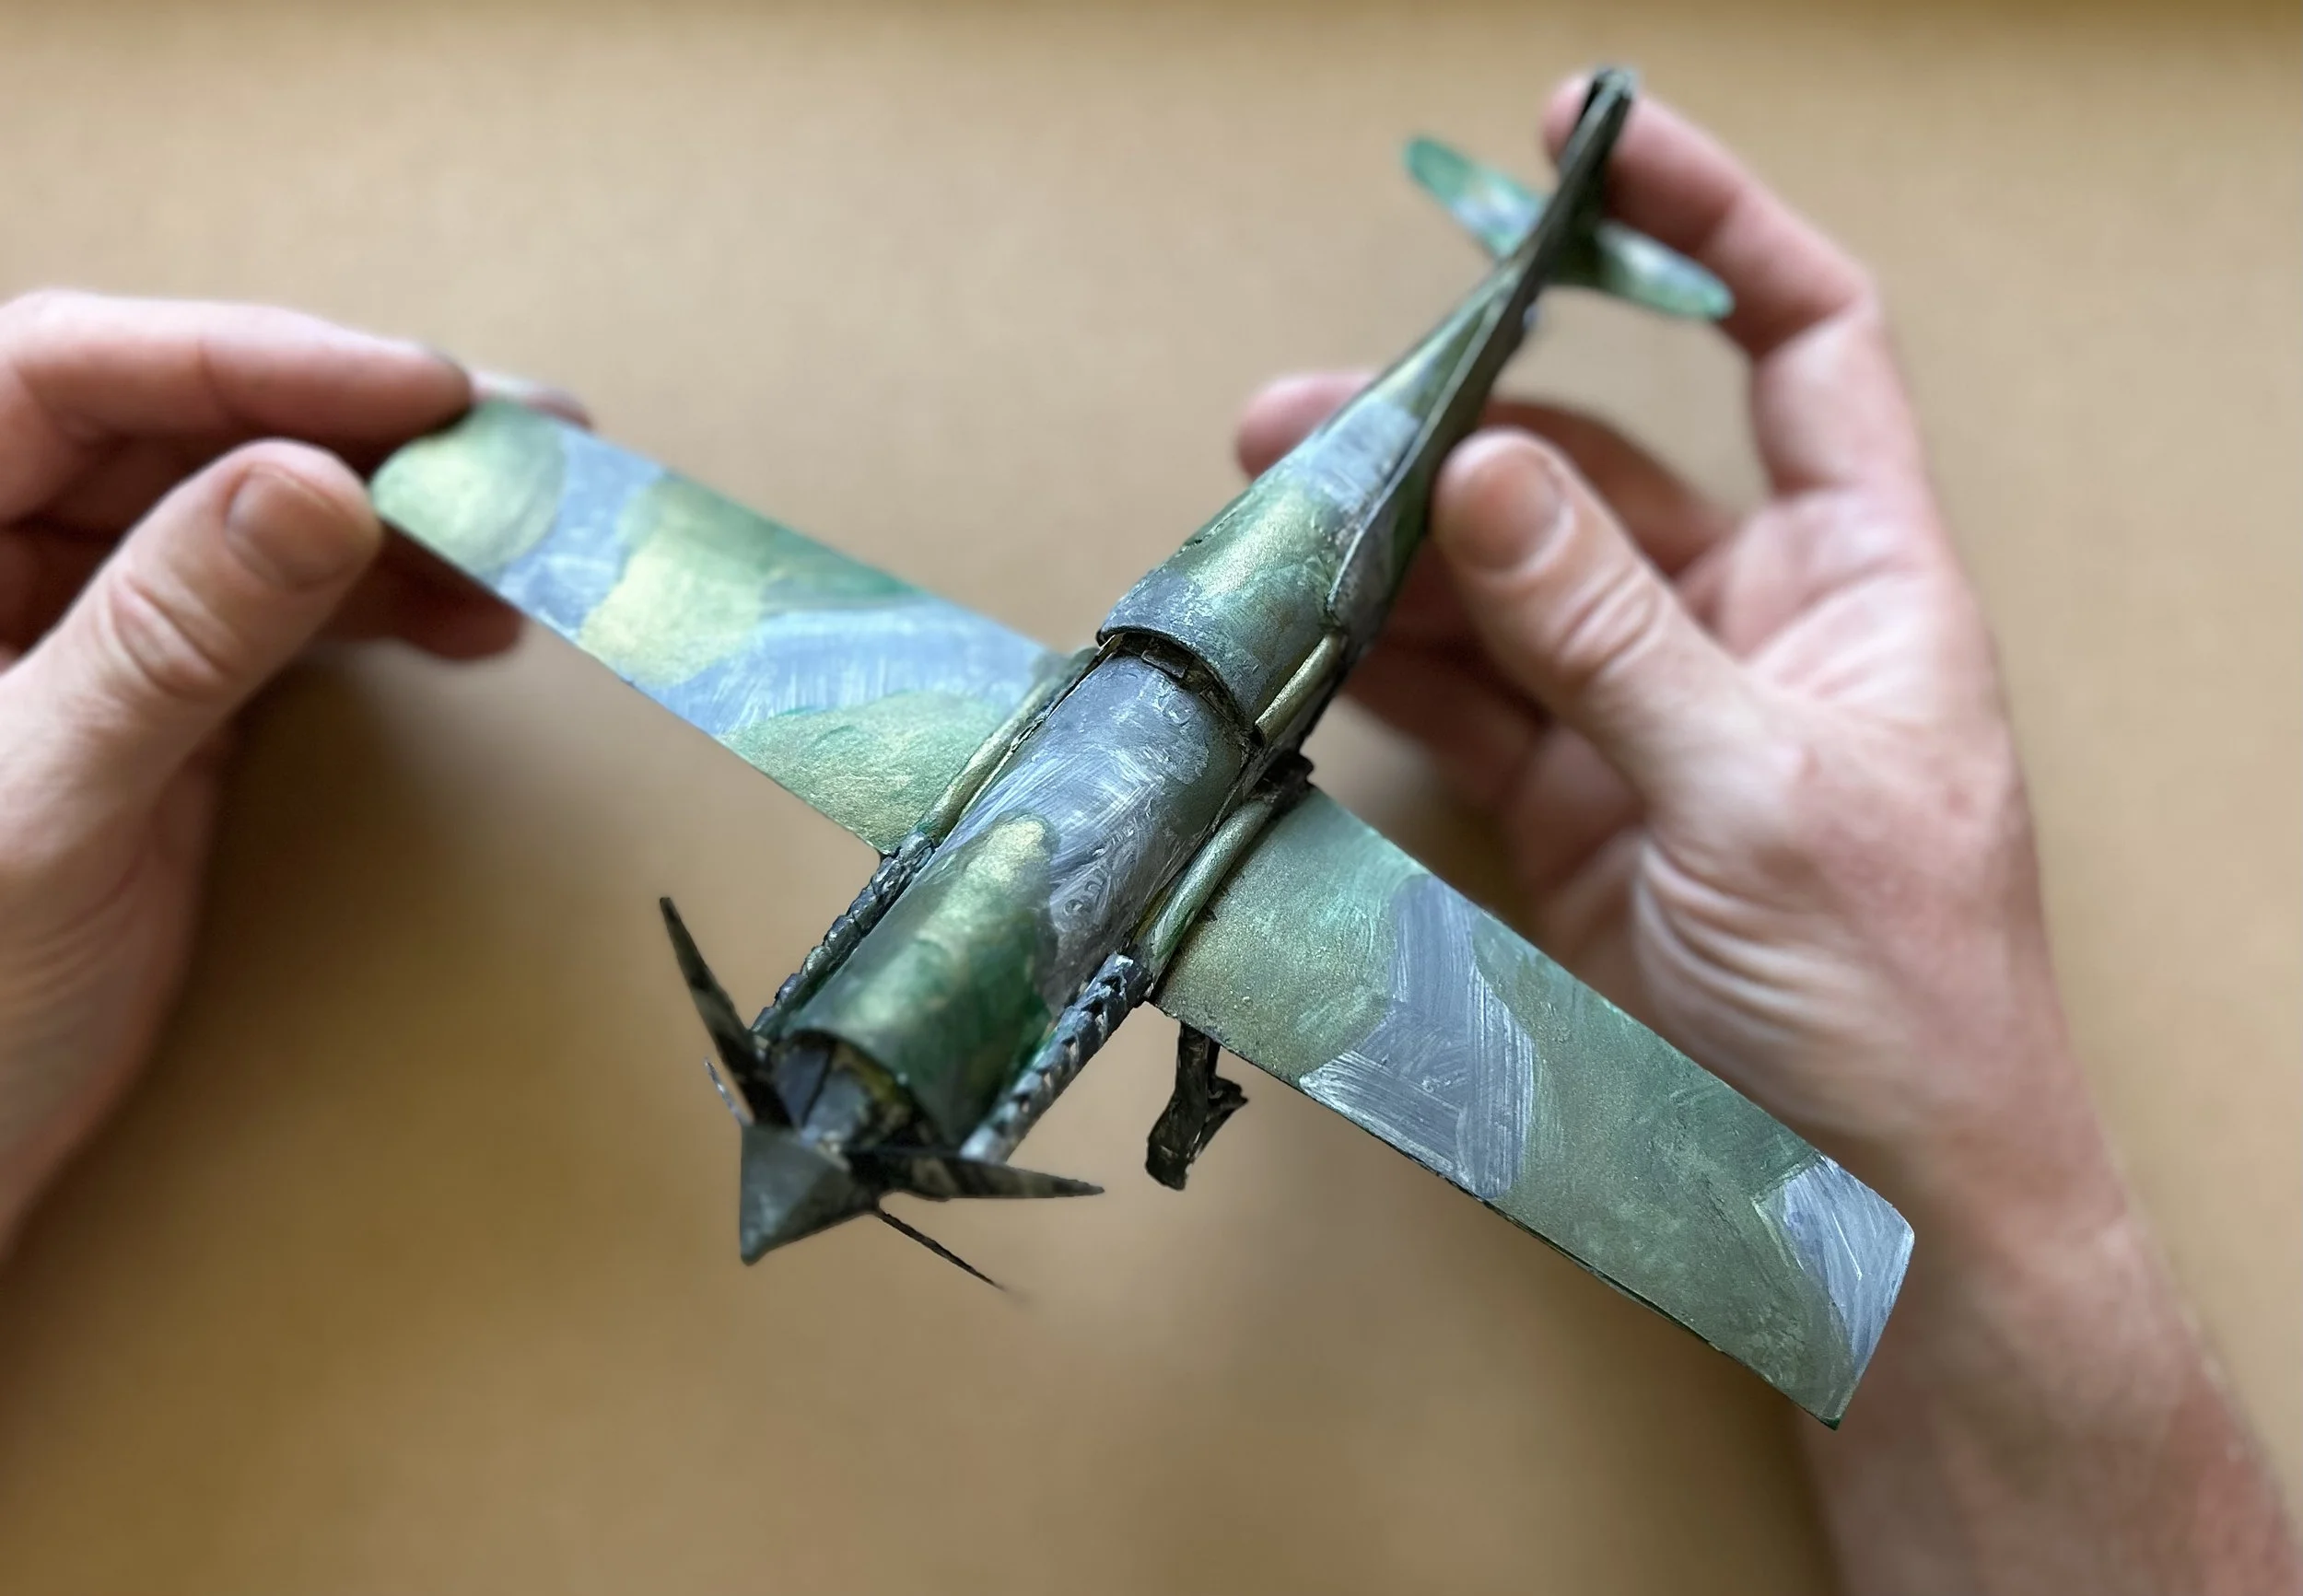
Painting is obviously up to you, your choice of colours, your design, etc. But I used a little bit of metallic paint mixed with mine which you can see clearly here. You might also need to use acrylic if you want a strong covering of colour, the paper cups have obviously got a slight waterproof covering, so are trickier to paint with just regular water-based paints. I actually used a mixture here, which I often do, acrylics mix okay with other paints and you can play around. I didn’t paint this particularly carefully, I never really do.
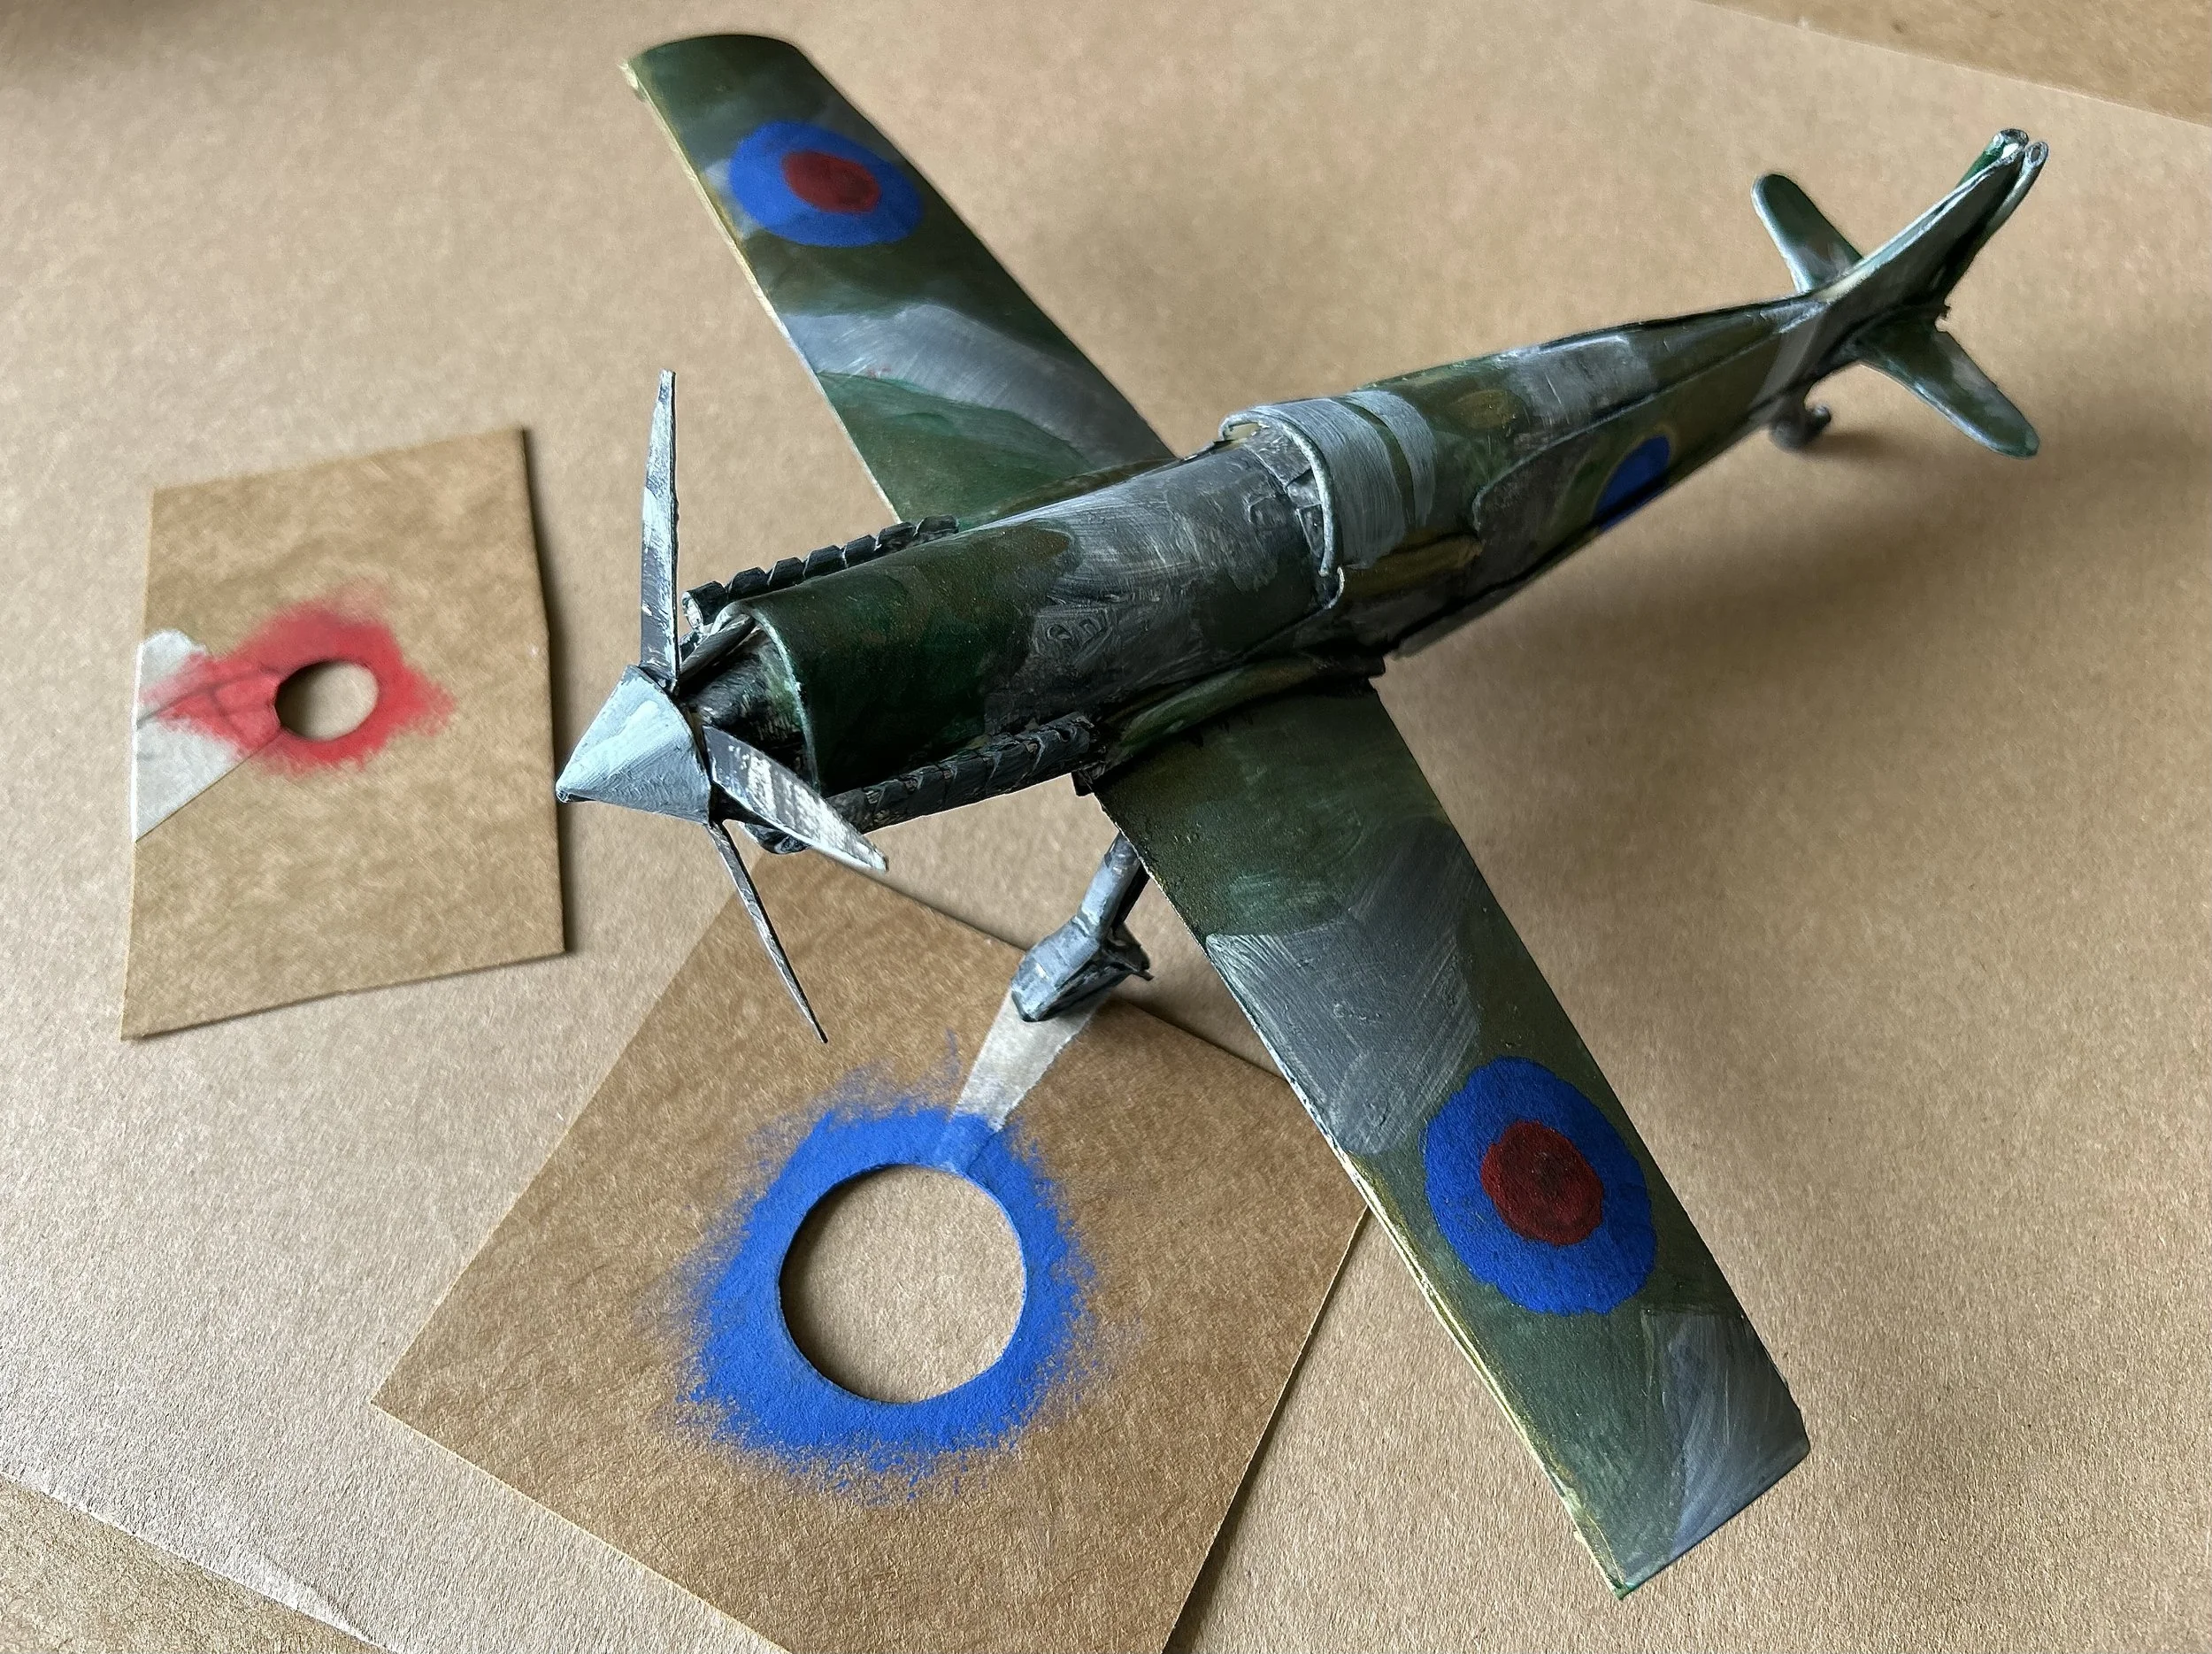
To make the designs on the wings, I cut out two little stencils from thin card, and then sponged the paint on. This obviously makes a ‘circle’ easier to achieve, and keeps it symmetrical. You just need to make sure one colour is dry before you do the smaller one on top. Patience!
So, there we are, a few very simple paint details, highlighting the wheels and the nose-cone, and it’s done.
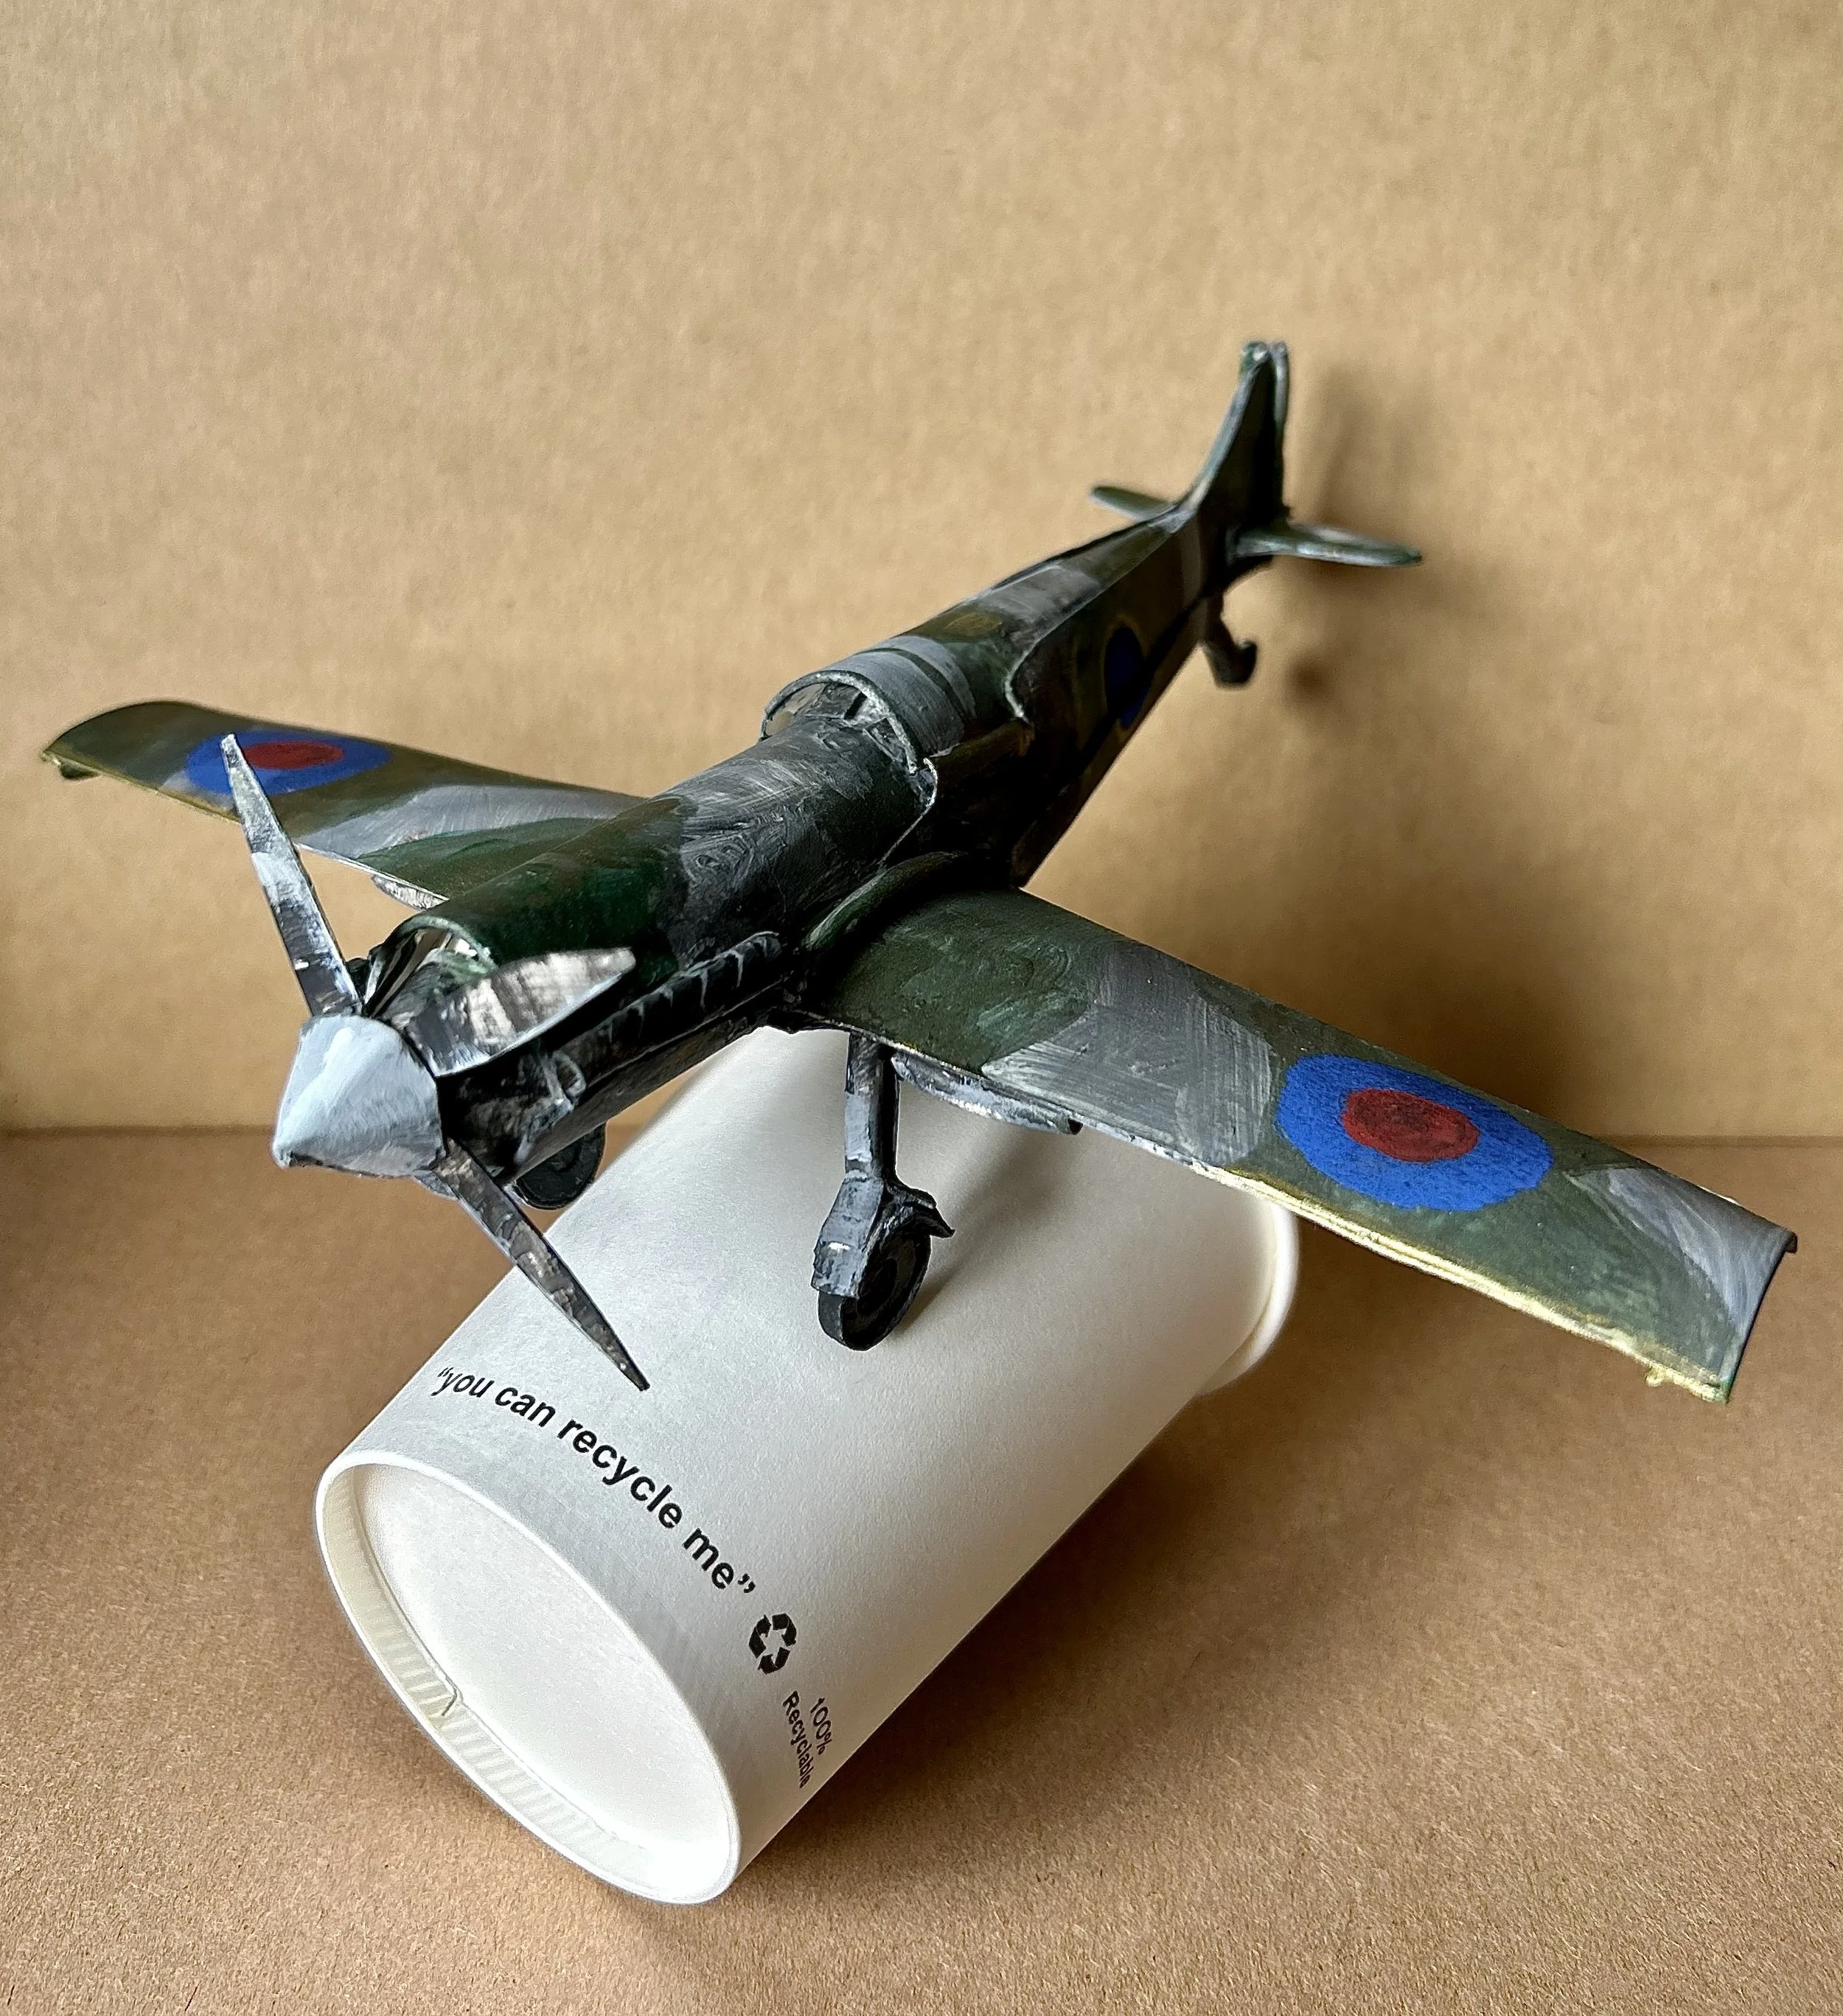
Who’d have thought that this little plane was hiding inside a coffee cup.