Paper Plate Owl

I’ve made birds from paper plates for many years now. The textured edges work so well for feathers, and they’ve always inspired me. This OWL is an example of what I call ‘pure making’, which is where the projects I devise create no waste, with all of the pieces of the original material being incorporated back into the design.
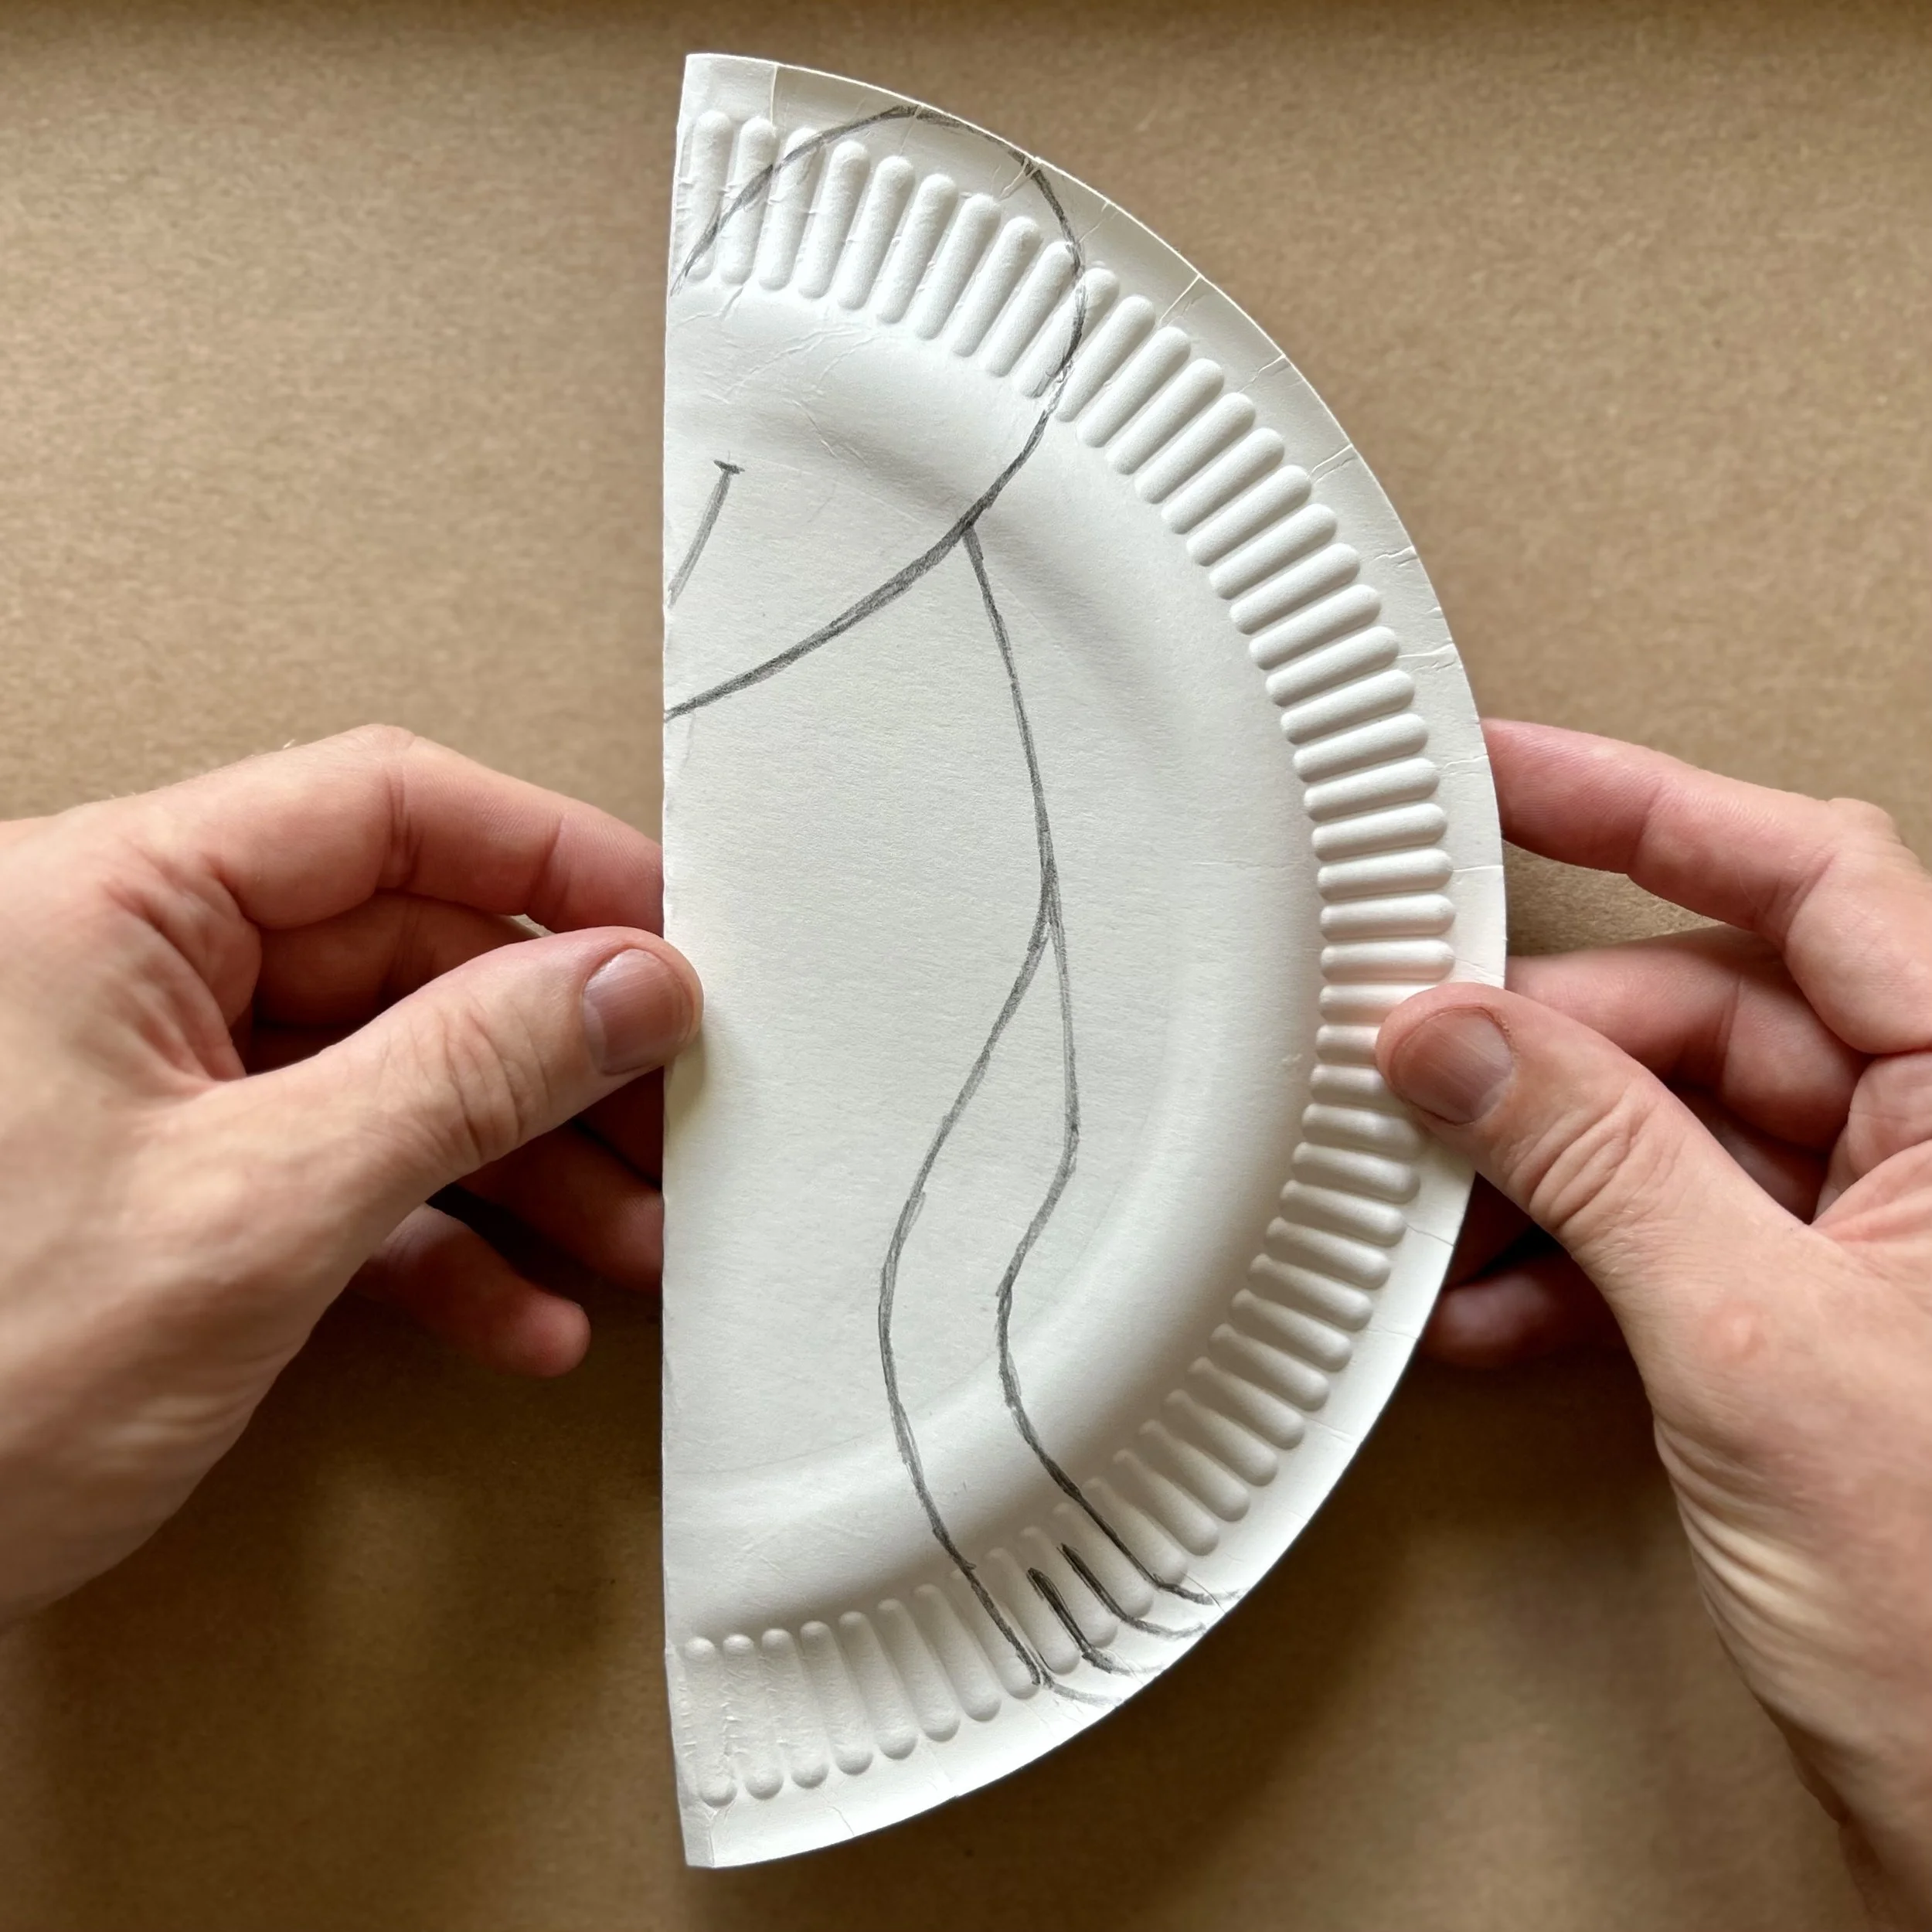
The basic blueprint, it doesn’t have to be exact.
A folded paper plate, and three main cuts, and you have all of the pieces you need. The heart-shaped face works best if you don’t cut all of the way through, you’ll see this in the video clip. The other two longer cuts give you a separate body shape (and tail) and the two wings and two legs. On the legs, you need to do two small cuts to make the three toes, while on the head, there are some simple cuts to create a beak and to make the face more three-dimensional. (These are shown clearly in the video)
The head of the owl is made entirely from the heart shape. The only thing you need to add are the eyes. I’m not a fan of plastic ‘googly’ eyes, but you could use those, or beads, buttons etc. I’ve simply hole-punched some scrap card, keeping the deign entirely paper-based.
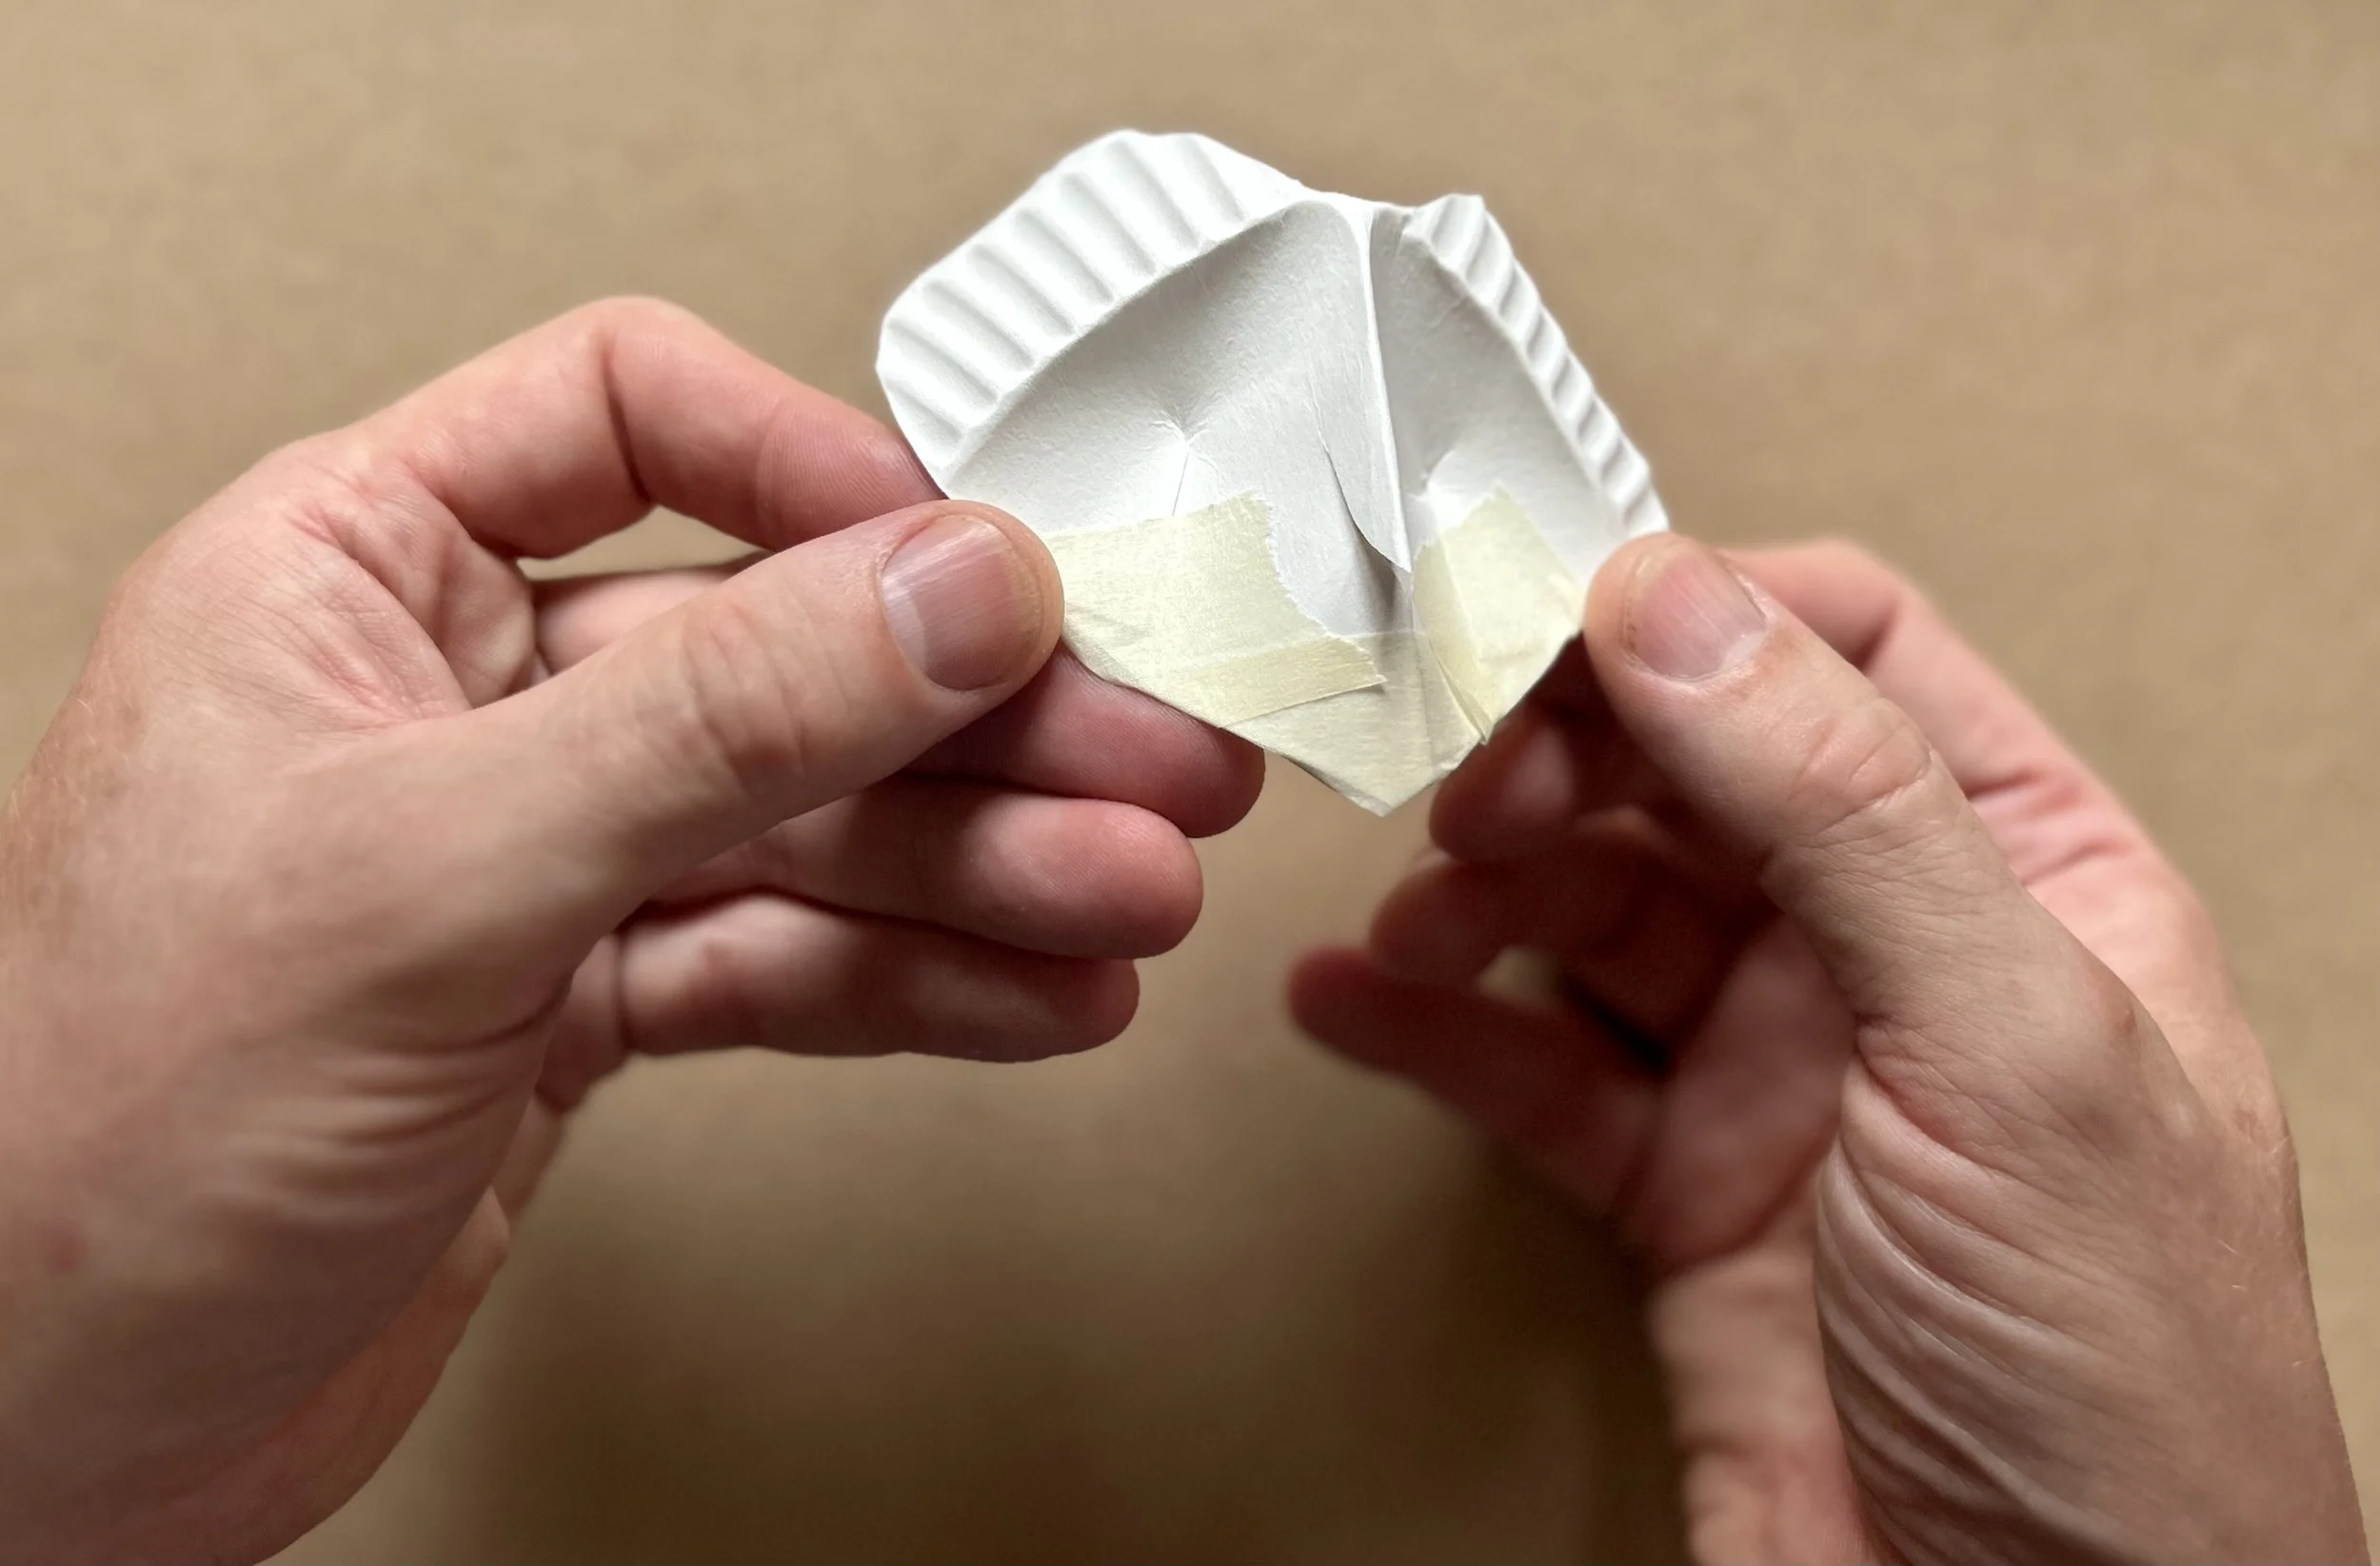
The basic head shape.
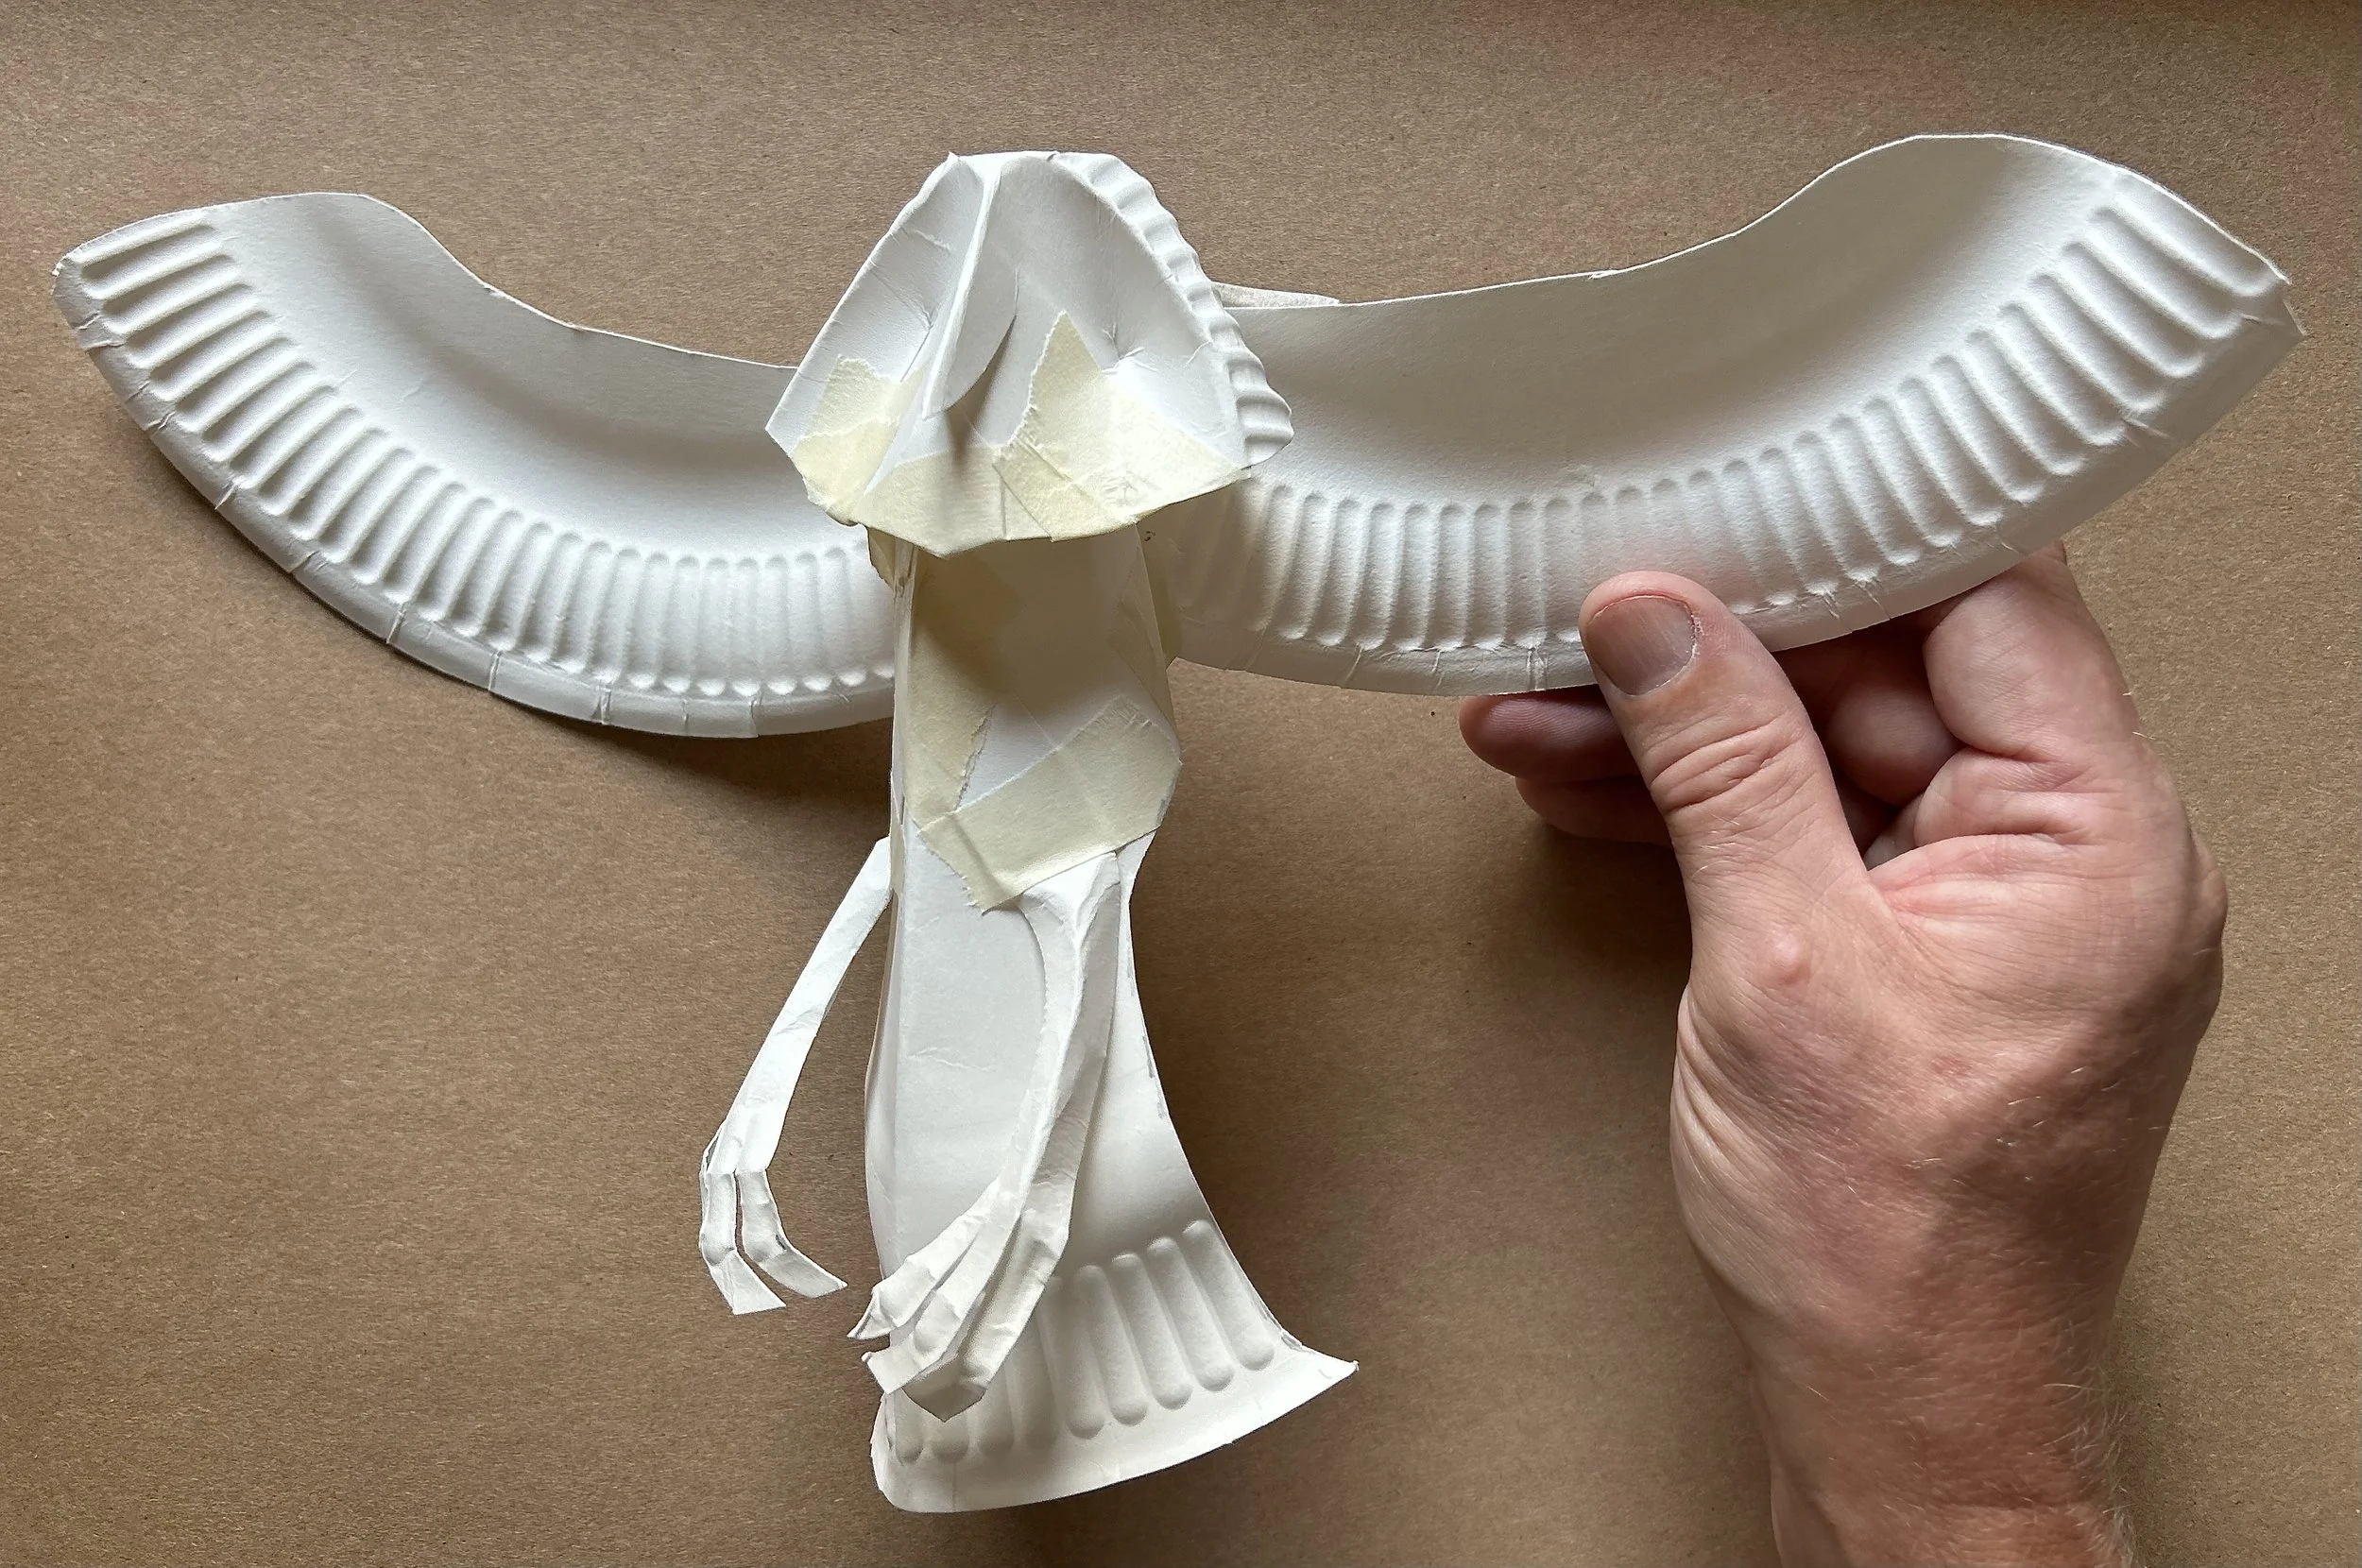
The main elements taped into position. This uses the entire plate, no leftovers.
As usual, I’ve taped the initial structure together with small pieces of masking tape. Then I’ve pasted a thin layer of tissue paper on top where the main pieces of the model are connected (see below image). You can do this over more of the model, but you have to be careful that it doesn’t make the paper plate too weak and wobbly. I use watered-down PVA glue, so I only add a thin layer.
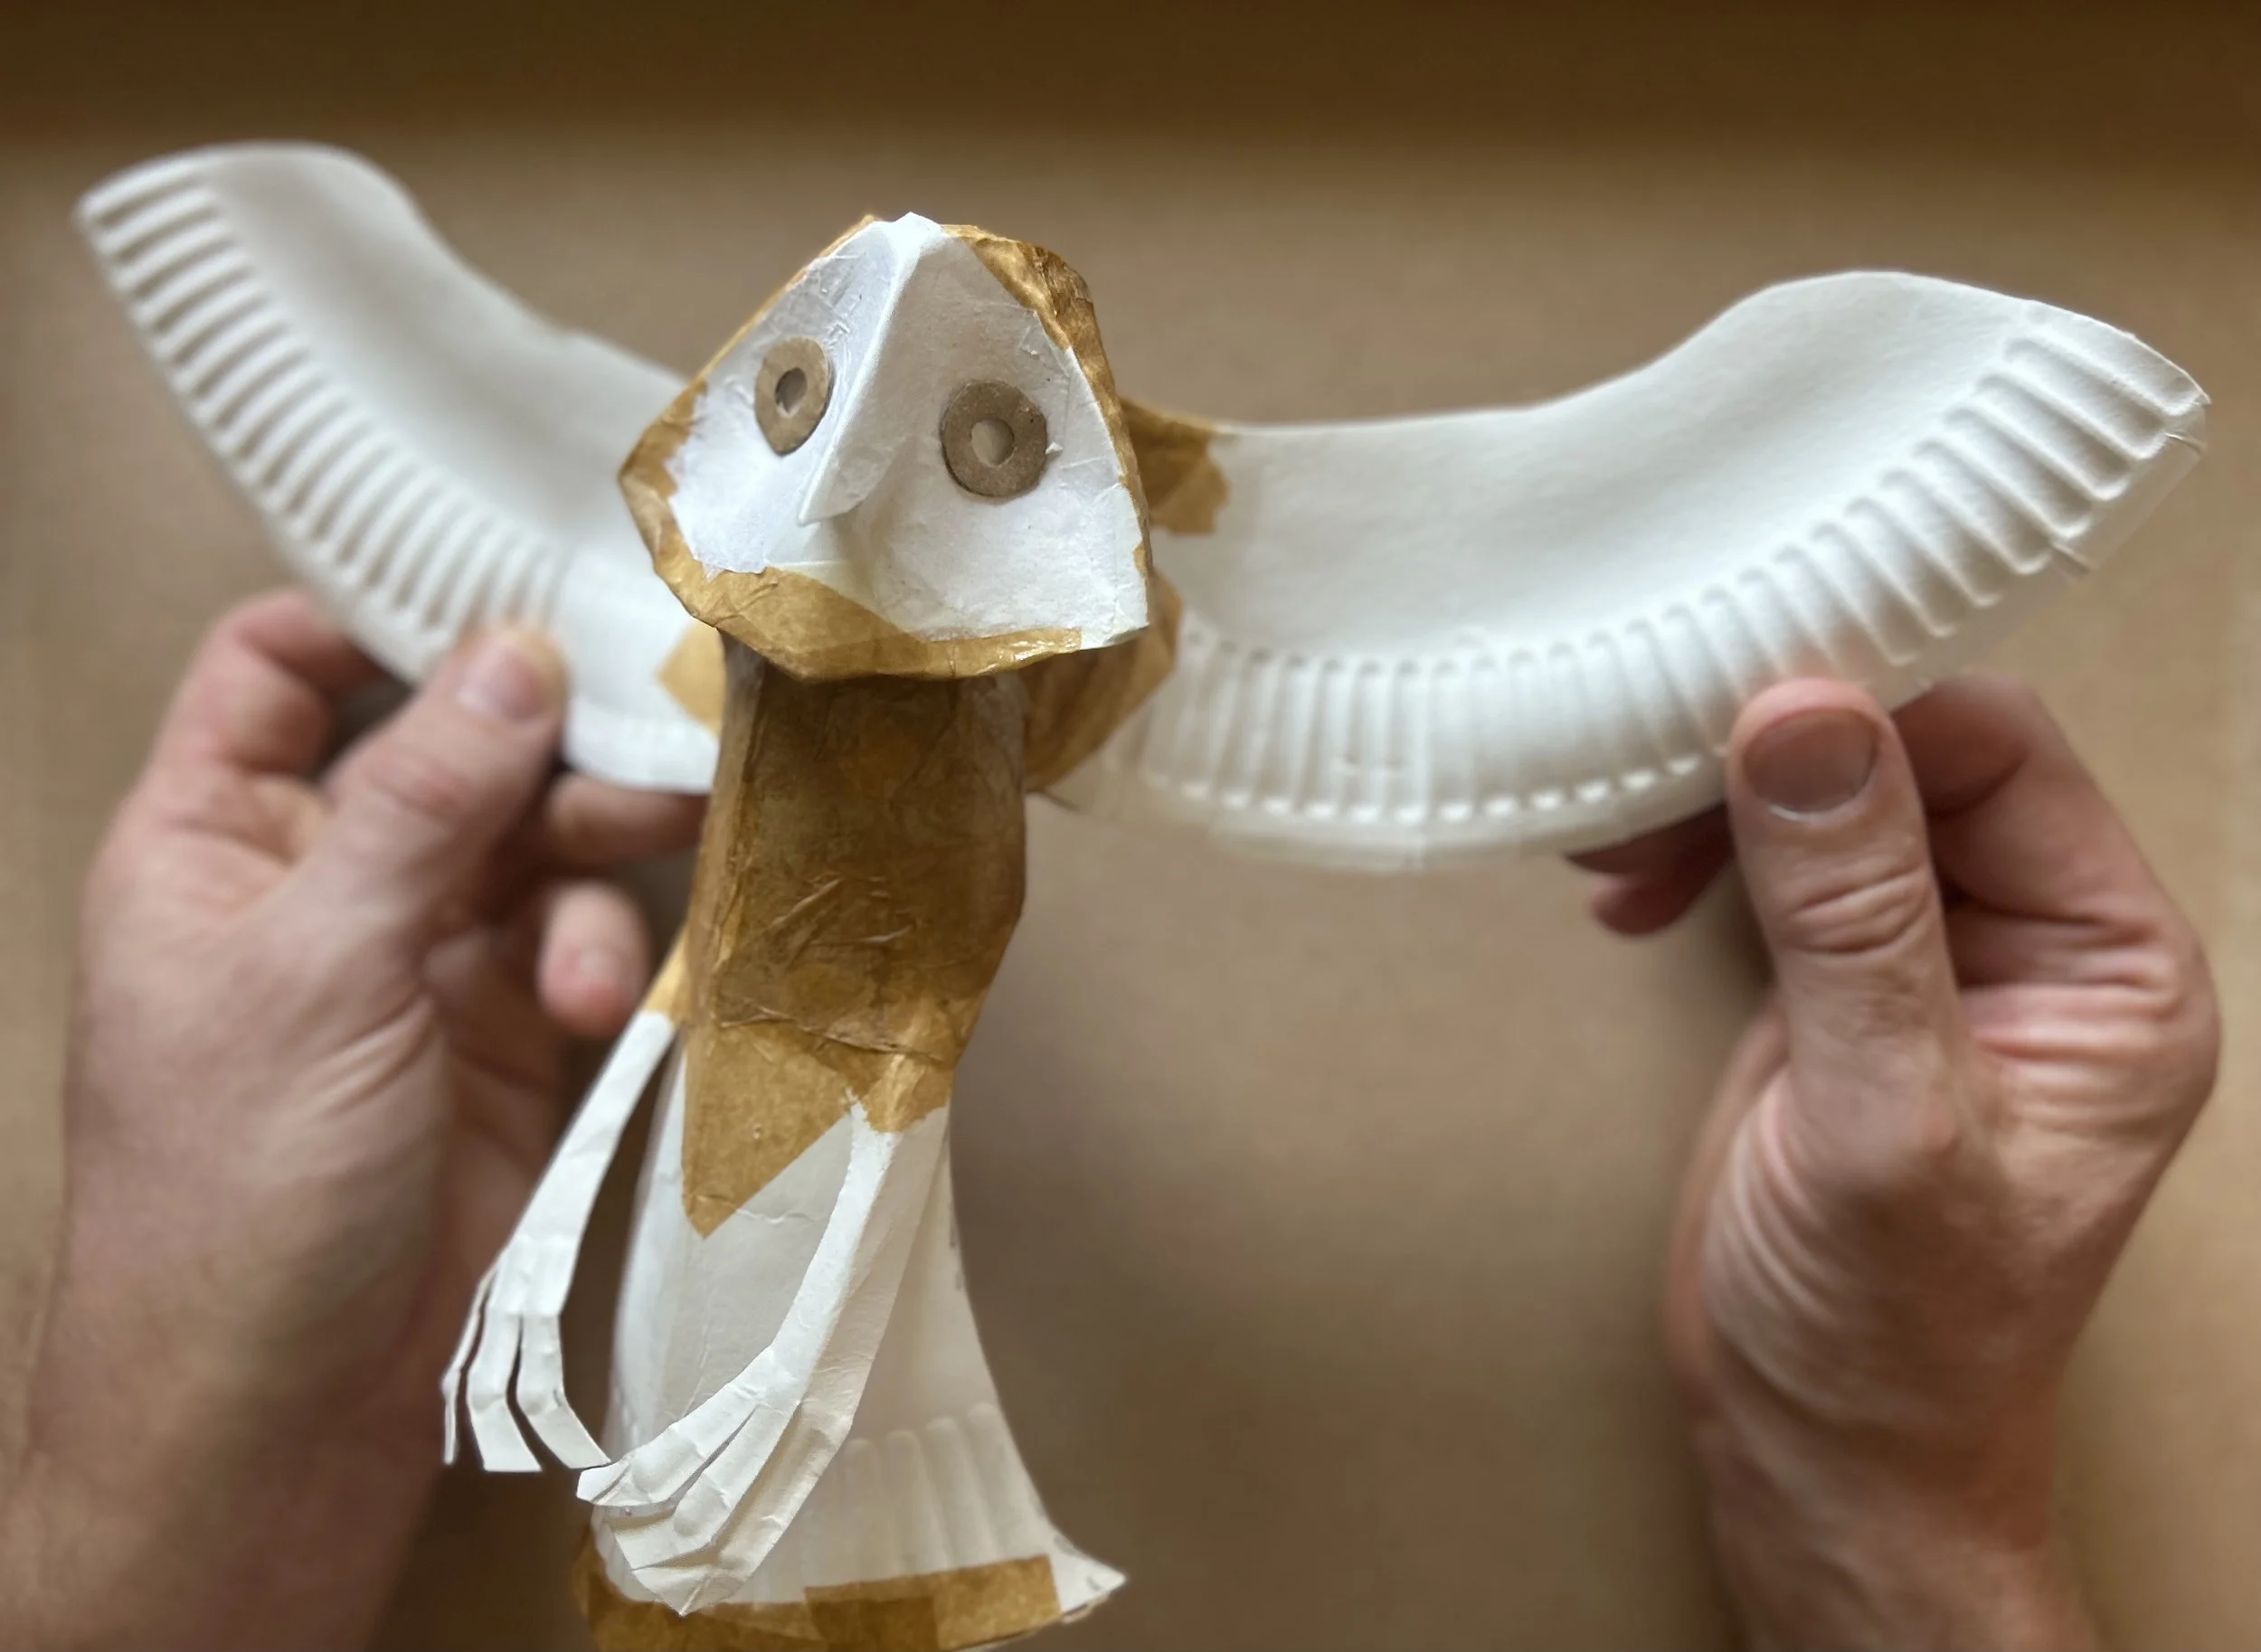
The owl with a layer of tissue paper added for strength. Note the ‘hole-punched’ cardboard eyes.
Once this is dry, you can add some paint. I’ve used mainly water-based school paints, with some metallic gold paint, and a small amount of white acrylic. A bit of gold, brown, and grey paint gives a nice undercoat, I’ve even splashed some of the paint on to add small flashes of colour. Then, with a smaller brush you can paint on the details, the black eyes and claws, small stripes across the feathers, and some white acrylic highlights. (acrylic paint provides a stronger, brighter white)
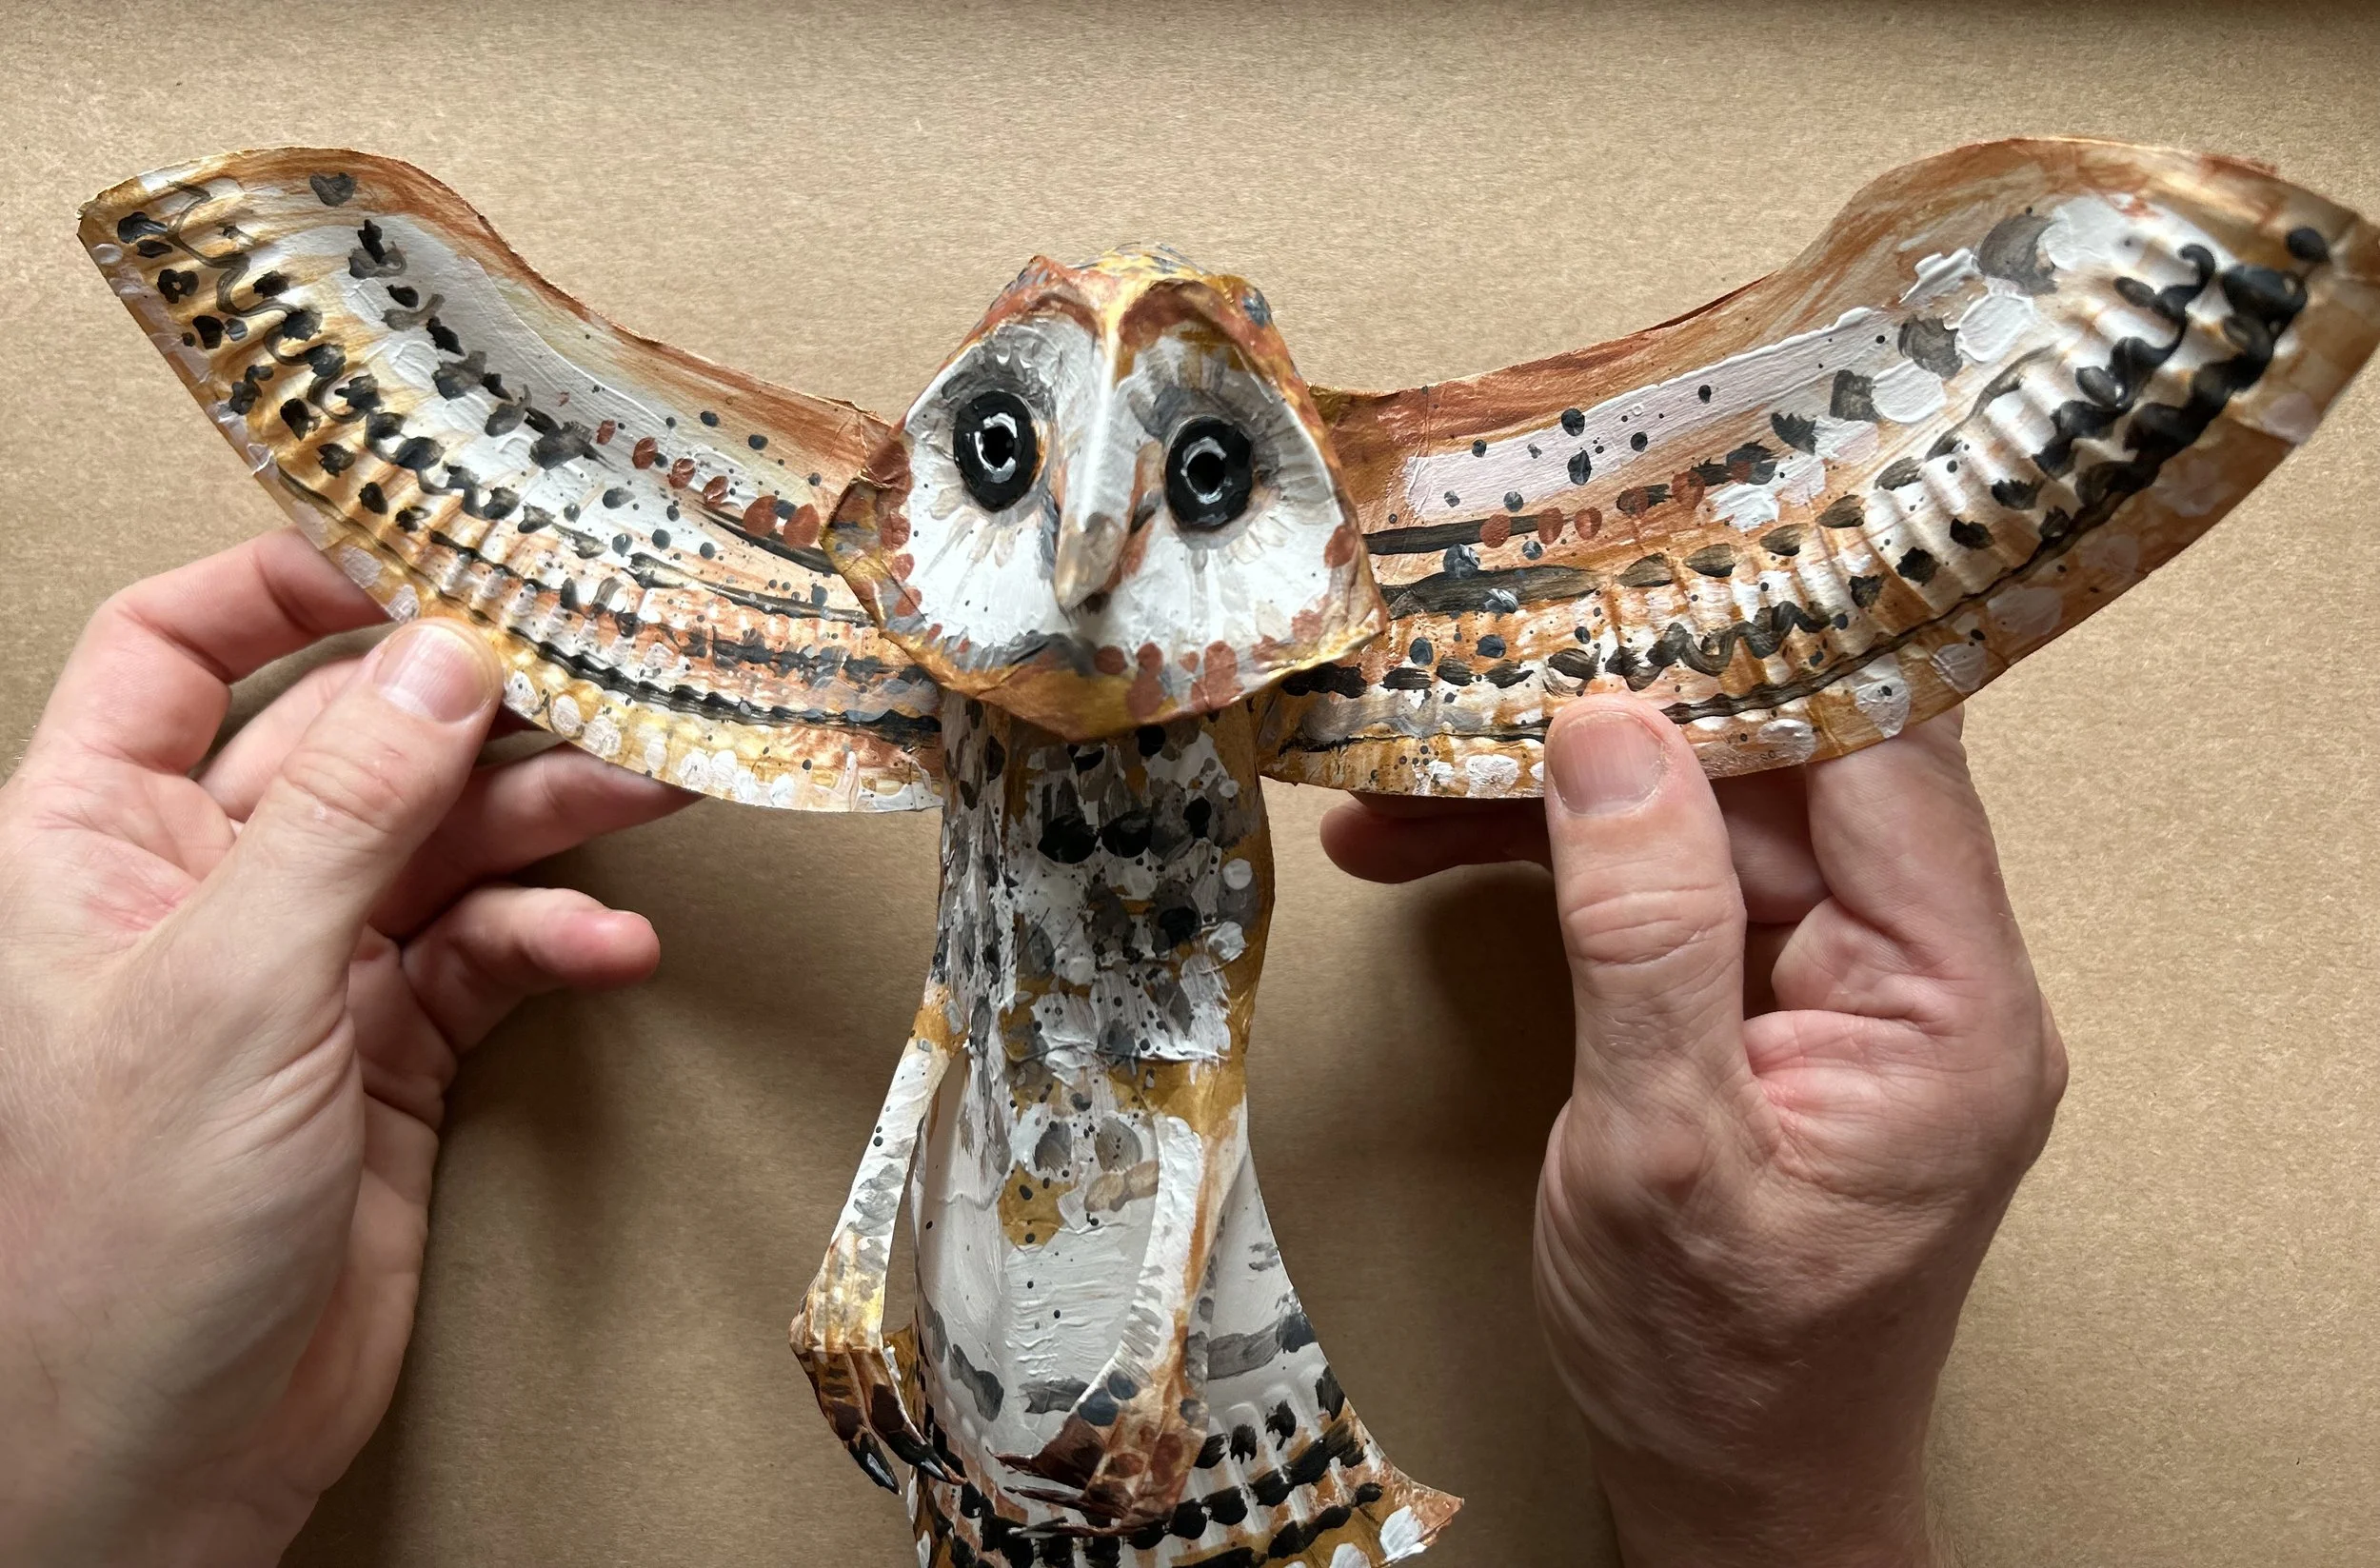
You can see some of the paint textures and details here. I used some photos of Barn Owls as reference.
This was a lot of fun to design and make, and even though it looks in the video like there are a lot of different stages, they are all fairly straightforward. The main thing to watch is the ‘strength’, I always try to make sure that the taped model is strong before I add any glue. Equally, when the tissue paper layer is dry, I check that this is strong before I start painting. You can always add more tissue if you feel like it needs a second layer.

I’ve made all sorts of birds like this over the years, different species, even imaginary birds. It’s an adaptable technique, and one that you can tweak for different projects and ideas. I’m already thinking about the next one.